Signature Memory Quilt: Notes, Ideas, and Thoughts on a Retirement Gift

This month, one of my favorite library coworkers is retiring. I decided I needed to make a quilt for her as a retirement gift. I wanted it to be a sort of memento to represent all of her years at the library, personalized by as many coworkers as possible. At first I thought of gathering favorite quotes from coworkers about books, reading, libraries, friendship, memories. I imagined formatting them all in Photoshop and then having them printed on cotton and…it seemed that would be lovely but overwhelming, and coupled with the fact that this coincided with me transitioning to working full time and, yeah. I abandoned that idea.

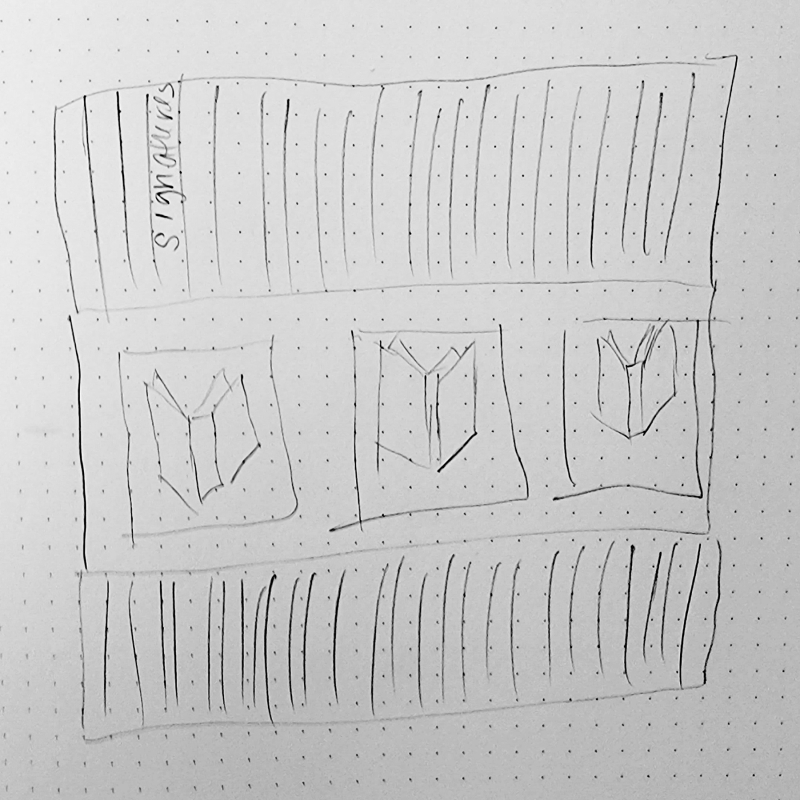
Instead I started with this sketch:

Signature memory quilt sketch

So, my basic idea was a center panel of books, with rows of book spines, some of them of printed fabric, some of them signed by coworkers.

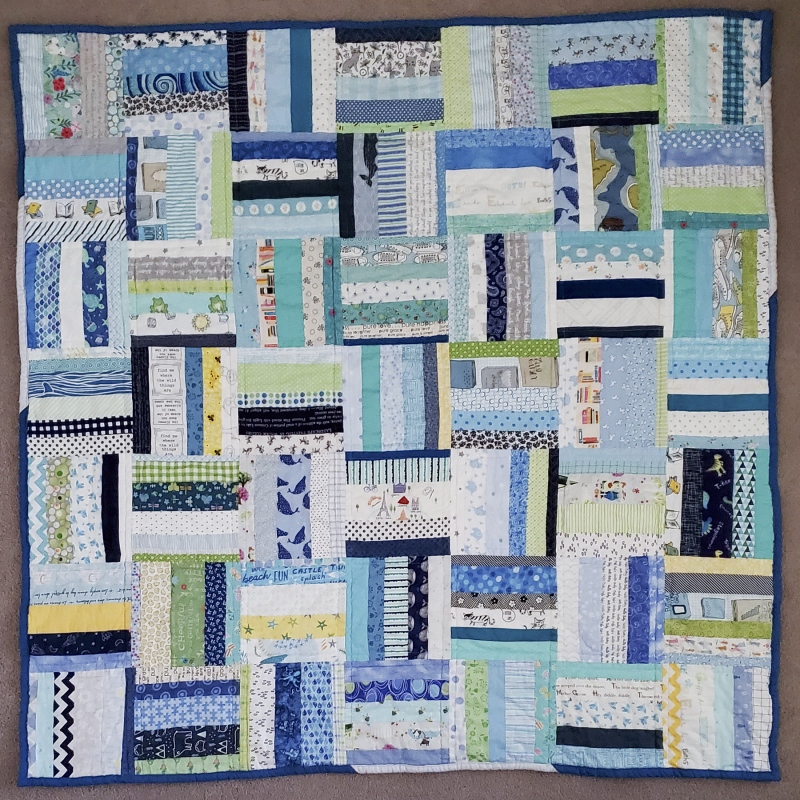
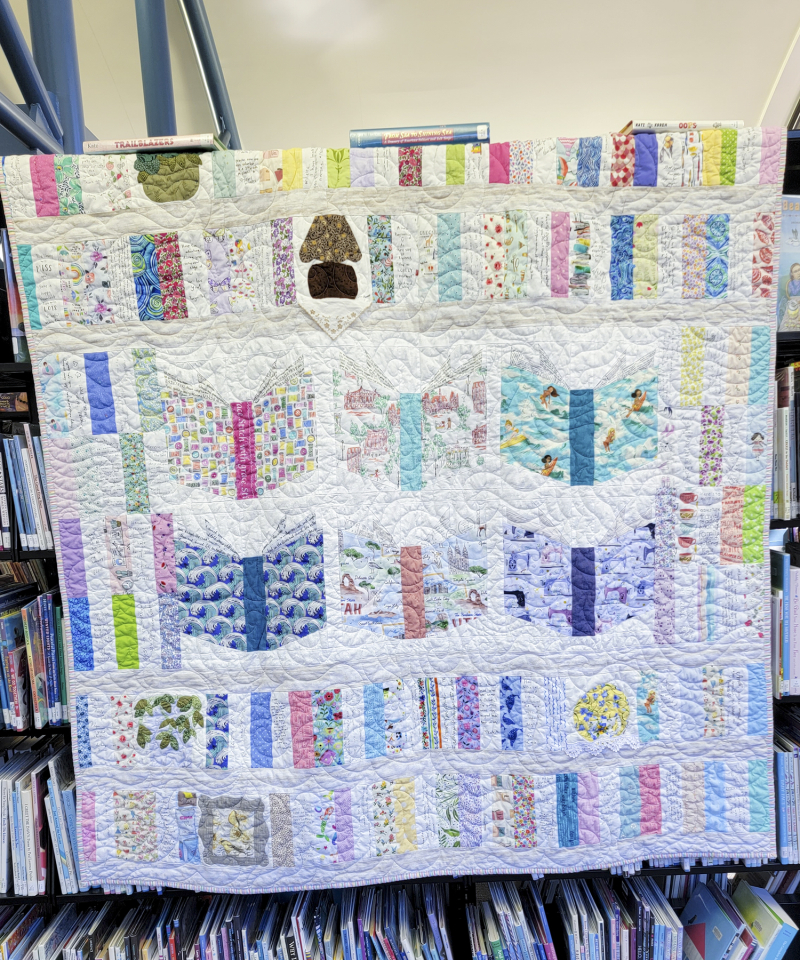
And here's how it ended up turning out:

Signature memory quilt front

I cut a bunch of 7.5" x 2.5" strips. I was working with a vague idea of how it might all actually come together, so I estimated I would need 50 6"x7.5 squares, (2 printed strips surrounding one white one with the signature(s) of coworkers). I ended up needing way more, which I added to the sides of the center panel. I think I ended up with 75 signed strips.

I made the books in the center panel using the Book Nerd pattern from Angela Pingel.  It is a paper piecing pattern and these blocks were super fun to put together. I changed the pattern by enlarging it overall and then making the books wider. For these books, I tried to pick fabrics that both represented things my friend loves (the ocean, sewing, books, travel) and fit into the general scrappy-pastel color scheme. The fabric with images from Utah was a last-minute discovery from Joann and I was so happy to find it! (Even though I don’t, I confess, often use fabric from Joann, as the last time I did the result was a dye-bleed disaster.) I meant to make two rows of five books but the addition of the spines on the side meant I just had room for three.

When I finally got everything ready and put it together, I did have to take away some of the colored strips to have space for all of the signature strips. I was planning on the quilt being 60" wide but it ended up at 64" (ish), which is close enough. It took some scootching and some of the spines are trimmed down, but I think that’s OK because of course all book spines aren’t the same width.

One of my friends who also quilts, and who also used to work with us at the library, made the five appliqued squares: two plants, a lamp, a cup of tea, and a framed picture. That kind of square is NOT my forte so I was so happy to have her addition. I think they were the perfect finishing touch to bring everything together.

A few process tips for making a signature memory quilt:

  • Prewash the plain cotton you want people to sign. This will help the ink saturate the fabric more deeply.
  • Use a high-quality cotton. I used Kona Snow for mine. Avoid fabric that has much obvious texture as it will make the writing bumpy—the smoother the better!
  • Use NEW markers. I used Micron Pigma pens because I have two quilts my mother-in-law made for my boys, and she signed them with these markers. Dozens and dozens of washes later, her signature is still there. You might have some lying around, especially if you do other crafts, but get new ones for the quilt. They write so much easier and darker when they are new.
  • Heat set every block before you sew them all together. The heat will also help set the ink.

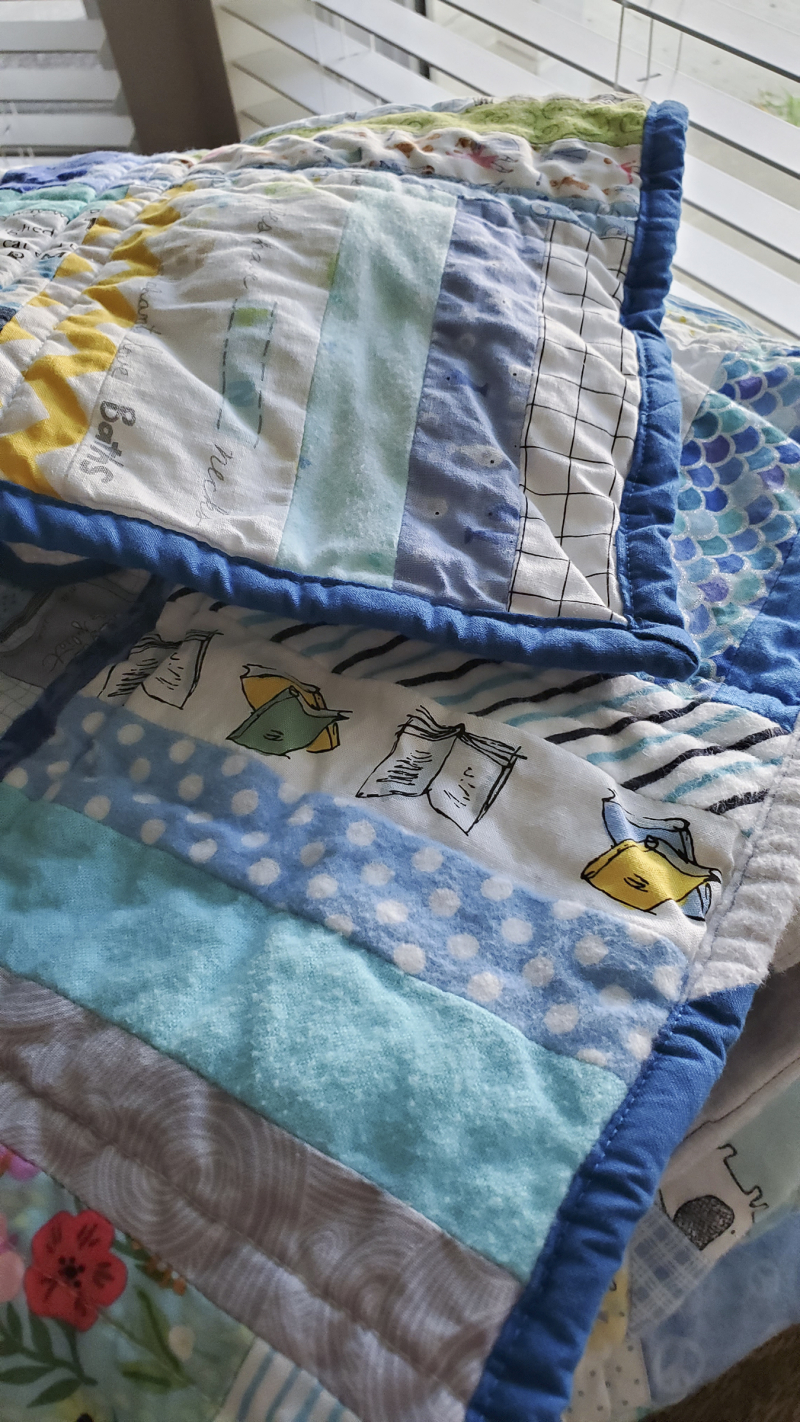
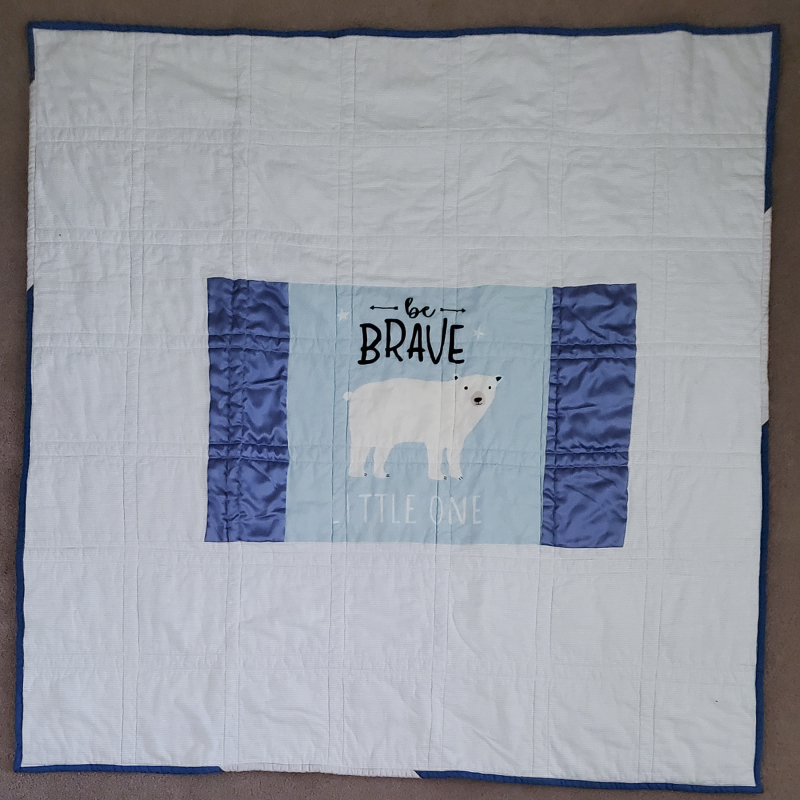
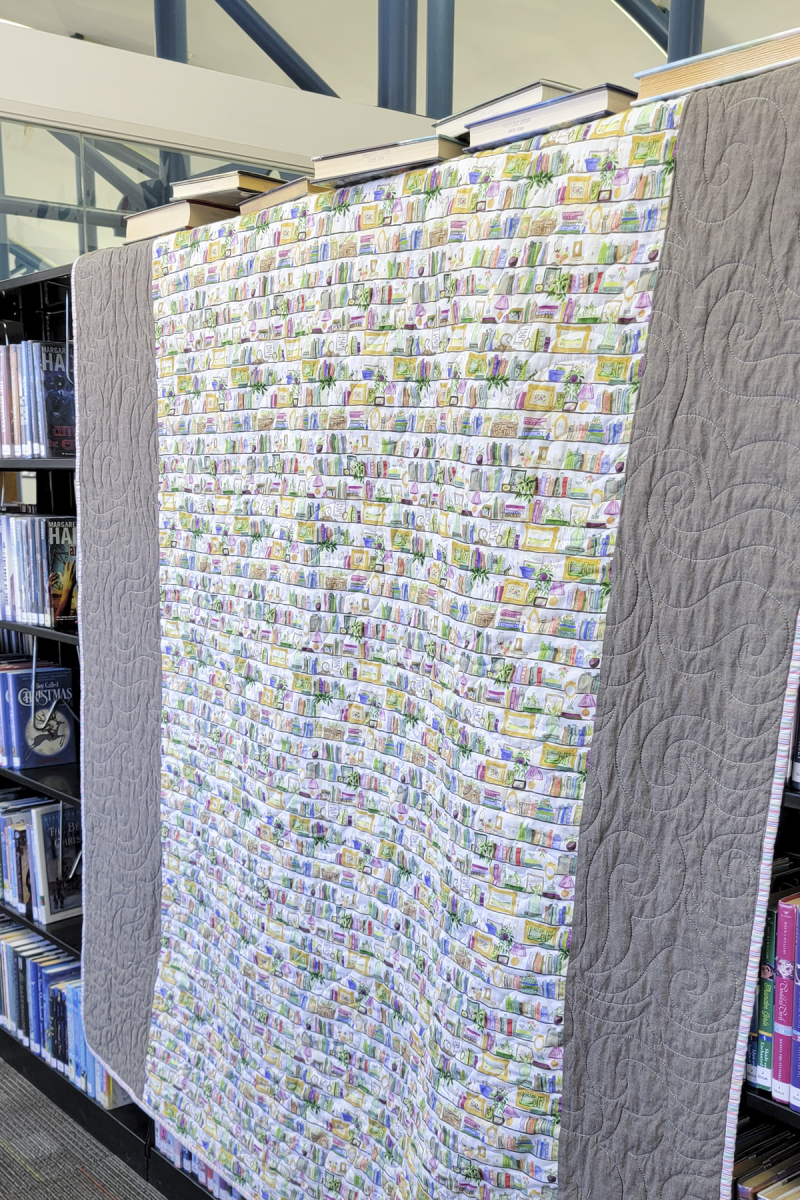
I backed the quilt with this fabric. Isn’t it perfect!!! (Another confession, I might’ve made the whole quilt simply because I wanted to use THAT fabric for a friend who loves books as much as I do.)

Signature memory quilt back

It’s called Book Shelves, by Caitlin Wallace Rowland/Dear Stella and of this writing it’s still available. I got mine at Hawthorne Fabrics. 

The quilting was done by Sew Shabby quilting. I was worried about this part because I thought the words people had written would be covered by the quilting. She arranged it perfectly, though, so you could still read all of the words. She has a lovely wool batting so I had her use that. It’s light and fluffy and I love it!

This was the first time I’ve made a memory quilt like this. Some things I learned:

  1. I was pretty terrified when I washed it that the signatures and notes would fade away, but most of them were OK. I had a variety of pen thicknesses, but if I do another quilt like this I will only have .5 and .8 pens. The thinner ones did get a bit harder to read when I washed it. I also learned that fine-tipped Sharpies are OK for this kind of project.
  2. I had the 6 x 7.5 squares already sewn together, so the left and right seam allowances were already taken care of. Even though I told people to write at least ¼" from the top and bottom, a few people bumped into the seam allowances. Next time I’ll draw pencil lines on all of the signature strips to help out with that. Also, I had a spare piece of the white cloth for people to practice writing with the pens, which I think helped. Writing on fabric is not like writing on paper!
  3. I wanted to collect signatures and notes from coworkers who don’t work at the library anymore, as well as current ones. This was a lot of mailing, worrying about mail, and one that didn’t get back in time. I definitely did NOT allow enough time and it was a little bit stressful in the end to make sure it was finished by the time of the retirement party. But, it was really fun to see and communicate with people who I hadn’t in awhile.
  4. I was surprised at how many people were very reluctant to write anything more than their name. I tried to just give them space so I wasn’t reading over their shoulder when they wrote. I also told them it was SO not a big deal if they messed up. That’s what seam rippers are for! I also encouraged them to not worry about their handwriting. As long as it is legible, it is great!

I got to give the quilt to my friend last Tuesday. I think she loved it and I hope it helps her remember how loved and valued she was at the library. And how much she will be missed.

(And, I have to say: I’m pretty proud of myself for getting an entire quilt finished while I was also working full time and recuperating from surgery. I can do difficult things!)
Trinket: My New Autumn Quilt

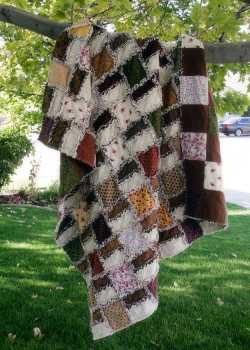
This September when I got out my autumn quilt from the top shelf of the linen closet, I got the itch to make a new one.

_MG_7647 5x7
my first autumn quilt

I’d been reading quilting books about paper piecing, and a technique I read about in Sarah Sharp’s book, Adventures in Paper Piecing and Design, . She calls it “graffiti,” and it means making the solid places on your quilt out of different pieces instead of one piece of fabric. She’s referring to paper piecing, but I loved the idea.

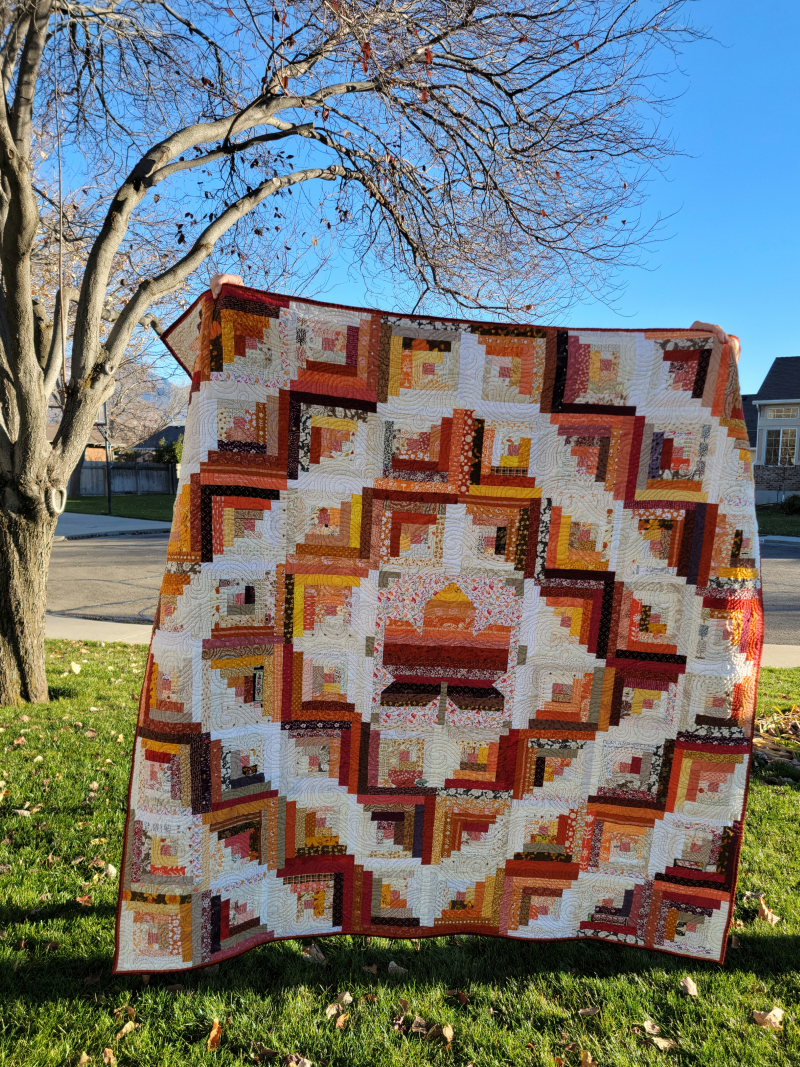
Somehow that little spark grew into an idea: what if I made a graffiti autumn leaf as a sort of center medallion and then surrounded it with log cabins?

Especially since I realized that while I’ve made several baby quilts out of log cabins, I’ve never made a quilt for myself with them. And I love log cabin squares. They are magical to me, that mix of dark and light and the way that how you arrange them entirely changes the quilt that you’re making.

So one morning after physical therapy, I popped in to one of my local fabric stores. I found some gorgeous autumnal pieces. Then I visited another store and found some more. I went through all of my stash, looking for extra pieces to add. I wanted the quilt to feel like a walk in the autumn woods does, when the mountain is scattered with all different colors of leaves and light filters through the thinning trees and it is all entirely magical.

It didn’t quite feel right yet, though. I kept looking at the fabrics I’d assembled and it was close but not yet exactly right.

Then, a few days after the autumn equinox, Kendell and I went for a long drive in the canyon so we could go on a short walk. (All I was up for at that stage in my surgery recovery.) As I scuffed through leaves, that’s when I noticed: there are bits of purple here and there mixed in with the golds, browns, reds, and oranges.

Purple was the bit I needed to bring the quilt to life. (I also mixed in a very few brownish pinks.)

I love how it turned out!

Trinket Autumn quilt

To make the center leaf, I started with the “Fall Leaves” pattern by Cluck Cluck Sew. I increased the measurements of the block by 1.5 because I only wanted one big leaf in the middle.

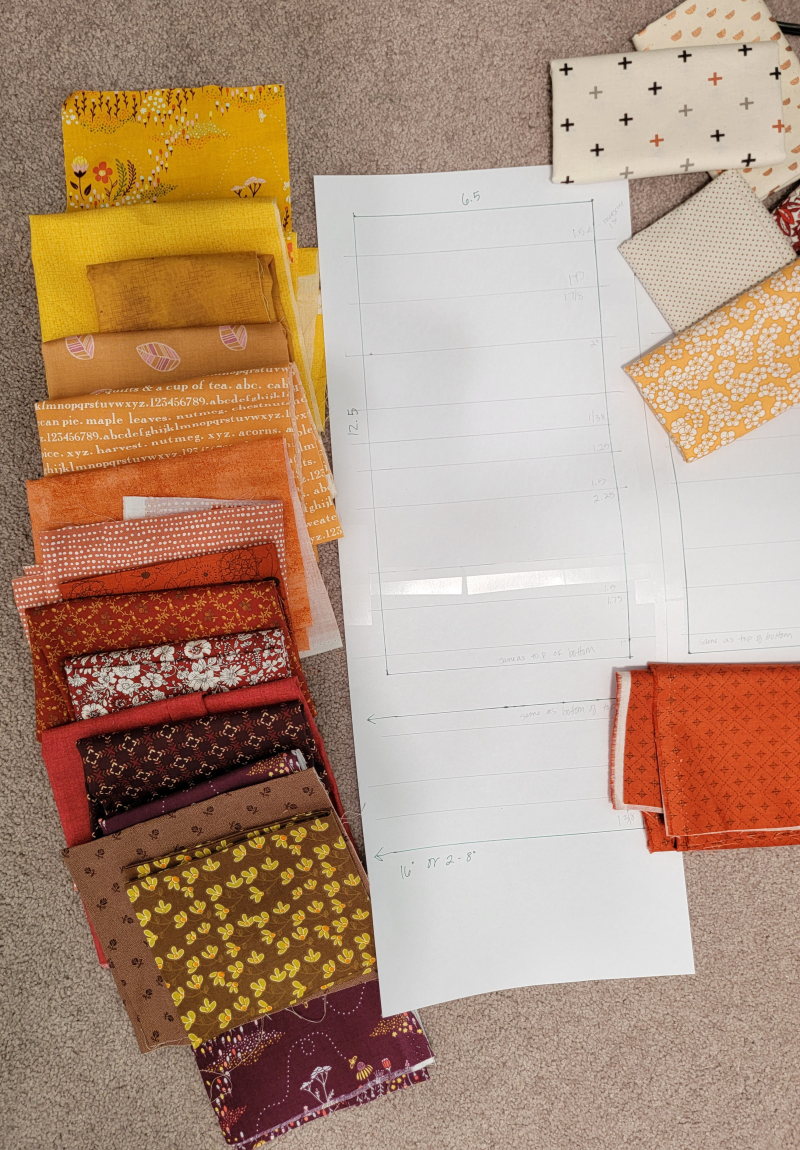
To create the “graffiti” for the leaf, I drew out how tall and wide the pieces would be, and then I drew lines to help me map out the horizontal seams. (The seams on the pattern, not the strips, if that makes sense.) I didn’t want a strip to coincide with a seam but wanted the color to cover both sides.

Trinket graffiti leaf

Then I sewed all the strips together, wide and long enough to then cut the pattern out. I arranged the colors of the strip into an ombre pattern. (Not technically a rainbow because there isn’t any green or blue.) And I used an autumn print I absolutely loved for the background.

I blocked out the rest of the leaf with background strips and what I think of as photo corners so that the leaf square was 19.5” squares.

For the log cabins, I used 1.5” strips for the low volumes and whites, and 1.75” for the colors. This is the first time I’ve made log cabins with strips the same width! (On other quilts I’ve just made wonky squares.) The uneven sides make a slightly curve in the resulting squares on the quilt. (This would be more dramatic if the difference was bigger.) There are four strips on each side (8 light, 8 dark). I wanted this to be a fall quilt, and since Halloween is in the fall, I put in a few Halloween fabrics, but none that scream ghouls and ghosts. (Although one literally does say “Witch’s Brew”!)

I made 60 log cabins (because it’s 8x8) so it’s about 75” square.

For the back, I used a panel I bought last year on clearance (it’d be hard to track down by now I think) and some Woolies flannel.

I worked on this throughout October and finished it a bit after Halloween. The quilting was done by Melissa at Sew Shabby Quilting and I have to say: HOLY COW. Her quilting just took this over the top. I wanted something swoopy and beautiful, and the wave pattern she used was perfect. I wanted the quilting to stand out so I had her quilt it with pumpkin-orange thread.

Finally, for the binding, I made a flange and then sewed the front of the binding on with chunky quilting. This was my first time doing that and I’m not sure I did a great job (and my thumb and forefinger are so sore!), but I enjoyed doing it. And I ordered several different colors of thread for it, so I think I see more chunky quilting in my future!

One thing I love about quilting is that it gives me time to my thoughts. Some of that time I spend listening to audio books, but some of it is just thinking. Part of my thoughts while I made this quilt was about creativity and personal style. In essence, this quilt grew out of one of my oldest quilts, the rag quilt I made in 2009. When I made that quilt, Kaleb was only three and Haley 13. So much has changed during the time between that quilt and this one. My family…my outlook on life…my faith…my body. I have learned so much about many things, including quilting. I am a better quilter and have more skills. But my basic design aesthetic is the same. I like scrappy quilts and I think I am pretty good at figuring out how to put a  bunch of seemingly-disparate colors together.

And all these years later, I still just love this hobby. The colors, the textures, the techniques. The making of things that might last longer than I do. Items to wrap around people, to sleep and read and snuggle under. Hopefully it will be something to love for the next decade. A bright thing to love during my favorite bright season.  

PS. I like to name my quilts. This one is called Trinket from an Emily Dickinson poem about fall. If you zoom in you might spot one of the strips also has an Emily D. quote. 


Messy Craft Table as Self-Portrait

This morning my plan was to add the border to the baby quilt I’ve been working on, so I can get that one and the other two that I need to finish sandwiched and quilted. I got derailed by laundry, though, and needing a quick trip to Target for the laundry and since I’m still not driving I had to wait until Kendell had a break in his calls and then…

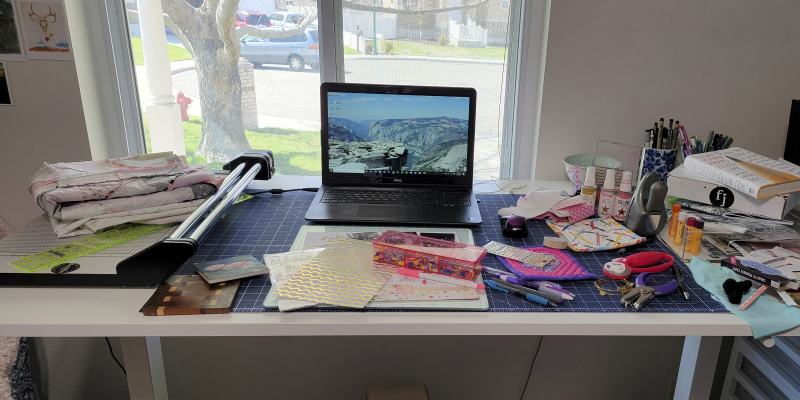
I walked into my crafty space and just kind of had to laugh. Because look at my table:

Messy crafty desk 4 8 2021

I’m not the kind of person who’s bugged by some clutter. I’m OK to work around it. But this is ridiculous…all the useable space is used up! So before I did anything, I needed to clean up my space.

But then I really looked at it, and I thought….hmmmmmm. That’s kind of a self-portrait right there, isn’t it? My desk says a lot about me, my personality, my affections, my obsessions. So before I cleaned up I snapped a pic. I know it looks like a cluttered ridiculous mess, but here’s what my table mess reveals about me (starting from the left and working to the right.

  1. I make quilts. I make baby quilts. If you are my friend or my family member and you have a baby, I’ll probably make a quilt for you. SOMETIMES I will buy the fabric but never make or actually give the quilt to you. But I still thought about it, that counts, right? It’s probably me overthinking, but the making of baby quilts is not just a shower gift for me. It is a love language that I speak to other people, a way of giving them my time and something tangible. It is because of Aunt Merle making me a baby quilt, and I can’t actually remember Aunt Merle but I can remember loving that baby quilt she made and so in essence some part of her is still here. Still remembered. Am I saying I make baby quilts to ward off my fear of death? Maybe. Don’t tell the new moms that though.
  2. My ginormous paper cutter. Kendell surprised me with this Rotatrim in 1997 or 98 and 20+ years later it still works perfectly. It felt obscenely expensive at the time but the long-lasting nature has made up for the cost. It is one of my most useful and most-used scrapbooking tools. And there on top of it is a quilting ruler, which I use interchangeable for quilting and scrapbooking.
  3. There are actually four things for placing cups on on my desk. The one I’ve used the longest is the one Elliot made for me. I think about him every day, partly because I have this beautiful and useful object he made for me. (Translation: my favorite gifts are the thoughtful and useful ones that carry some of the giver’s personality.) Also Monet’s Water Lilies, which I bought at the Denver Art Museum after seeing the exhibit. The corner is chipped because the airport security made me empty my entire carry-on bag (as has happened every time I’ve flown out of Denver) and the woman handling my stuff dropped it. Guilty of transporting art over state boundaries I guess and there’s always a price to pay for that. I’m not bitter.
  4. I didn’t think I would love having a laptop. I like the sturdiness of a desktop. But since Kendell’s been working from home (for the past four years, folks, don’t complain about your year-long time of never having any solitude or peace or quiet until you’ve done it for almost half a decade) and he uses the desktop, I’ve fallen in love with my laptop. Poems, essays, blog posts, political diatribes, editing photos, chatting with friends, writing scrapbook journaling and in my journal and bits & pieces of unfinished stories and…I use it a lot. So much so that I’ve worn out the left arrow key. (I don’t know why it’s that key.) Yes, I do have a purple mouse.
  5. The last scrapbook layout I finished, some supplies I still need to put away, my box of pins (unapologetically pink), a pile of purple pens. Just pretty and fun and colorful stuff I use.
  6. A couple of the border strips. I’m not 100% sure I can make the vision of this border actually work, but I’m going to try! I’ll let you know!
  7. My surgery amulets. I like Alex + Ani bracelets. During my recovery I wore those two gold ones. One has a seashell and it reminds me of the moment on the beach at Carmel when I had to admit to myself that I couldn’t muscle my way through this injury but would probably have to have it fixed. I cried a little but then I felt a deep sense of peace. Maybe the ocean waves were fooling me, but I felt like it would eventually be OK. The other has a charm of a gymnast doing a pose similar to dancer’s pose. I wore that one to remind myself that I have been strong and flexible in the past and those traits will help me be strong and flexible again. I’ve worn them every day since my surgery.
  8. Burt’s Bees. My favorite line stamp for journaling. My only real “mixed media” supplies that I actually use (the Heidi Swapp Color Shine spray). A box of new stuff from Felicity Jane, one of my favorite scrapooking companies. A book I’ve partially read.
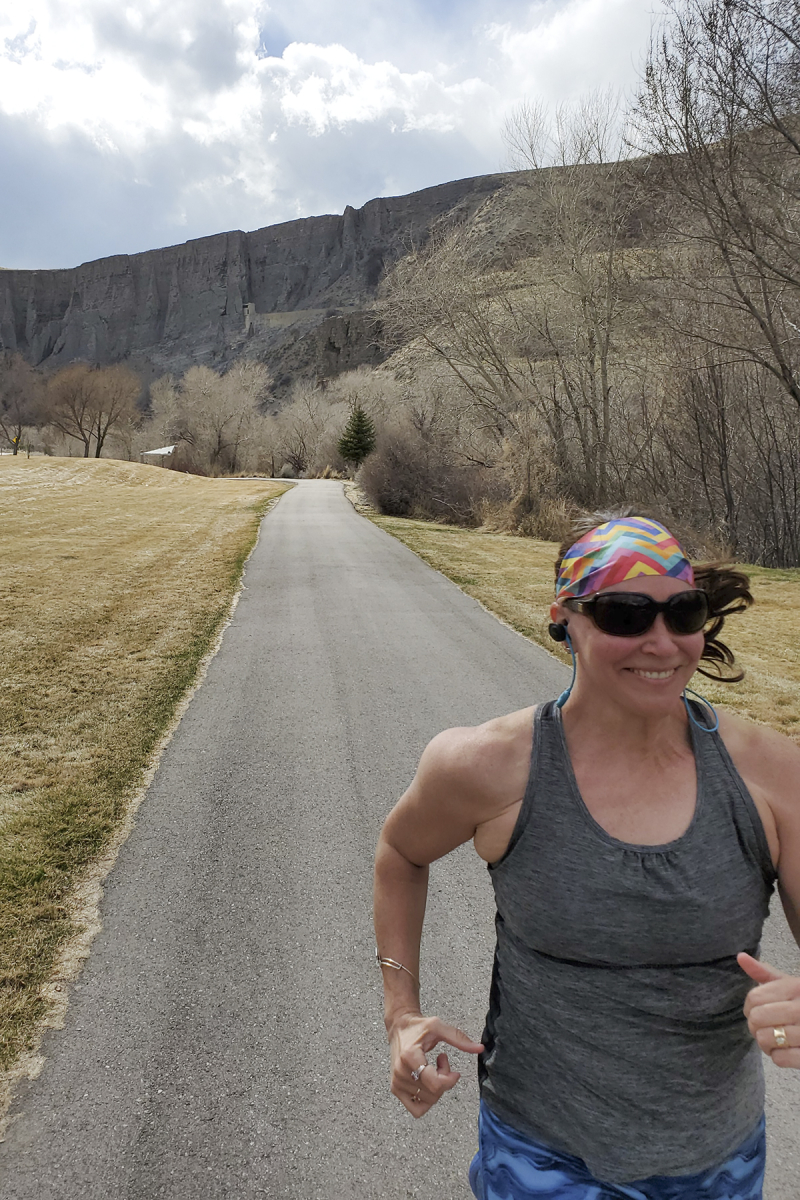
  9. A headband and a scrunchie. Head bands are starting to show up around the house again, proof that I am doing more outside movement. I have some longstanding and fairly deep Forehead Issues, friends. It’s a story. I can’t stand to have my forehead exposed to sunlight. So I have a, well…a generously-sized collection of Bondi Bands. I keep them handy in all the spaces just in case.
  10. That clear tray holds new photos and supplies I want to use ASAP. The smaller pink one holds scraps I’ll use to make cards. As soon as I make cards. I still need to make, write, and send thank you cards to the many people who helped after my surgery. Three months later isn’t too late is it? 

I had to slightly clean off my desk just to write this post. Now I’m going to put on the border. Except I just heard the laundry machine ding…


Patchwork Forest, or How My Crafty Ambitions Spiraled Out of Control Once Again

Ever since I saw Amy Smart’s Christmas quilt called Patchwork Forest a couple of years ago, I have wanted to make one. (Seriously…look at her blog post and then search the hashtag on Instagram and tell me you don’t want to make one too?) But I’ve talked myself out of it because seriously, I don’t need another Christmas quilt. And because sometimes if I start a quilting project in December I let it consume me and I know my family hates it when that happens.

But I never stopped wanting it.

This November I was admiring some Christmas fabric at the fabric store, thinking about that pine forest quilt. And how, to make it scrappy enough, I would have to buy a lot more Christmas fabric. And how I didn’t need to spend a whole bunch of money on Christmas fabric.

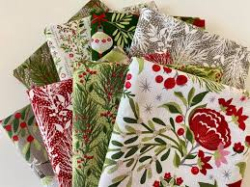
But also how gorgeous that fabric was. It’s called Naughty or Nice and it’s designed by Basic Grey, a designer I’ve loved since they made scrapbooking product (wish they still did!):

Moda naughty or nice

(I mean…could YOU resist that? Especially that floral???)

I’ve also been thinking a lot lately about low volume fabrics. About making a quilt with low volume fabrics. (Because I totally need another quilt, yes!)
And somehow, right there in the fabric store, my thoughts, ambitions, desires, and fiscal responsibility combined into an idea.

What if I just made a few trees, with the scraps I have saved from previous Christmas projects?

And what if I just made a few more trees, with the fabric I love this year?

Then next year, when certainly there will be more Christmas fabric I love, I could make a few more squares.

And it could be my thing I do in December, just make a few squares, until I have enough for a whole quilt.

Perfect, right!?! I could just make a few, without spending all of this December making a quilt.

And this year I could make some low volume ones, because certainly by next Christmas my creative itch will be different.

It was a perfect, perfect plan.

Except.

When you make the pine tree squares, you make two reversed images (or four, depending on how many you cut at once). So one square has fabric A as the background and fabric B as the tree, and the second square is the opposite.  And there was something in my scrappy-makes-me-happy nature that rebelled against that. I wanted all the trees to be different.

And, yeah.

It spiraled out of control from there.

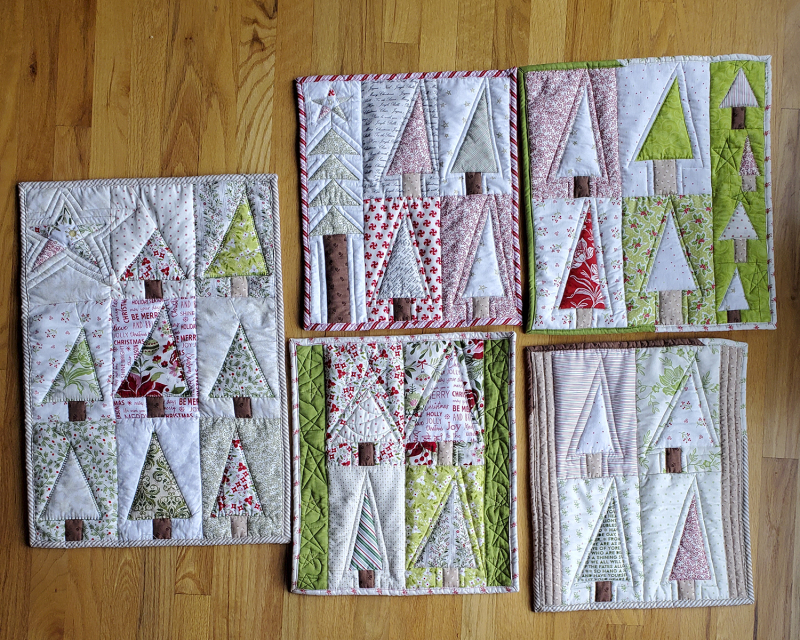
Because I had the reversed squares, I thought well, I’ll just make a few little gifts with the extras. And that turned in to five Christmas potholders

Patchwork forest hot pads

(the one on the left is mine; I made that one first, before everything spiraled out of control, and decided I didn't love how big it was, so I made the others all slightly different so they're not quite as large)

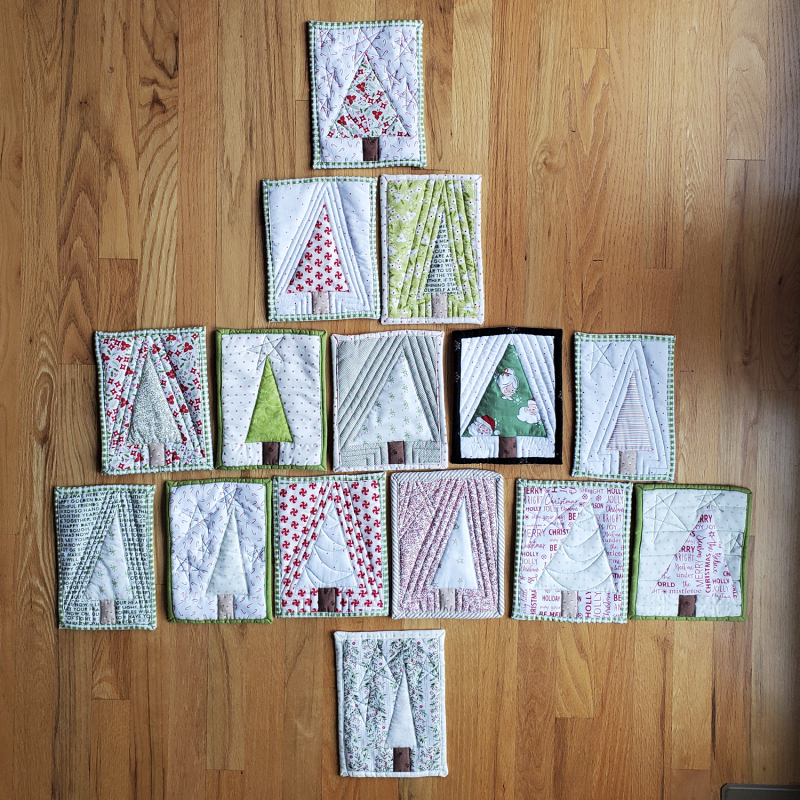
and more than 20 Christmas mug rugs:

Patchwork forest mug rugs

(Not all of them are pictured because I left some in the dryer and didn't notice until I'd packaged the rest up.)

And then Becky sent me some of her scraps so I made a few more squares (what will I do with the reverse duplicates? Because I am 100% sure my current friends and family have enough potholders and/or mug rugs. Should I try to make more friends so I can have more people to make stuff for???)

I totally did NOT make my goal to not get consumed by a quilting project.

At all.

Most of December my crafty space was covered with bits & pieces of patchwork trees in various forms of "finished." But I learned how to make them pretty quickly, and also how to cut them so they all look a bit different, and even what to do if I didn't have a big enough scrap to make two squares. Also I discovered, right at the end, that making them drastically different heights is fun. I'll use all that knowledge next year!

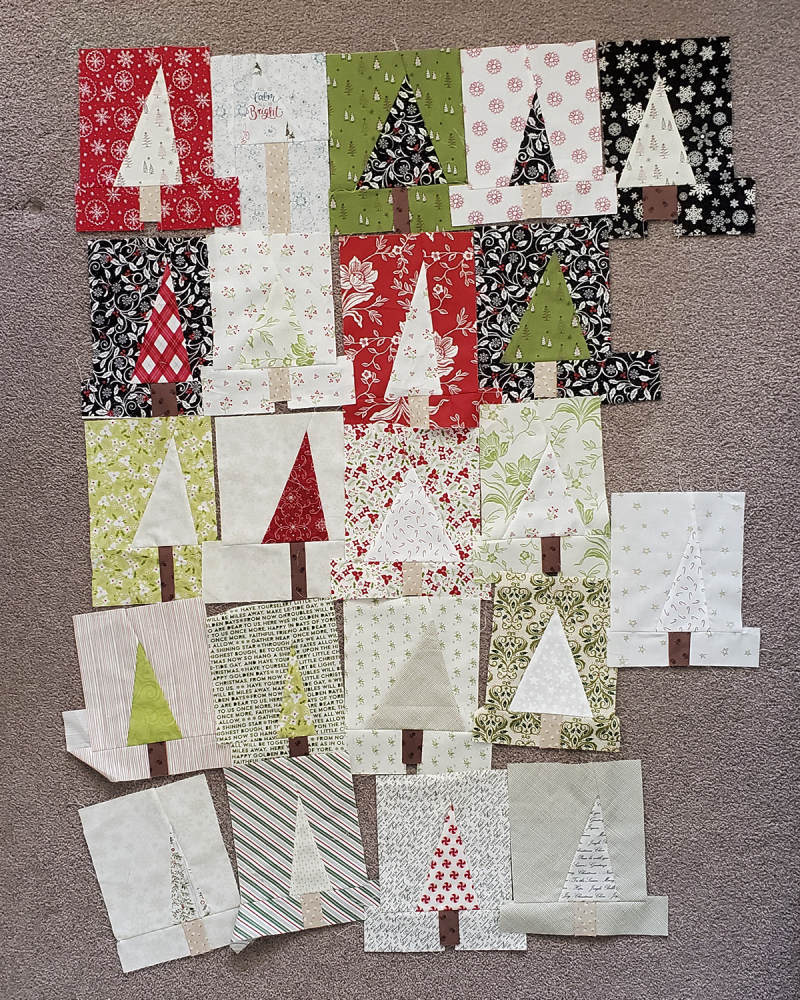
Before my surgery, I made sure that all of my Christmas sewing projects were cleaned up—extra fabric boxed up and the squares packaged carefully. I have 22 squares that will eventually go into a quilt—and, ironically enough, none of them made with that original floral I love so much! (It's OK. I noticed that when I was putting them away, and I still have some left.) I'll square them all up when I'm ready to sew them all together.

Patchwork forest 2020 squares

And, I confess…I’m a little bit excited to see what fabric I can get next year to make more trees!


Three Baby Boy Quilts

In the quilting group I’m in, lots of people have been posting their “quarantine quilts.” Things they finally finished during the shut down, or even started AND finished. Some people have finished five or six! I’ve also been sewing a lot. I think I made about 100+ masks before I got so tired of making them and gave it a break. I’ve made several quilty things, a few I can’t share yet because they are gifts, but here are the three baby quilts I made.

Board Books
I made this one for my librarian friend’s new baby. In the spirit of the age—ie, not shopping unless it was necessary—I tried to only use strips from my scrap box. I only partly succeeded…I think there are 4-5 totally new fabrics in there, and I cut into some fabrics I already owned because I needed a bigger variety of colors. 2020 quilts board books front
There are lots of book- and word-themed fabrics because she’s a librarian! I just sewed together random strips until they were about 8" wide, then trimmed into 7.5" squares. Since this is a mixed-media quilt (flannel AND cottons), I used a 3/8" seam to make it sturdier.

I was a little bit worried as I made this one that it would be TOO scrappy, but I think it turned out OK. I debated for a good while with myself about whether to make all the patterns run in the same direction (so there is a top and a bottom in the sense of "reading" the quilt) but in the end decided a random approach was better. 2020 quilts board books detail
One thing I love about making scrappy quilts is being reacquainted with older pieces. I had bits & pieces from quilts I made all the way back to Kaleb’s baby quilt. Quilts I’ve made for friends, family, neighbors, and my own kids. Seeing them again takes you back to how it felt to be making that first quilt. I love that!

For the back I used a panel. I had planned on framing it only with flannel, but when I dug into my stash I discovered a little piece of ultra flannel so I used that, too. Ultra flannel is a very thin flannel on the back side and silky on the front. My mom used to make us nightgowns with ultra flannel! I like using it in bits and pieces because it adds a different texture, both with the literal feel of it and the "visual" texture as well.

2020 quilts board books back

Mama Elephant

2020 quilts mama elephant front
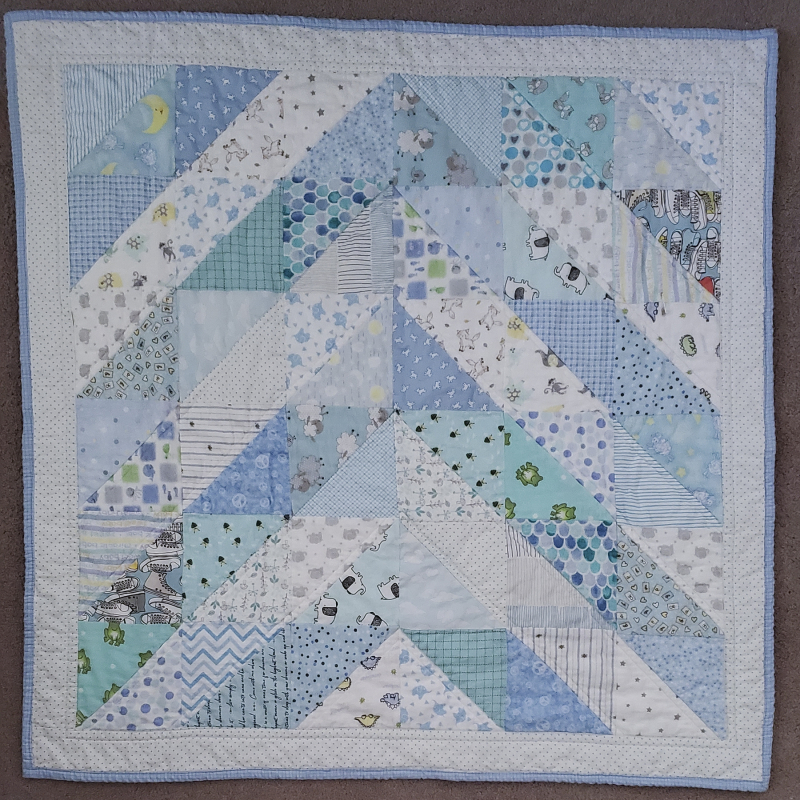
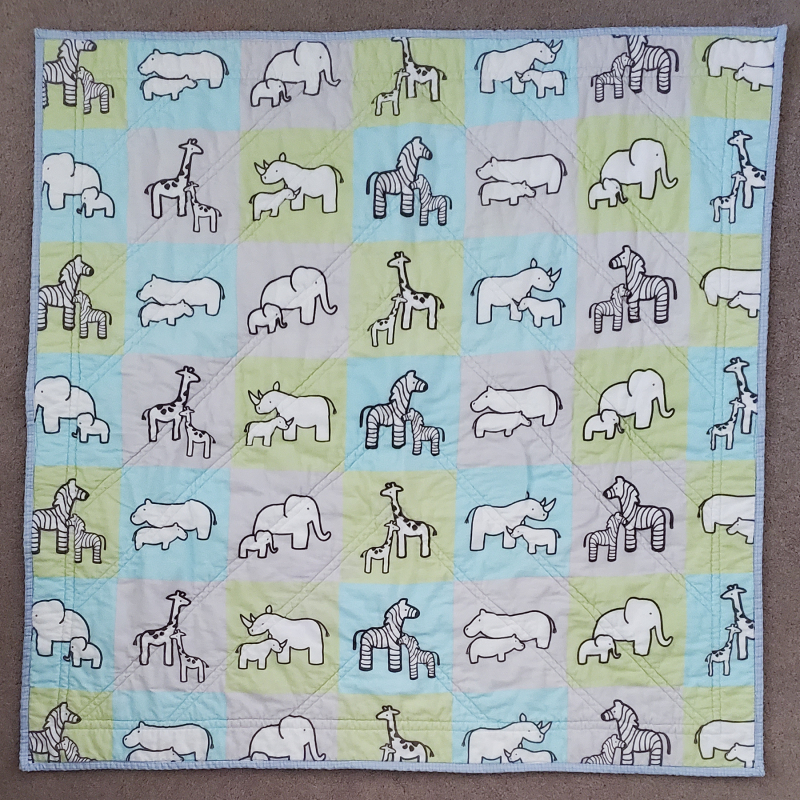
I made this one for my neighbor’s daughter. Ha—writing that out sounds a little bit crazy. I love my neighbor, though, so even though I only know her daughter a little bit, I still wanted to make a quilt for her. I made this one with some of the 7.5" squares I cut when I did my big fabric organization last year. (I meant to cut 8.5" squares but for some reason, one day I cut a pile at 7.5" instead.) I’m so glad I finally conquered my fear of triangles! Half square triangles are so fun to make and come together really quickly. And there are so many options for how to piece them together. This was another quilt I tried to only use my stash for, and I achieved that with the top. The back, though, is new. So cute! 2020 quilts mama elephant back
The mom wanted African-themed baby items, so this seemed perfect. I tried to find every elephant-themed print I had. I have been experimenting with mixing low-volume prints so I tried that with this quilt. I didn’t get it exactly right…I think there are a few that aren’t low-volume enough, but it works.

Arthur’s Court
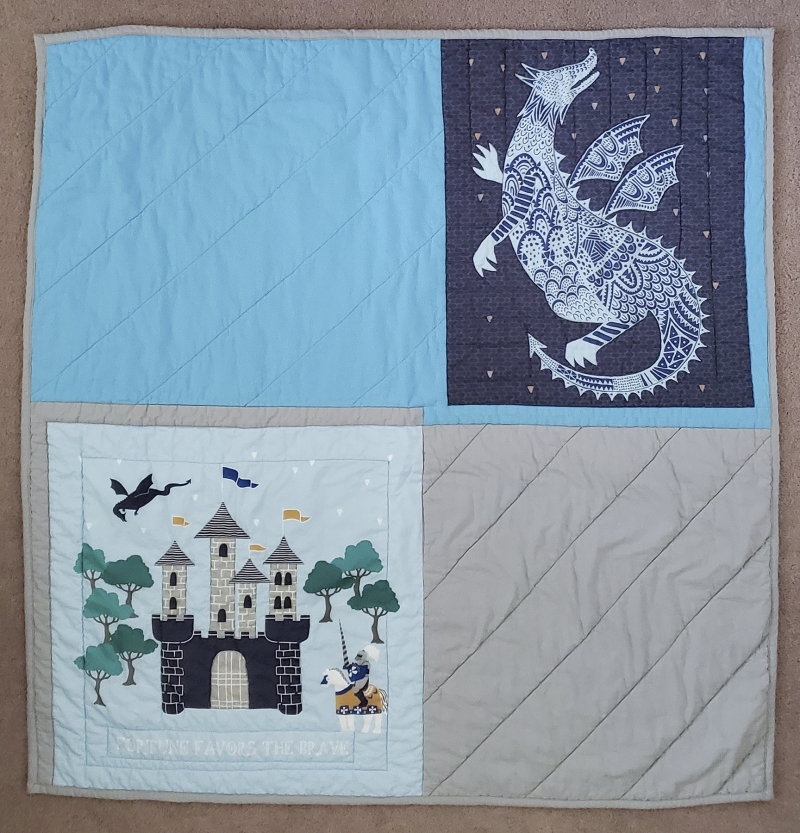
One of the girls who grew up in my neighborhood was having a baby named Arthur, and she was doing a dragon theme for the nursery. When I saw this panel I could. not. resist! (I got it from Hawthorne Fabrics.) I wasn’t sure how to cut the panel, though, because they aren’t the same size. I framed them each on one side to make the sizes the same, and since nothing in my patterns really matched, I went for solids on the other two squares. 2020 quilts arthurs court front
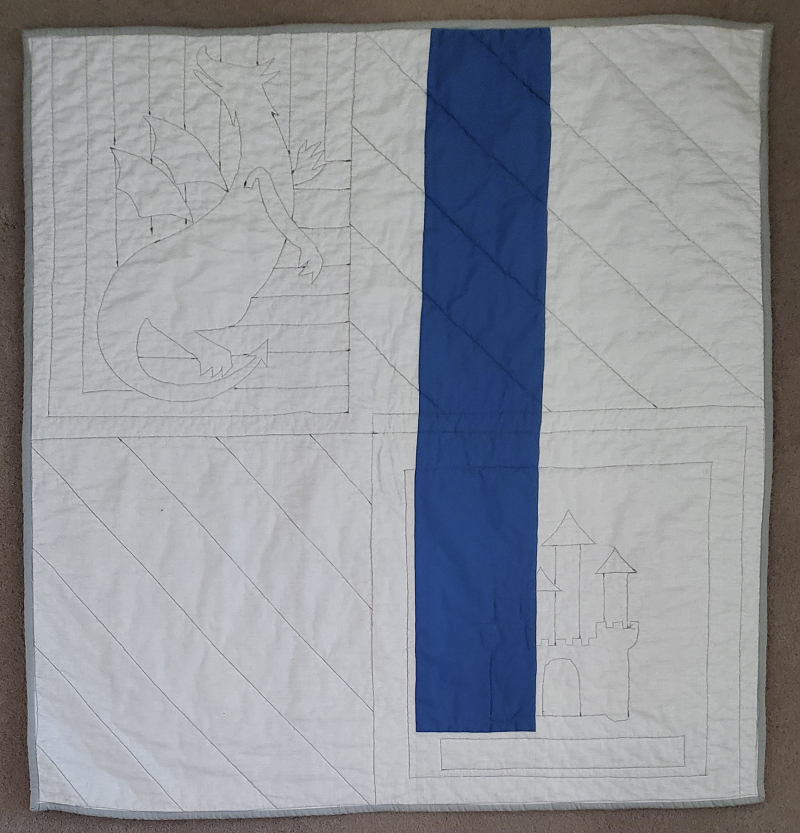
I LOVE that grey fabric! I bought it for masks and am glad I got three yards because it is the perfect grey. I *think* it is a Moda Bella solid called Silver. Sometimes greys are too something (green or yellow, usually, but sometimes purple) but this one seems to be right in the middle. Anyway, I quilted around the castle and the dragon to help them pop. The back is mostly flannel from my stash, except I had to piece a strip in the middle to make it big enough. I used dark grey thread for the back of the quilt so that the shapes would stand out against the light grey fabric, and then on the front I used light blue, dark blue, and light grey thread.


2020 quilts arthurs court back

Right now, I need to quilt two mini quilts I’ve made just the tops for, along with three hot pads. Once I get those done I am finally going to start on Kaleb’s quilt. I keep putting it off because I’m nervous about matching corners. Wish me luck! (Well…luck and precision!)
Did you make anything during the quarantine?


Corona Virus Masks: My Process Notes on the A.B. Mask Pattern

I have finally started making masks! I don’t know why I didn’t start making them sooner; it’s not as if I don’t have fabric for it! I even prewashed and dried fabric that I thought would make appealing masks. And then Colorado, where Haley lives, started requiring people to wear masks outside so then it was a necessity! It still took a few days to get started because A—I was sick for a few days and B—I was kind of intimidated. In quilting, it is sometimes easier to hide mistakes than it is with clothing and while yes…I’ve sewn dozens of quilts and more than a few pair of pajamas, I wasn't sure my quilting skills would be enough to make a little piece of clothing.

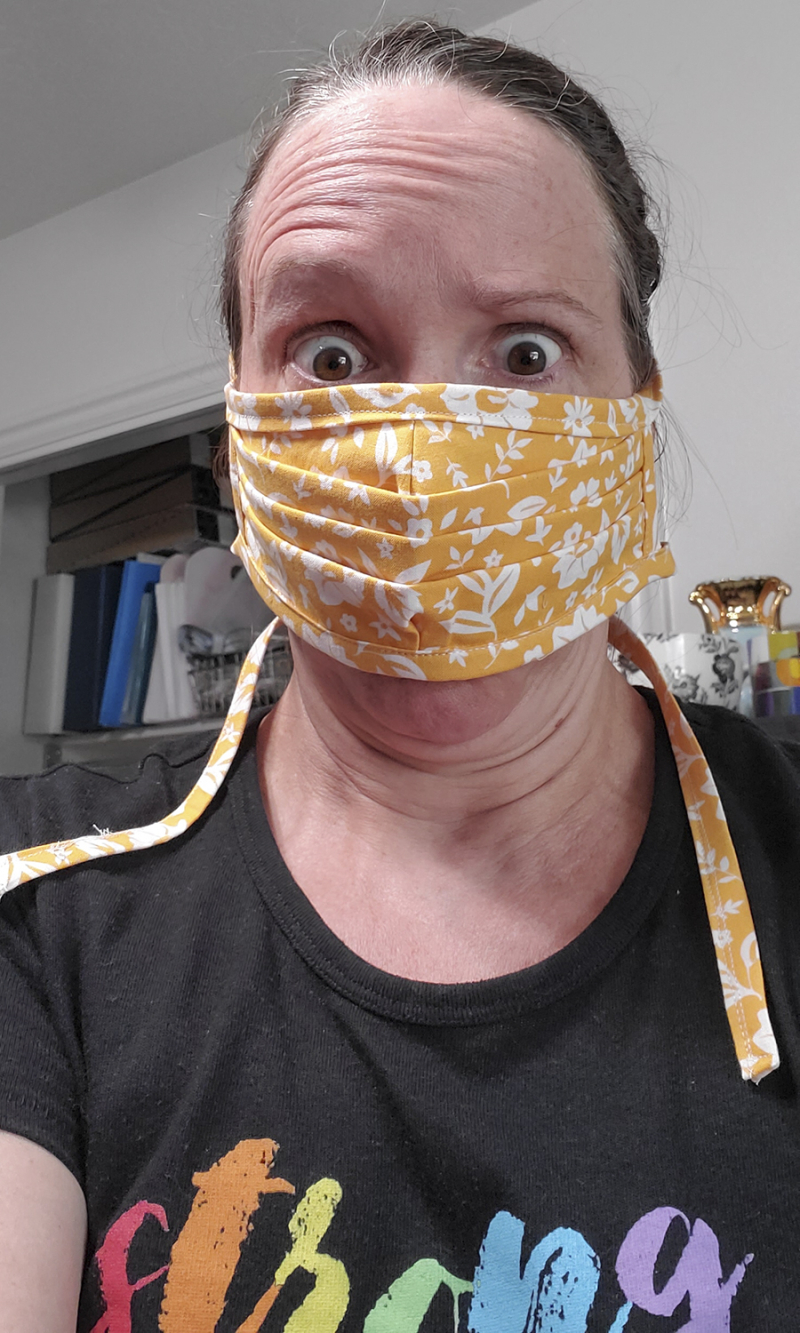
Corona masks panic
Please: Allow me to caption this photo. This is not me making a goofy face. This is me PANICKING. Same thing happens when I put on a snorkeling mask. Low-key panic because I can't get enough air. Happy to make the masks. A little bit freaked out if I actually have to wear one.

But today I decided: enough. I’ll just try one and see what happens. What’s the worst thing that could happen? I mess up and make something unwearable out of a piece of fabric?

That is acceptable risk!

There is no 1/4 inch elastic to be found anywhere near me, so I went with this pattern:

A.B. Mask for a Nurse by a Nurse

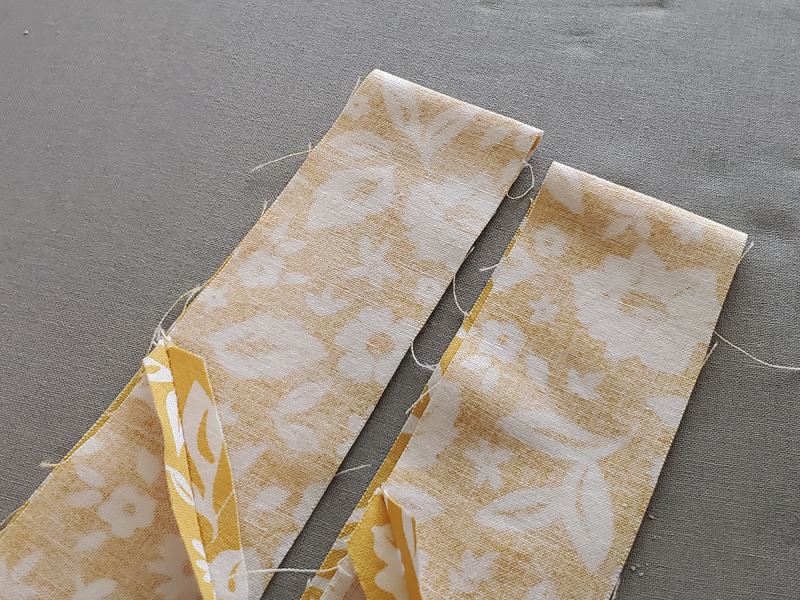
It is designed to be worn either just on your face or over an N/95 mask. It uses ties instead of elastic and two layers of quilting cotton. It seems intimidating because there are a lot of steps and it looks complicated…but really the steps are well-written and make sense if you follow them carefully.

And it was really pretty fun to make!

I know there are a million mask tutorials floating around right now and I’m definitely not the person to write another one (remember: my clothes-sewing skills are pretty unremarkable).

But I do have some notes I thought I would share. These are just notes I made as I went through the steps, and maybe they will be helpful for someone else who is also making the same pattern.

So here are my notes on each step. You can also download a PDF of the notes at the bottom of this post. And if you are thinking about sewing masks, my biggest advice is this: just do it. If they aren’t perfect, who cares? Have fun. Use bright fabrics or fun fabrics or whatever you think fits someone’s personality. If you don't have big enough pieces of fabric, use a different color for the ties. Mostly, don’t get too worried about your mistakes. Perfection isn’t the point, right? It’s protecting and caring for each other!

First things first: before you start making masks, you should preshrink your fabric. Wash it in the hottest water your washing machine has and rinse twice. Wash light fabrics separate from darks. Use a color catcher because that hot water will stream out a bunch of dye. Dry on hot, too. Trim the strings and then iron. In theory the masks should be washed once a day so you want to get the shrinking done first.

Also, if you have a fabric marking pen or pencil, find it. It'll come in handy!

Notes correlate with each step of the original pattern and are named the same thing as the patterned named them, for clarity.

  1. Print the pattern. I had no problem with this, except I should’ve printed on cardstock instead of printer paper, just for durability.
  2. Fold fabric. Quilting cotton stretches more on the width side (selvedge to selvedge) than it does on the length size (cut edge to cut edge), so if you are using odd sizes of fabric, see which side stretches the most, and fold so the stretch goes across the width of the mask, rather than the height.
  3. Cut binding and ties. I cut my binding strips 1.75 inches instead of 1.5. I know…a quarter inch doesn’t seem like that much but for me it made it much easier to make the ties. Also, if you can use larger yardage so you can cut width of fabric strips, it does make it easier!
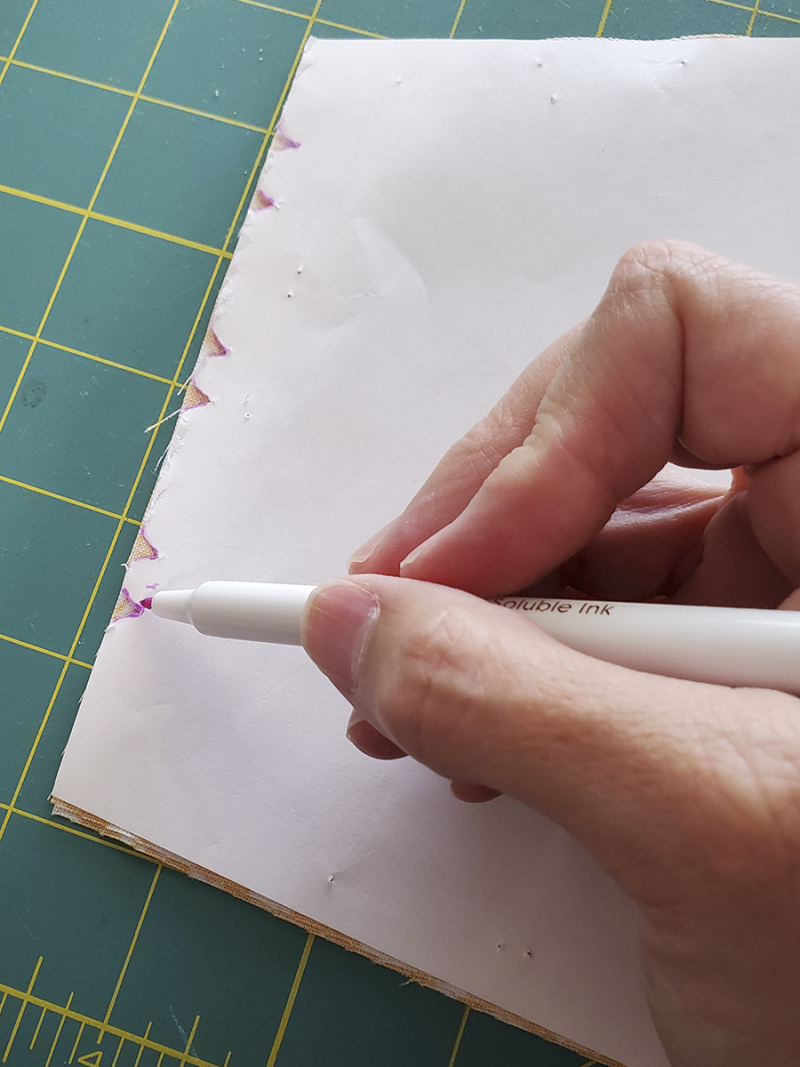
  4. Refold and cut mask face. I folded my fabric twice so I could cut four pieces at once. You can use scissors or a quilting ruler and a rotary cutter, up to you. I skipped the step of cutting out the notches. I marked it with a marking pen instead. Corona masks mark the notches
    Also, I have no idea what the difference is between a “taco” style fold and a “burrito” style fold…tortilla shells are all round.
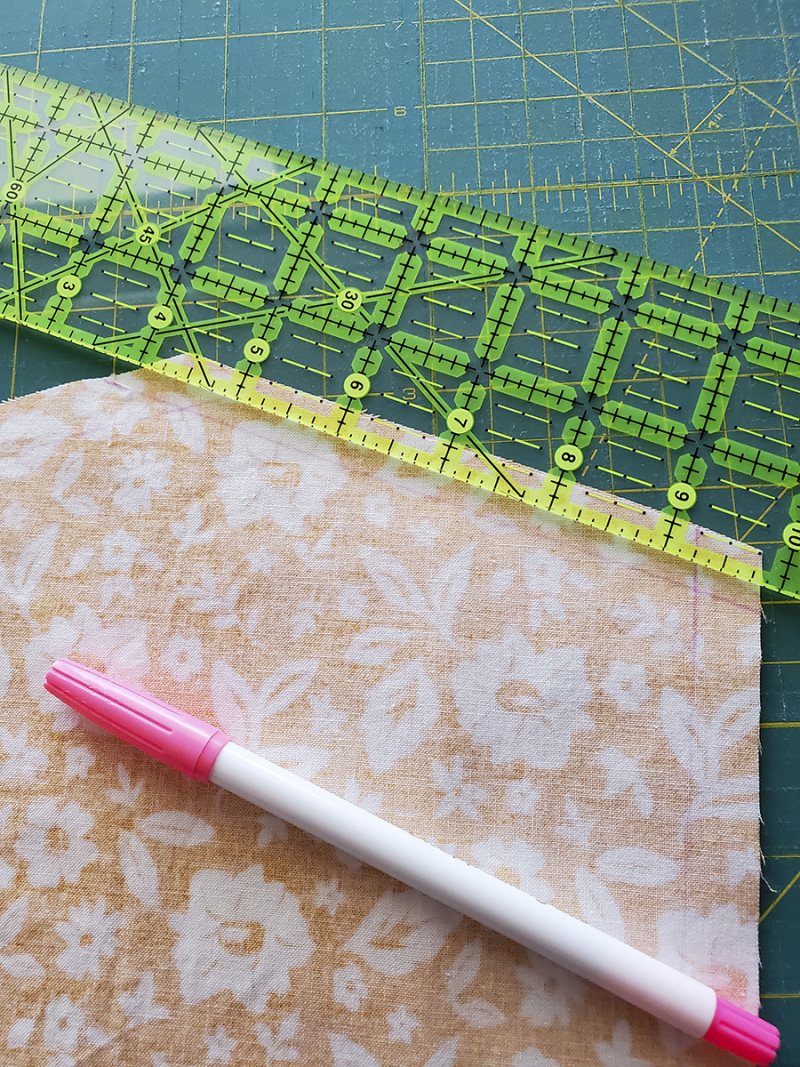
  5. Stack and sew. I have a hard time knowing exactly where to turn at the points, so I just marked a line 1/2 inch from the edge. Corona masks half inch marks
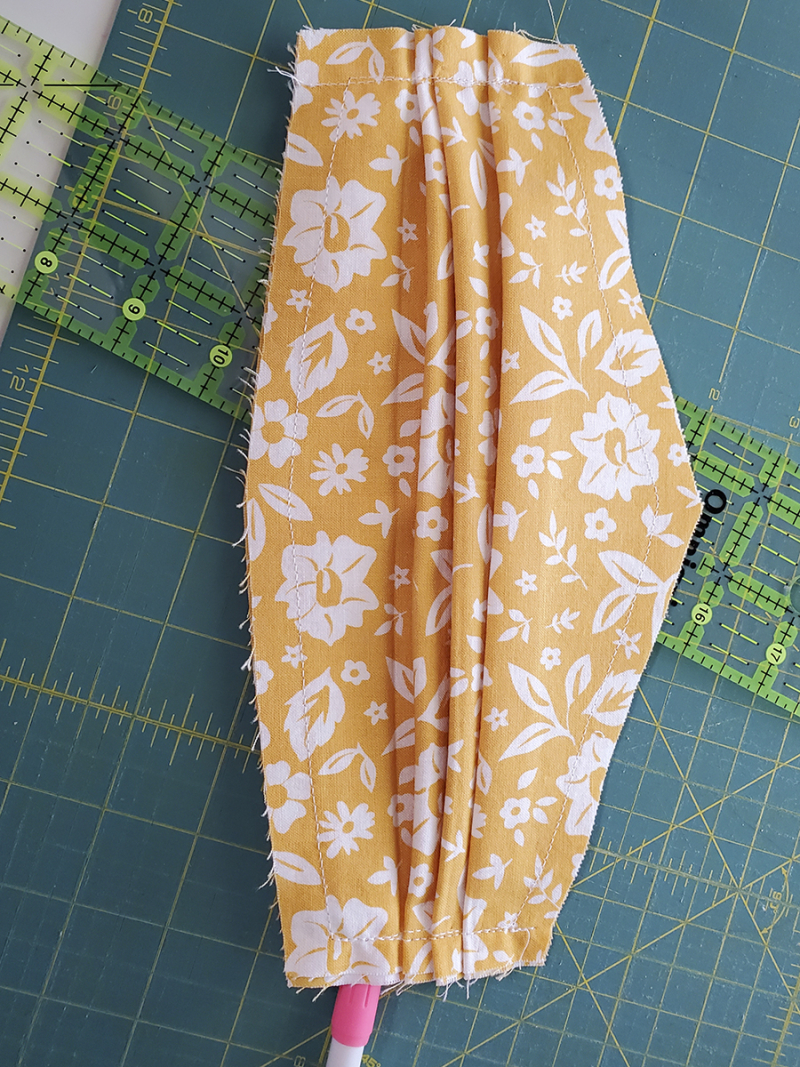
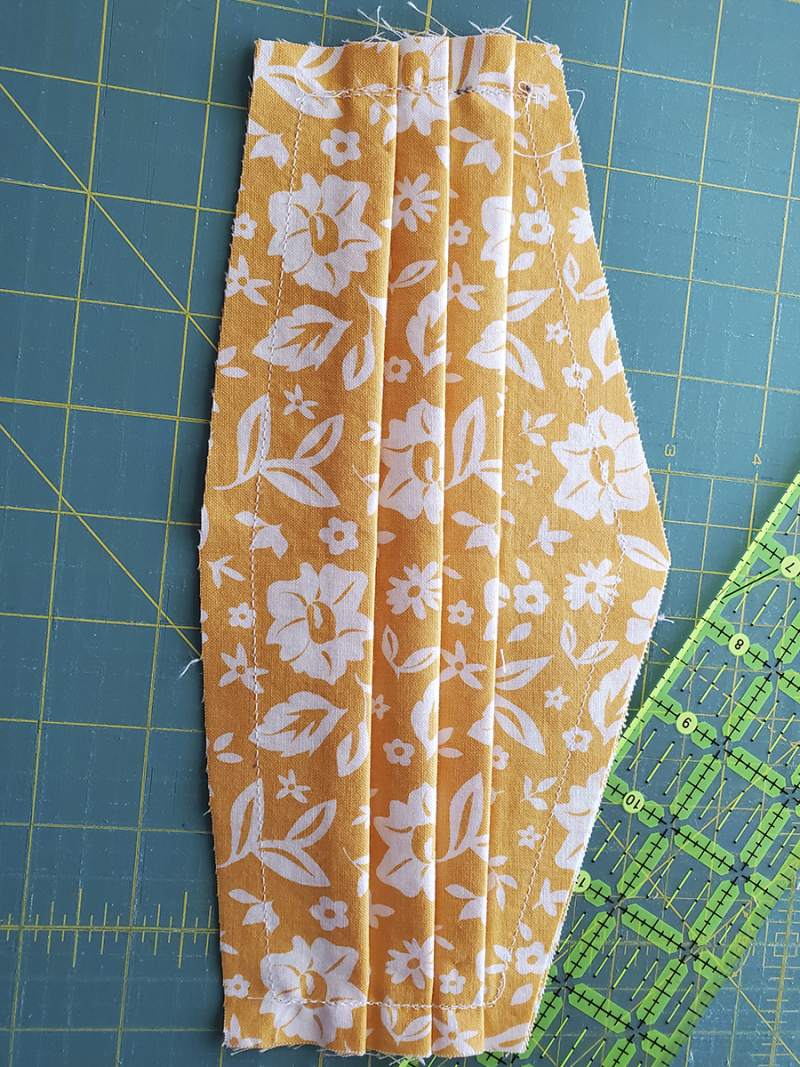
  6. Iron in pleats. I have no idea if I’m doing this step right. I THINK the fold should go up, toward the top point, but if you look at the picture of the folded pattern, it seems like they Corona masks pleats down
    point down. I’ve made it both ways…I continue to think the fold goes up. But I am happy to be corrected if I’m wrong. UPDATE!!! I found an updated version of the tutorial that states Corona masks pleats up
    "Pleats should be facing downward when looking at outside fabric of mask face." OK, got it wrong! Luckily I've only made a few so far. Maybe no one will notice? The updated version also includes instructions for a pocket for a wire. I haven't tried it so I can't speak to that part of the process, but HERE is the updated version.
  7. Sew pleats in place. Careful not to hit the pins with your sewing machine needle. Just saying.
  8. Mark and sew darts. When you sew the darts in, use the denim stitch on your machine. This is the stitch that does three stitches close together; on Bernina machines it is stitch #6.
  9. Trim excess. The tutorial photo shows these cuts being made with pinking shears. If you don’t have those, regular scissors are just fine! (I might really now want to buy a nice heavy pair of pinking shears. My mom used to have a pair that fascinated me when I was a kid. Wonder what happened to them.)
  10. Prepare the binding. If you cut width-of-fabric strips in step three, you don’t have to sew seams! Also, the smaller pieces (the one you cut in half) don’t need to be 10 inches, only about 4 inches long.
  11. Attach side binding. Sew toward the folds of the pleats to avoid sewing them down the wrong way.
  12. Finish side binding. When you sew it down to the front, again sew toward the pleats; that way your presser foot doesn’t get caught in the folds. Try to make sure the fabric edge covers the stitching lines you already stitched (also, if it doesn’t, don’t sweat it).
  13. Attach top/bottom binding. Fold the binding strip in half (end to end) and iron the fold. Then, line up that fold with the dart from step 8. This way your ties will be even.
    Corona masks folded binding
    I had to piece these binding strips together out of scraps because I calculated wrong. This is how I know it is faster to cut them from the width of the fabric!
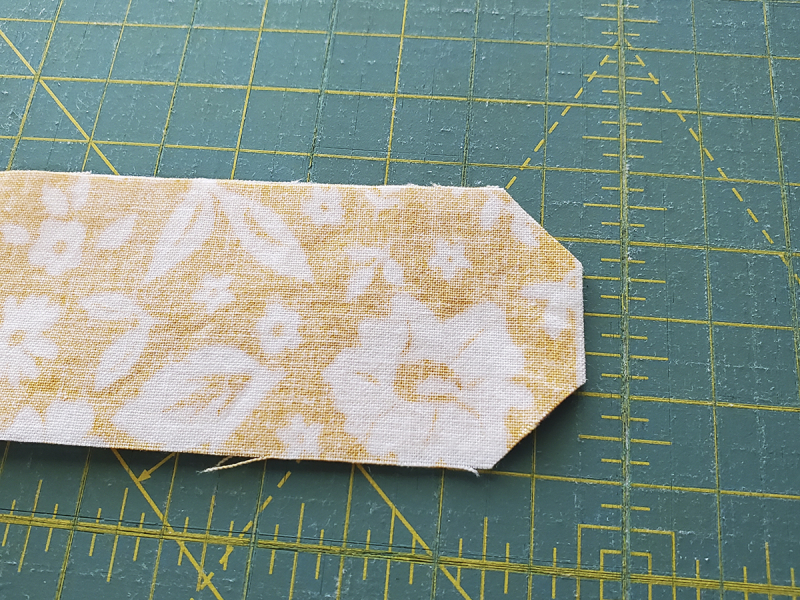
  14. Finish top/bottom binding and ties. If you folded in half on step 13, you can skip trimming the ties to make them even, as they already will be. However, I trimmed the corners off the edges of the ties because it makes sewing the ends easier.
    Corona masks clipped ends
    Fwew. This close up makes me realize I am about ready for a new cutting mat...This is the last birthday gift my mom gave me, though, so I just keep using it even though it's bumpy...

    When you sew the binding strips on, make sure to back sew once over the dart spot, just for added strength. Take this step slow at first, because it’s kind of tricky to get such a small strip in the right spot. Double check that you didn’t miss sewing both edges once you’re done; if you did, just sew it again.

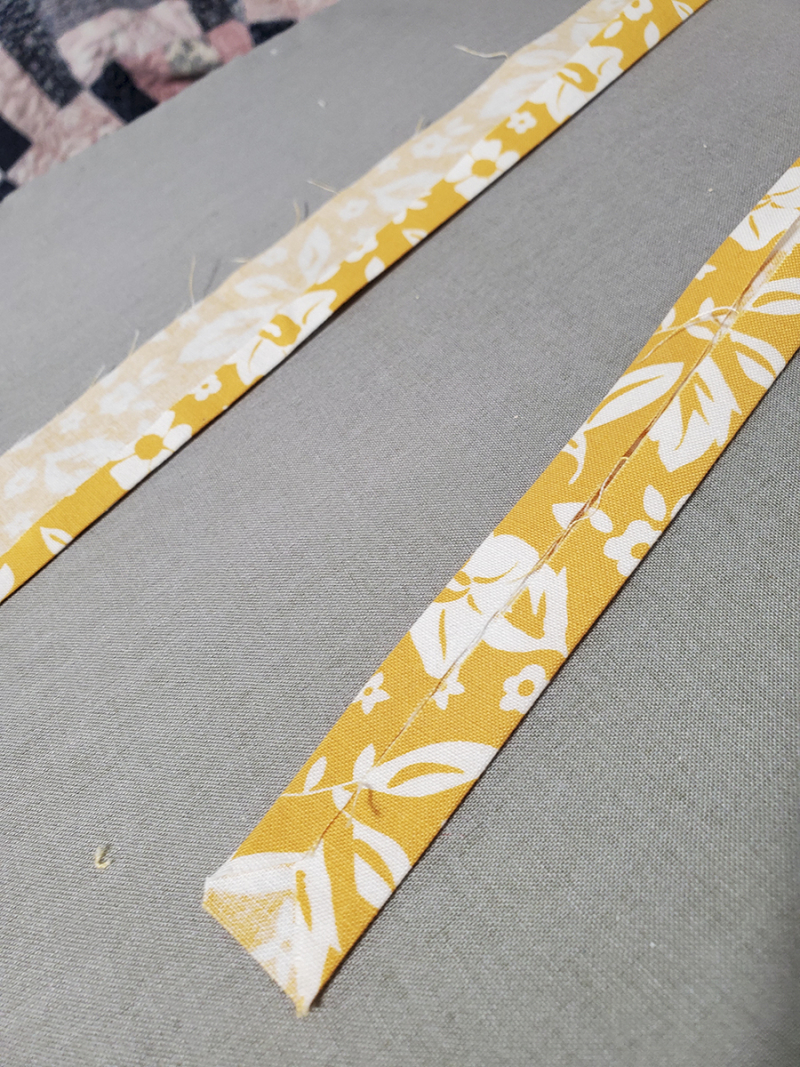
Alternate version of the clipped ends, this time folded: Corona masks folded binding ends better

The first mask I sewed took me almost 45 minutes from start to finish. By the third I was down to 30 minutes!

Download Notes on corona masks.

Let me know if you are sewing masks, have questions about sewing masks, or are also, like me, utterly panicked at the thought of wearing masks...

Happy sewing, friends!


2020 Goals: March Recap and April Ambitions

Keeping up with my goal to COMMIT this year, here’s an accounting of my March progress and a list of my April goals.

MARCH GOALS:

  1. My EXERCISE goals were to run 50 miles and to go to 10 ballet barre classes. March goals running
    COVID-19 put an end to the ballet barre classes, but I did get in three before the craziness escalated. As the month progressed, Kendell wanted to walk with me, so I walked a lot. More than I ran. I am feeling like getting outside and moving is more important than ever right now, and it matters more that I do it and less HOW. My mileage this month:

6 runs, 23.55 miles
6 walks, 24.55 miles
2 hikes (Dry Creek and Grove Creek), 10.28 miles
58.38 total miles

March goals dry canyon hike

  1. My WRITING goals were to blog two times a week, work on four poems, and finish an essay. Almost total fail. I did blog 8 times, but I worked on zero poems or essays. The enforced togetherness of the quarantine is not fantastic for my writing goals.
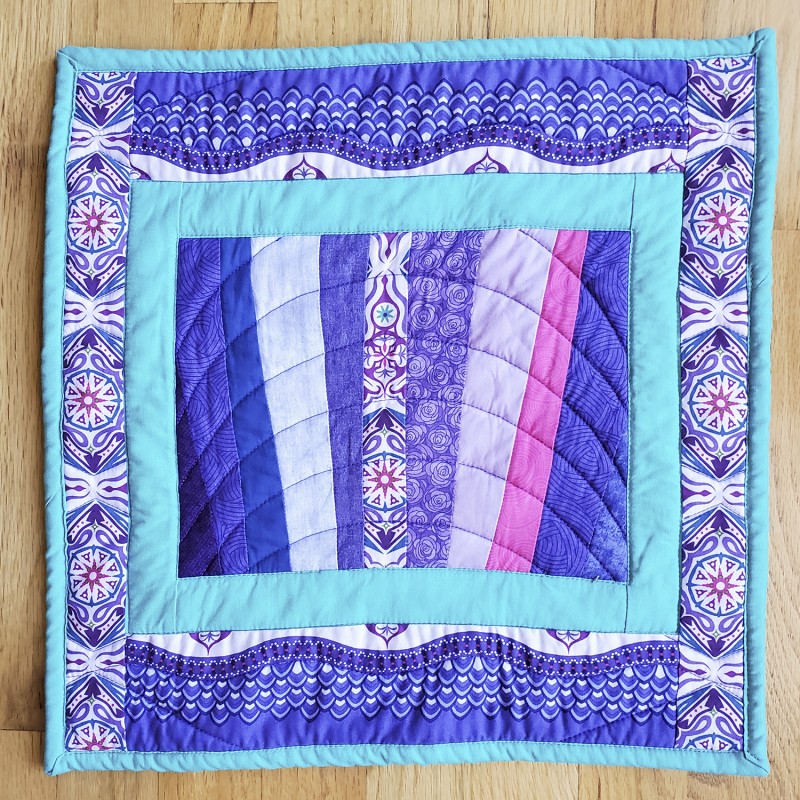
  2. My QUILTING goals were to finish the octagon flower blocks, bind Jake’s quilt, and figure out the process for Kaleb’s quilt. I finished a hot pad I made with some scraps from my Crazy Paving quilt (it is named "purple chakra") March goals purple chakra
    and the octagon flowers and I bound Jake’s quilt, but he hasn’t used it yet because I haven’t dared to take it to the laundromat. I did not figure out the process for Kaleb’s quilt but I did print out the pattern so that is a start! My other goal was to NOT quilt as much, and I did accomplish that; I made one little mug rug and I shopped for fabrics for another table runner, but that was all.
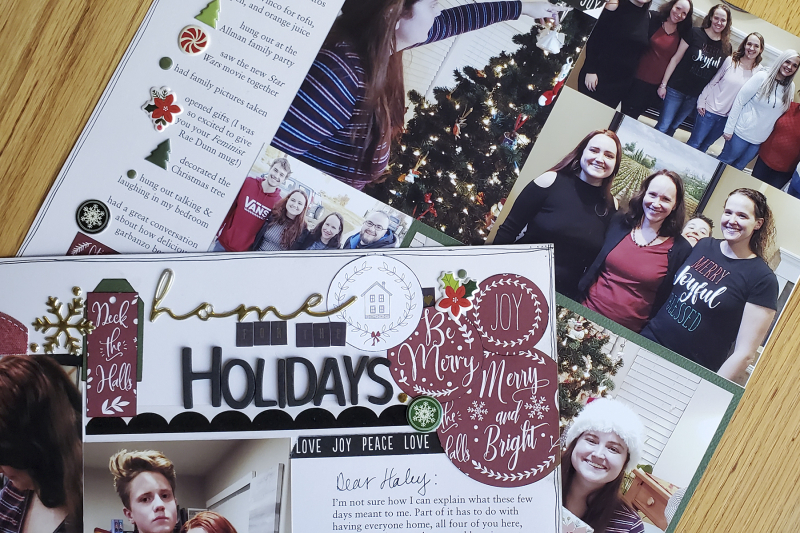
  3. My SCRAPBOOKING goal was to make some layouts, and I did that! I organized and executed my Christmas in March week (which is extending into April!) and I made 10 layouts. March goals scrapbooking
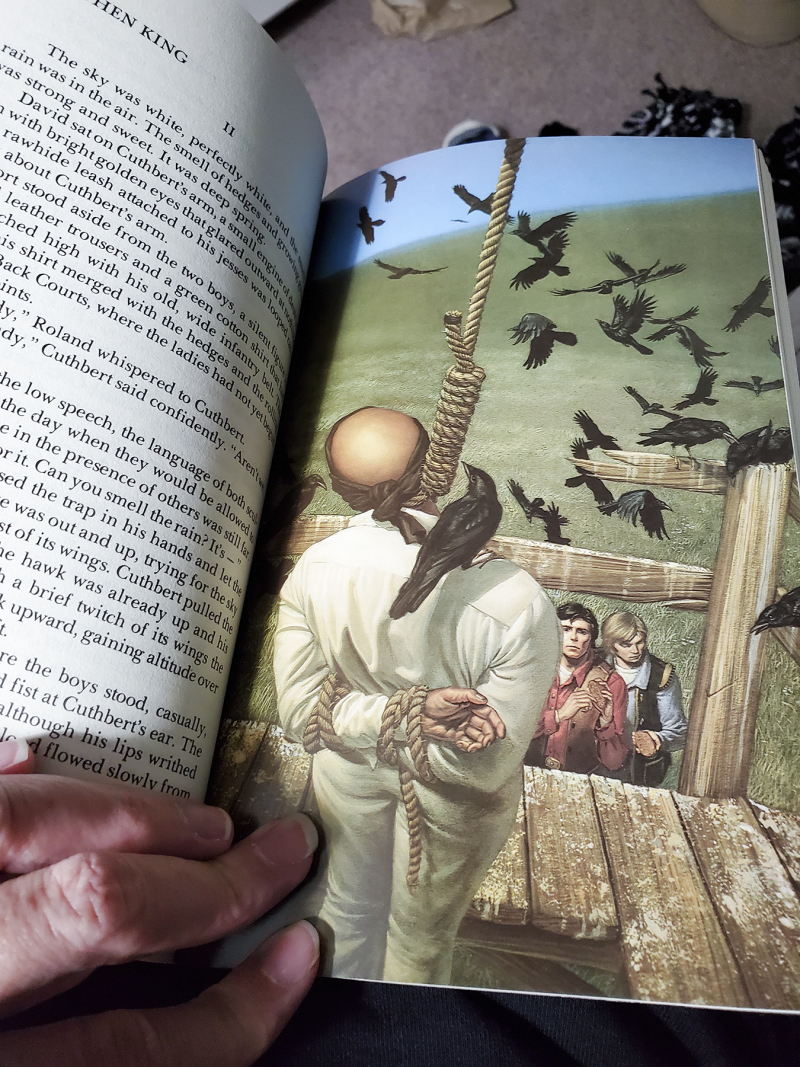
  4. My READING goal was to finish the two books I hadn’t and to start The Dark Tower series. Reading has taken the second-biggest hit during the quarantine for me (writing is first), but I did accomplish these goals. But I haven’t read much at all.

March goals dark tower

APRIL GOALS:

  1. EXERCISE: Eight runs (two a week) and as many walks as Kendell or anyone else wants to go on. Three hikes. Pick up strength training again by logging in to my Beach Body account and/or Peleton app. Also, MOVE MORE while I’m working at home. On Wednesday I took several 5-minute breaks where I did a little bit of exercise—jumping jacks, planks, burpees, each one followed by some gentle cobra poses—and my back felt 100% better at the end of the day.
  2. WRITING: Blog twice a week. A couple of days ago, I got sucked into a YouTube add for a Master Class by Joyce Carol Oates. Three things she said I want to remember: “The most destructive thing to our creativity is constant interruption.” “If you feel like you are a writer, you probably are…Take that instinct and turn it into a craft.” “What we all need is the psychological uplift of finishing something.” I was listening to this at the same time I saw that meme about how if you don’t finally do the thing you’ve been putting off doing during the quarantine, you obviously didn’t NOT do it because you didn’t have the time, but lacked motivation. If I don’t finally settle down and write something, anything, during the quarantine, will I ever? Well…who knows? What I want to do is to look at it like a challenge. I WILL be interrupted. I love my people and I love that we are together, but just their presence in the house makes me feel less able to write. (Does blogging count as writing? Yes…but also, sort of no, because it is easier. It doesn’t have the challenge of being chosen by an editor in order to be seen, and so in that sense it is more of a writing exercise.) So, I am making my goal smaller and more specific: I am going to finish an essay I started a while ago and submit it to the Ploughshares emerging writer contest.
  3. QUILTING: Actually make the table runner. Start on Kaleb’s quilt.
  4. SCRAPBOOKING: Finish the Christmas layouts I had planned and make three layouts for my family stories album.
  5. READING: Commit to reading for 30 minutes a day. I have the time. I’m going to try to not let myself feel guilty about this.
  6. BONUS GOAL: Right now, it feels like packages are life. I keep placing online orders for stuff I don’t need. So, I’m setting the goal of MAILING more than I order. I’m going to make and send two cards a week.

Of course...with all that is going on, maybe the best goal is just to survive! How did your March goals go? 


Fabric for The Plague Year

When I was a kid living my Jack Mormon life deep in the heart of Utah County, my mom had an on-going joke. Whenever anyone mentioned something about food storage (and living in Utah County in the 70s and 80s, even as a Jack Mormon, “anyone” might mention this often), she would say “I don’t need to have food storage. If the apocalypse happens, I will trade my fabric for food.”

Even then, she had an enormous stash of fabric. (She also had, in the very same room as her fabric stash and sewing machine, two floor-to-ceiling cupboards that were filled with food she’d canned during the summer, anything from apple pie filling to refried beans, green beans to a weird pickled succotash with carrots and jalapeños that I don’t think anyone ever actually ate, even shredded beef and of course salsa and tomatoes. Was this not food storage?)

By the time she passed away last year, she had a dragon’s hoard of fabric. If trading fabric for food ever really became a thing, she and her family and her neighbors and probably some of her neighbors’ families would’ve never gone hungry.

What’s the likelihood of ever actually trading fabric—or any craft supply, really—for food? It was just a family joke.

Of course, until now none of us had ever actually gone through anything apocalypse-esque, so we really had no idea.

But now there’s COVID-19. There is shelter-in-place, and no sit-down restaurants, and the library is closed. The movie theater is closed and school is online and the stock market crashes every single day. There are riots in the aisle of Costco. (Literally: TWO Costcos in Utah have had to call in police because of fist fights.)

It’s not really the apocalypse. At least, I don’t think it is, but it is surreal. I came out of Costco yesterday feeling like was floating because I was so relieved that they had milk. When in my life have I ever worried about being able to go to the store and buy milk? Never.

Yesterday morning, I woke up with a quilt. Meaning: I dreamed about making a quilt, and when I woke up I knew exactly how I would do it. What it will look like, where I will put it. (It’s a table quilt if you were wondering.) I don’t simply want to make this. I need to make it. I lay there in bed, figuring out fabric measurements in my head, fueled with creative energy.

Except, you know? I don’t have a fabric stash like my mother did.

Sure: I have fabric. Scraps from previous projects, of course. I have four different boxes where I am accumulating small scraps for different types of projects. I have a huge box of 6x6 squares and another of 8x8. I have fabric in the closet under the stairs and in a box in the storage room and in stacks next to scrapbooks in my crafty space.

But the quilt I brought out of my dream is yellow, blue, and green. Colors, especially yellow and spring green, I don’t have a lot of.

And plus, shopping for fabric is one of the fun parts.

I’m serious: it almost felt like a compulsion to go to the fabric store. Like a deep itch that could only be scratched by looking at bolts of Moda and Riley Blake.

I tried. I tried to talk myself out of it. I tried to be logical and calm and socially responsible. Fabric isn’t a need, it’s a want. Nevertheless, I found myself in the Fabric Mill parking lot later that day. It was completely empty, but the store was open, so, I confess: I use some hand sanitizer and then went inside.

I bought the fabric for my quilt.

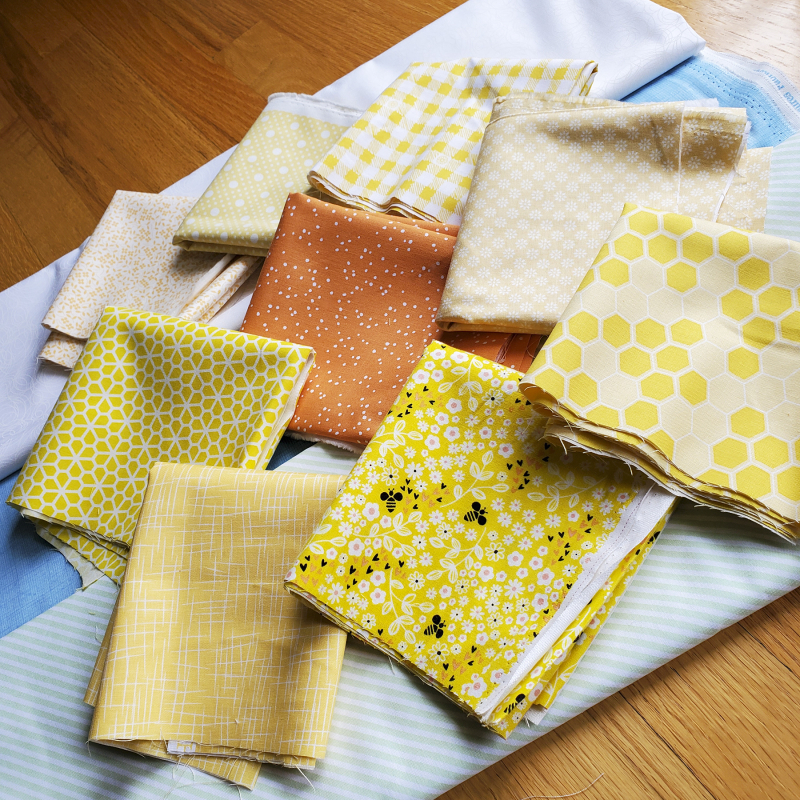
Fabric for a plague year

Maybe this wasn’t my mom’s intent or understanding. Maybe it really was a joke. But at that moment in the fabric store, where I kept my eye on the door just in case someone else came in, where the feeling of guilt for not being socially responsible battled with that fabric-store joy of being surrounded by color and print and possibility: right then, I understood our inside joke in a way I never had.

In times like these, we don’t only need the essentials. Yes: toilet paper and canned chicken are required. We have to eat. We have to take care of our bodies.

But if all we do is exist, that isn’t really living. And for me, a large part of living is making. Creating things helps me feel alive. It is, in fact, one of my reasons to be here on this earth in the first place. Making things gives my life meaning. And if we can’t have lives with meaning, why try so hard to stay safe from the virus? Life without meaning is life without joy. And during stressful times like these—not just individual trials, but social ones—we need joy. Maybe we need it more than we do in regular, non-pandemic times.

So even though it goes against the goals I made for myself when March started (and doesn’t March 1 seem so far away? So long-gone, those times when we didn’t get anxious about getting milk or shaking someone’s hand?), I’m going to make my dream quilt. I’m going to make it because I am alive right now, and because making things makes me happy.

I’m also going to bake cookies (as soon as I can find a source for dark-brown sugar, that is; I’ll trade a fat quarter or ten sheets of patterned paper for two fresh bags) and make scrapbook layouts.

I’m going to work on the other thing I brought out of a different dream, which is a poem about protective kittens.

Because in addition to loving my people, I make my mark on the world by making things. Maybe you make your mark by collecting stamps or by perfecting your golf swing. Doesn’t matter what it is. What matters, especially now, is that we honor who we are by doing what we love, because in the end—and that is the terror, yes, that this coronavirus experience could be our end, or the end of someone we love—that is what we have to offer.


2020 Goals: February Recap and March List

Trying to be more proactive with my goals this year, I’m breaking things down by the month instead of thinking bigger. My word this year is “commit” and while I am not 100% there yet (nor will I probably ever be), I’m feeling good about my progress. I am much more apt to work on my goals if I put them out into the world, so I’m going to attempt to do this each month, either on Instagram (I am @amylsorensen) or here: review the previous month’s work and list the current month’s goals.

February Goals:

  1. Exercise for 30 minutes every day. I didn’t accomplish this, mostly because of a strained hamstring I didn’t want to aggravate. But, I did exercise MUCH more in February than January. Almost 50 miles, two hikes (it’s been muddy here and Kendell can’t deal with mud), and seven ballet barre classes. I’m OK with not making the goal exactly because it still helped me to move more. Goal recap running feb mar
  2. Push ups and planks every day. Yeah…totally tanked on this one. I think I managed it for three or four days, and then random days here and there.
  3. Work on a writing project every Monday, something that is not my blog. Another miss. I am realizing that when I am deep into the quilting process, I put everything else on hold. (Even stuff like laundry and fixing dinner.) However, I did have some ideas that I put down on paper, and besides, see #4.
  4. Blog twice a week—posts that aren't book reviews. I wrote nine blog posts this month, one of which was a book review, so YES. I accomplished this goal! My favorite post was the one about raisin bread and while it is perhaps too personal, this post about my continuously developing relationship with my faith was cathartic and helped me to understand myself better. I feel like picking up a blogging habit again will contribute to my writing progress as well, even if no one reads my posts, because I am remembering how satisfying it is to spend an hour crafting something with words.
  5. Make my January family stories scrapbook layout and one other one from last year. Remember that all-encompassing thing I do with quilting? Yeah…my February quilt is pretty much the only crafting I did this month. BUT. I did get the photos printed for January 2020 and December 2019 for the family stories album, and I have the journaling formatted and ready to print. Plus I gathered up a bunch of photos I had already printed for other 2019 family pages and got them organized into the correct months. So, not fully completed, but progress!
    Goal recap scrapbooking feb mar
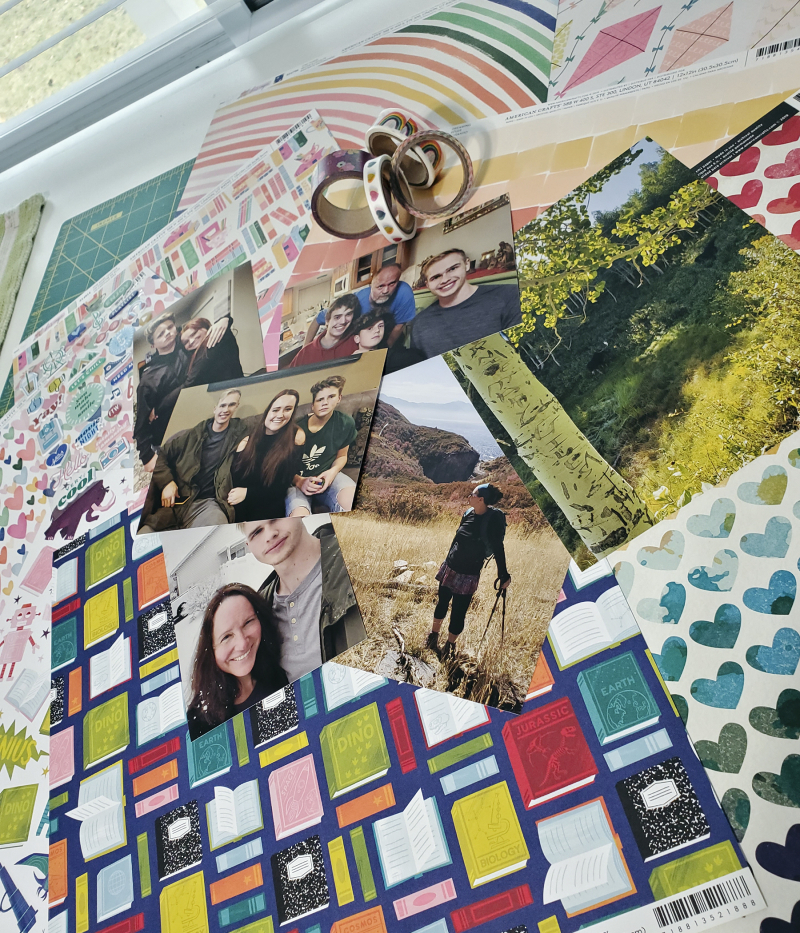
    I also managed to buy a few new supplies! These papers don't go with these photos but they are all new.

March Goals:

EXERCISE: 10 ballet barre classes and run 50 miles. I’ll take whatever hiking I can get but it’s so dependent on weather right now I don’t want to set any goals. PUSH UPS AND PLANKS! I know those are so good for me. Also, continue working on my year-long flexibility goals, which are getting my splits back and perfecting dancer pose.

WRITING: Continue blogging twice a week. Finish four poems and polish my pie-crust essay.

QUILTING: Finish the last straggly bits of quilting projects: the octagon flower blocks and bind Jake’s quilt. At the end of the month, sit down and figure out the process to follow for the quilt I want to make for Kaleb. I have the pattern, but the process and fabric requirements are for fat quarters and I’m making it out of yardage and scraps, so I need to create a process. (I’m not going to do this until the end of the month so as to give myself a few more chances at finding any other fabrics I need to include—the main fabric is sharks, and the accent fabric is white with wavy aqua stripes, so I’m just looking for bits of aqua or navy or ocean-themed (but not cutesy) to finish out the collecting phase.

SCRAPBOOKING: Make some layouts! I am going to focus on the family stories layouts but I also have pictures printed for some other layouts I’m excited to make. Also put together my 50 Hikes album—all of the photos are printed and the journaling is written, just need to put it all together. (This won’t really be a scrapbook, per se. A few little embellishments but it’s mostly just photos and journaling in a 6x8 album. I meant to finish this for Christmas for Kendell’s gift. Then for our anniversary. Guess I’ll just give it to him as a “happy Wednesday!” gift!)

READING: I’m almost done with the two novels I’ve been meandering through. Then I’ll start The Dark Tower series.

What are you working on these days?


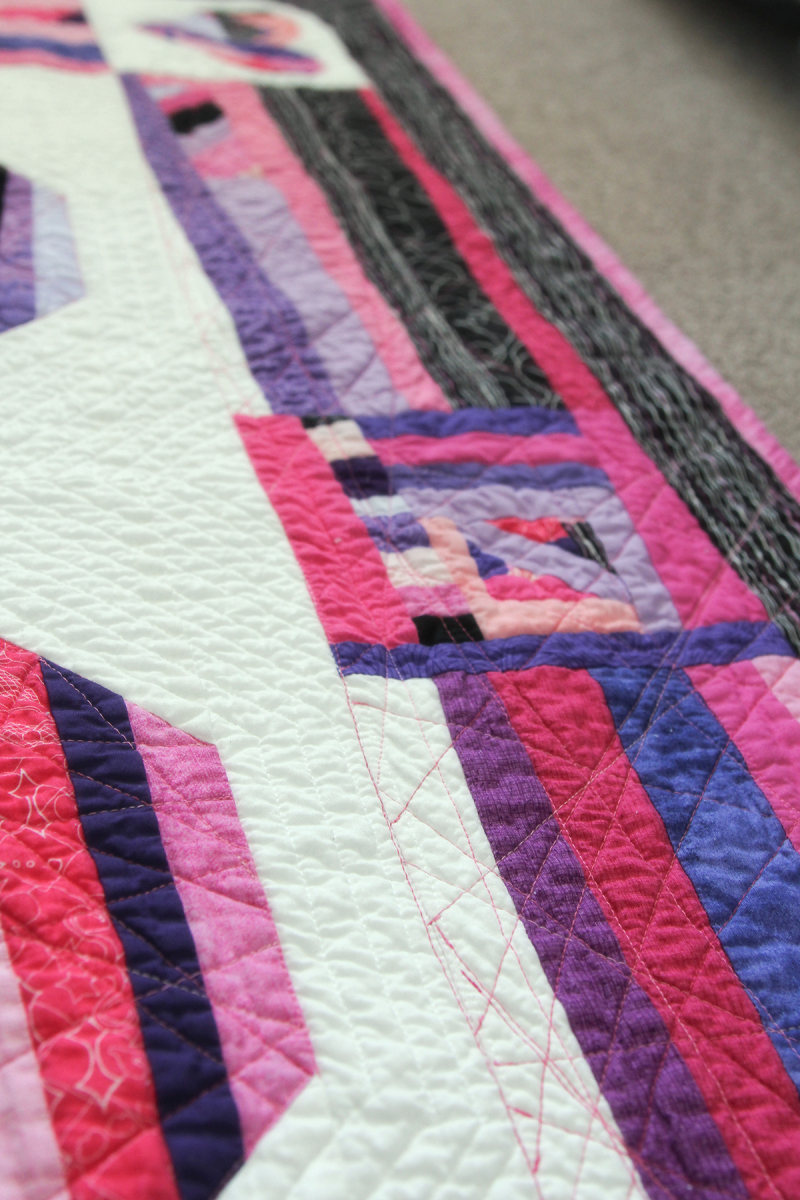
Hearts Like Crazy Paving Quilt Tutorial

Hearts Like Crazy Paving Instructions

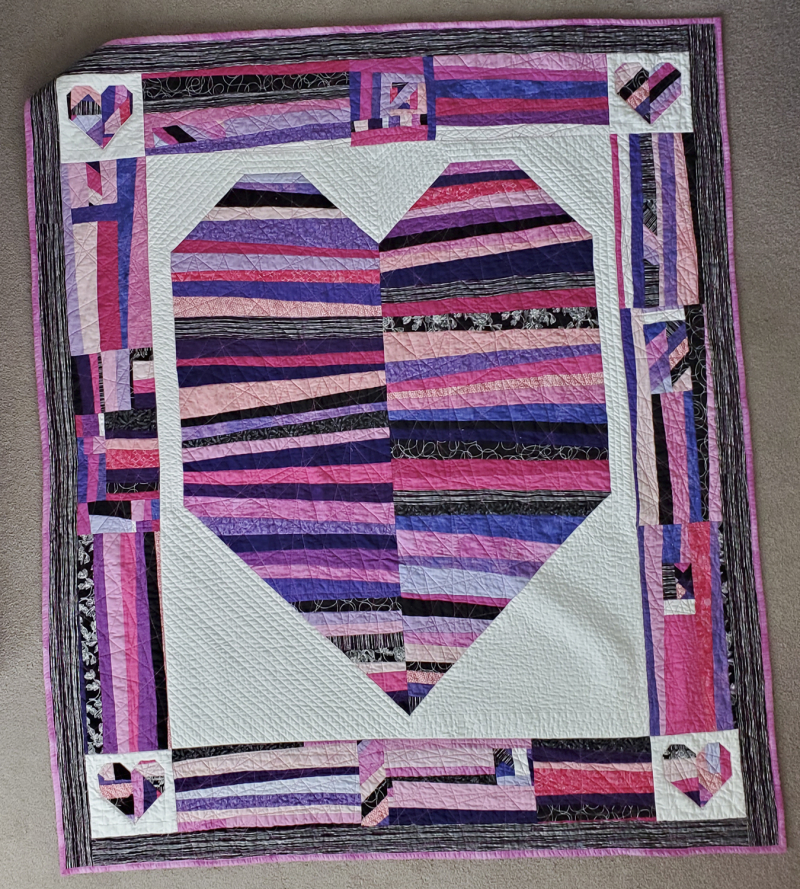
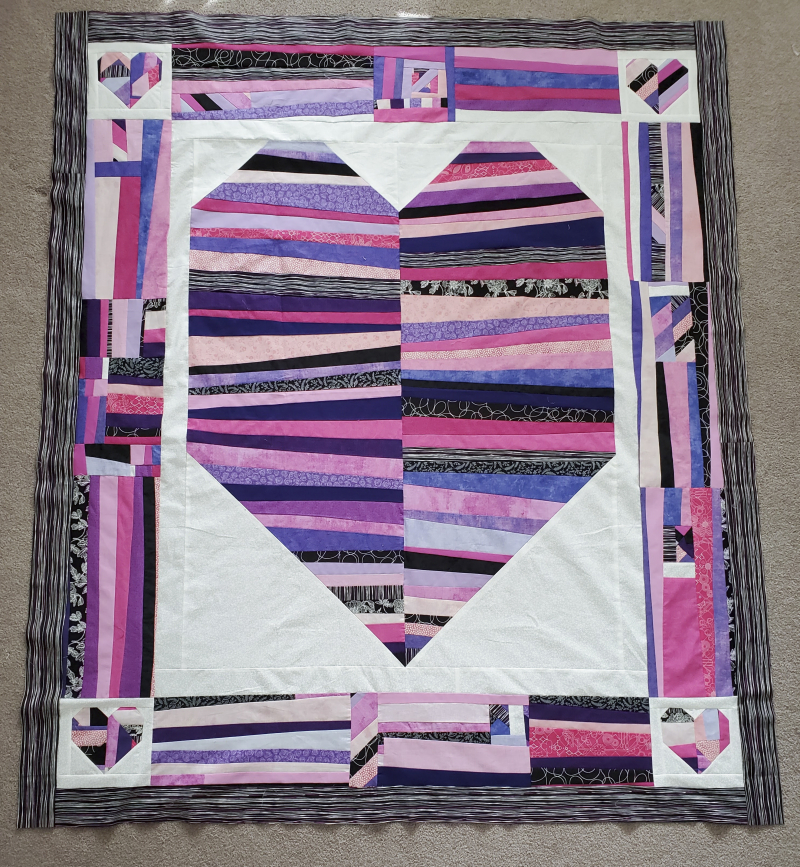
Hearts like crazy paving finished

FABRIC:

hearts and inner borders: I bought 11 assorted fat quarters in purples and pinks. Some of these are Moda solids but most are subtle patterns that read as solids. I used two more purple scraps and three pink scraps from my stash; these were less than 5” wide and in one case (the pink flowers) I literally only had 2” to use. I used four pieces of black fabrics also from my stash. I had quite a bit of leftover fabrics, but since I only bought fat quarters it wasn’t too much. (I think I am going to save these scraps and make a baby quilt—one that isn’t an angsty statement about modern love, mind you—but it will definitely have to be for a mom who loves purple too.)

color theory note: I tried to only use cool pinks and purples, but when I started pairing fabrics up, it felt like there needed to also be a few warm ones. Since I don’t love warm or plummy purples, I threw in a couple of warm-ish pinks.

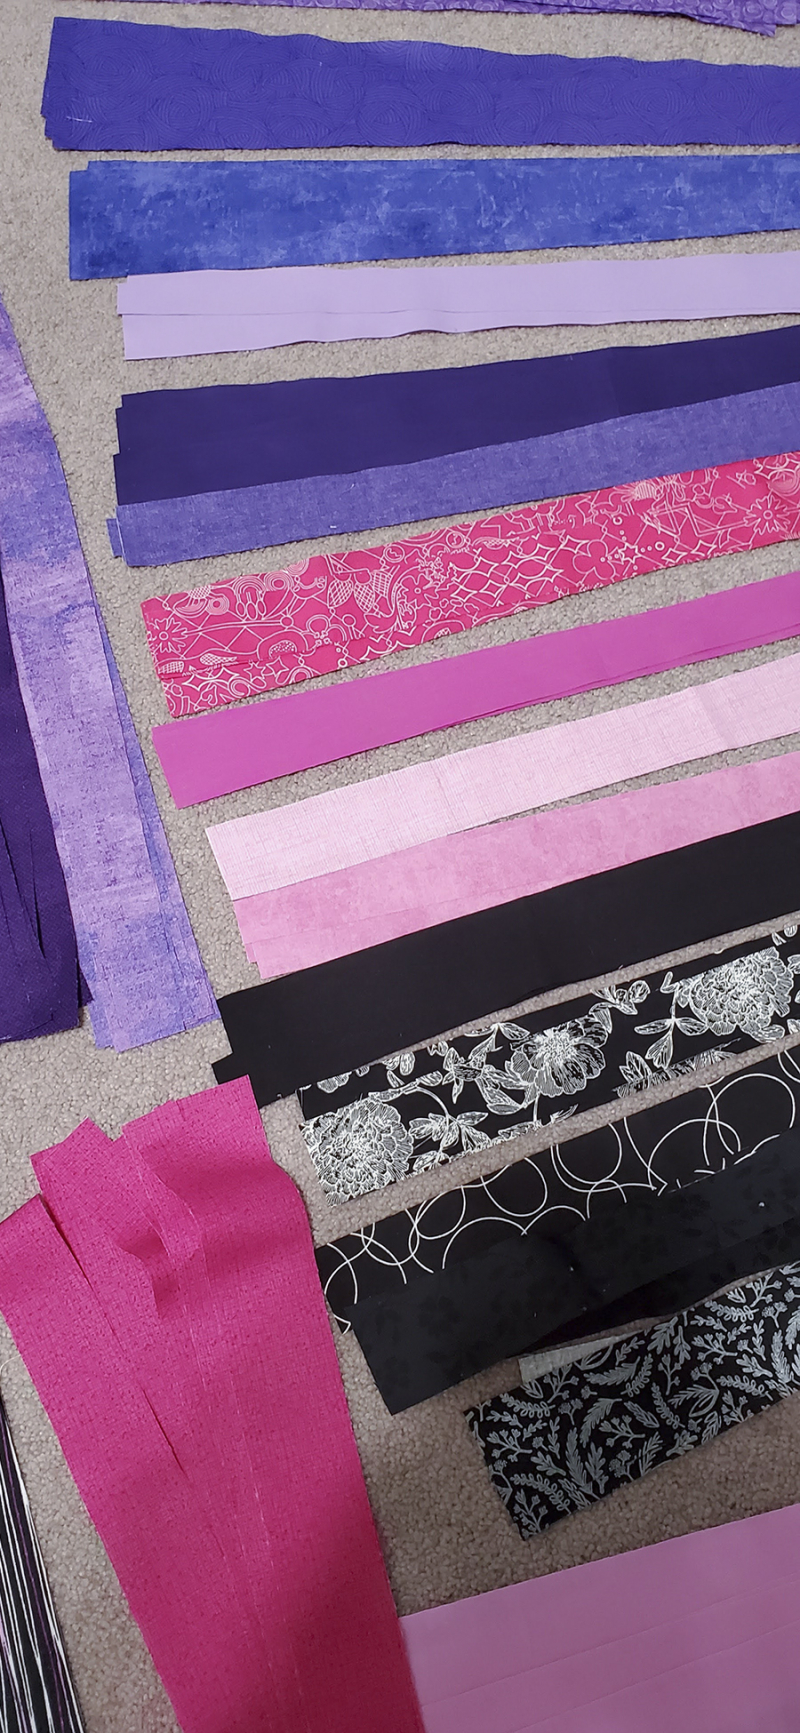
Hearts like crazy paving cut strips
I tried to group the like colors together as I cut, which makes making contrast easier. Also, here is a first introduction to my messy crafty space. It's small so it gets crowded.

outer border (the black with wavy lines): I bought two yards because I wanted the stripes to run vertically and I didn’t want a seam on the long borders. This means I cut the strips for the borders on the long side (parallel to the selvage) of the fabric. (This is called the straight grainline.) It also means I have a ton left over! (I was OK with this because I like the fabric enough to use it for other projects and because I bought the end of the bolt and so got it at a better price—I think it was only $6.50 a yard.) I prefer doing borders this way when I can, even without stripes, because when you cut the fabric strips lengthwise there is less stretch and it makes squaring up the quilt much easier. If you cut the strips along the width of the fabric (crosswise grainline) instead, you need 5/8 of a yard.

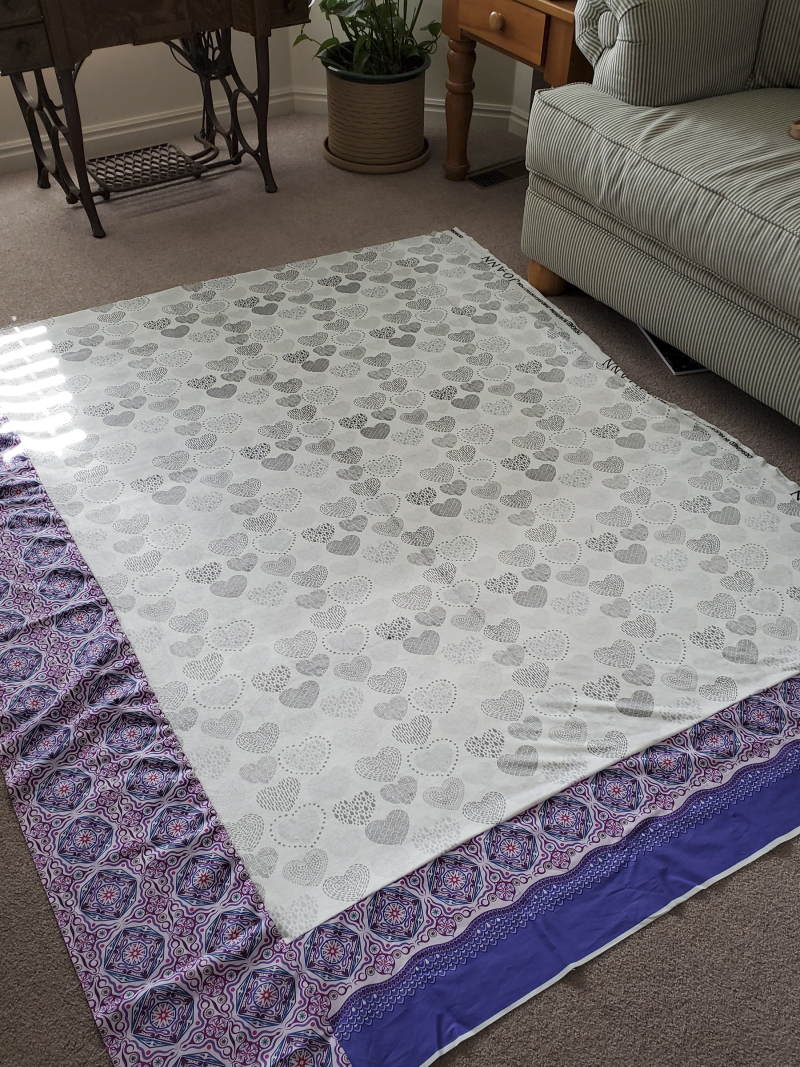
white background: If you cut *exactly* right without any mistakes, you need exactly 35” (there will be some leftover smaller scraps), so one yard will work if you never mess up. I always buy extra just in case; so 1 1/6 yards might be safer. I loved this white tonal floral (It is from the Sugarcreek line by Corey Yoder) so I bought 1 1/2 yards.

batting: I used a white cotton batting from my stash…not sure what brand. (I have a few more large-ish chunks of batting and once those are used up I’m going to invest in some Quilter’s Dream batting instead, as my Joann has stopped carrying—or is just always out of—the Warm and White batting which I like. I don’t love what they carry now.)

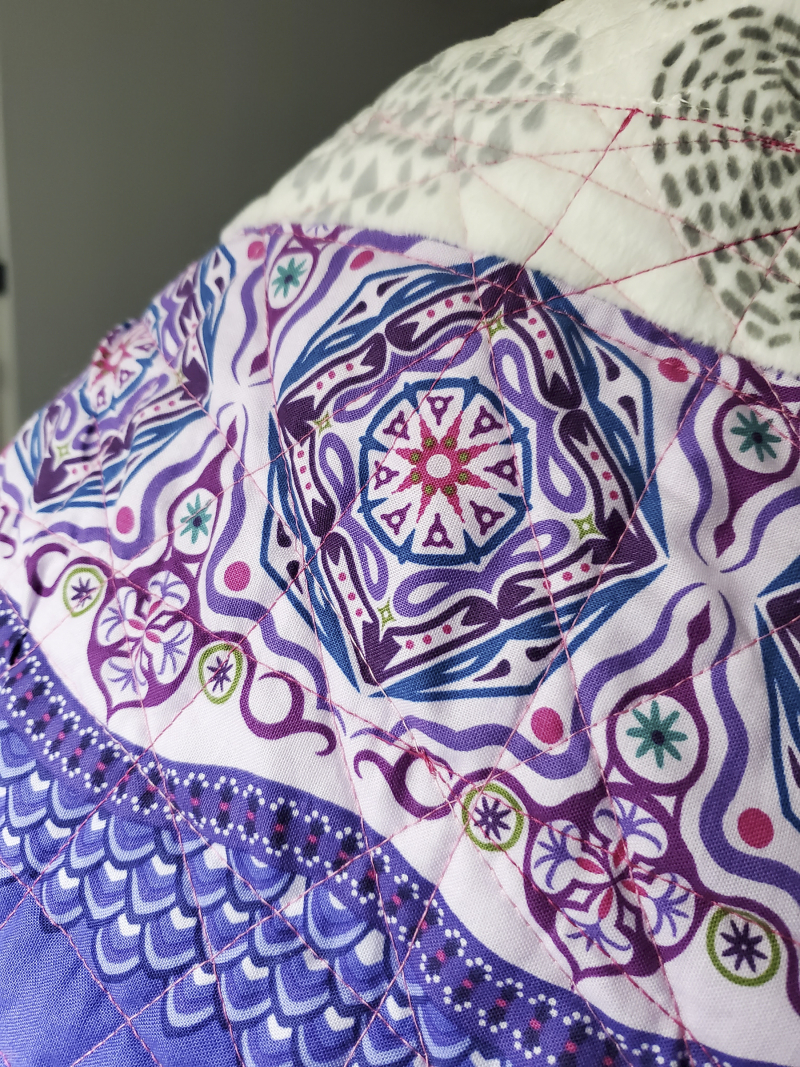
quilt backing: My finished quilt is 53”x62”. I used a big chunk of minky (this one came from Joann) plus some cuts from the two yards of “Magic Carpet” by Bernatex I bought at a new fabric store I found a few weeks ago. When I make pieced backings I don’t do a ton of measuring, I just lay the fabrics out and then cut and piece as it feels like it would fit. Sometimes this means I cut things wrong and have to add an extra strip here and there…but this one turned out just about right. (I have a fairly wide scrap of the minky left that will also be perfect for a baby quilt. Or two.)

Hearts like crazy paving quilt back
I also tend to take quilt pictures in my front room. Also a small space so getting a straight-on pic is hard. But the light is better.

CUTTING:

assorted colors:
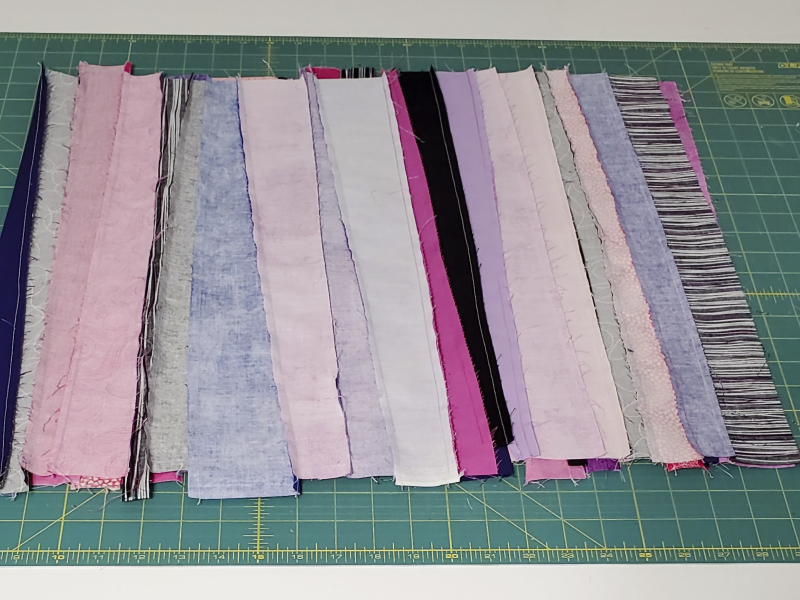
cut three or four angled strips on the crosswise grainline (so if you’re cutting fat quarters, these will be 18” long). I stacked three colors together for this part. The angles are not exact but random. Make some of the strips wide and some narrower, with the narrowest edge at least 1” wide. I LOVED this cutting process as it was fast and sort of…freeing, I guess, to not worry about exact straightness.

black scraps:
I wanted the black to not overtake the colors, but just be an accent, so I cut all of the black strips in fairly thin widths. I also put in some of the border fabric, and I cut those strips straight (no angles). A few straight strips helped to balance things out a bit.

background fabric:
2 18.5”x18.5” squares
4 6.5”x6.5” squares
2 2.5”x35”-ish strips
2 2.5”x width of fabric strips
16 1.25x1.25” and 8 2.25x2.25” squares (cut from scraps, see step 8 in assembly)
8  5.5x1.25” strips (cut from scraps)
8 7.5x1.25” strips (cut from scraps)

outer border:
2 3x52” strips (seam as necessary)
2 3x65” strips (seam as necessary)

ASSEMBLY:

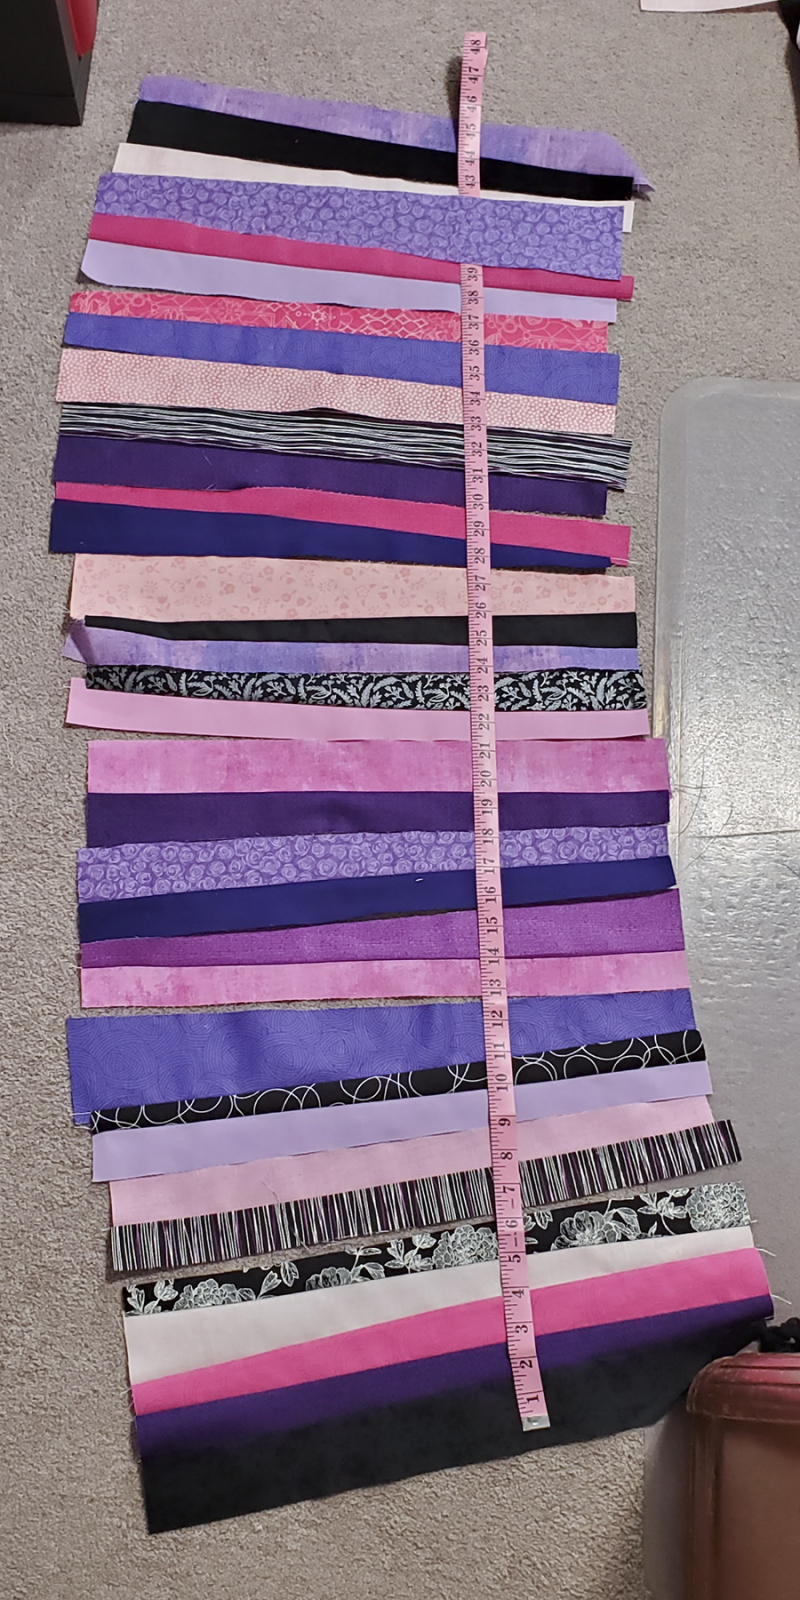
  1. Chain piece colored strips together, alternating colors and angles to create a scrappy mix. I pieced them first into pairs, then I added a third strip to about half of the pairs, then pieced a two-part piece with a three-part piece. Then I laid the strips out on the floor to see if I needed to add more. This is improve piecing, so just have fun with this step. You will make TWO pieces that are 18”x43” (or so…it’s OK if it’s longer). End with a fairly wide piece on the top and bottom to give yourself room for straightening. It’s OK if you have leftover strips as you’ll use them in the border.
    Hearts like crazy paving making the strip
    As you improv piece the two strips, keep in mind the seam allowance. I added five or six more strips after this point! Also, make sure to alternate some fat ends with small ends, or the long strip will curve too much and you'll have to trim it much narrower.
  2. Iron the seams. I ironed mine open because there is so much dark/light going on and I didn’t want the dark undersides to show through on the light fabrics. I would be faster to iron them all to one side, it’s up to you.
  3. Straighten the pieces. Due to the nature of the angles, the two pieces of the heart will not be straight yet. Fold each piece in half and straighten to 17x40.
    Hearts like crazy paving trimming straight
    One strip, folded in half just before trimming.
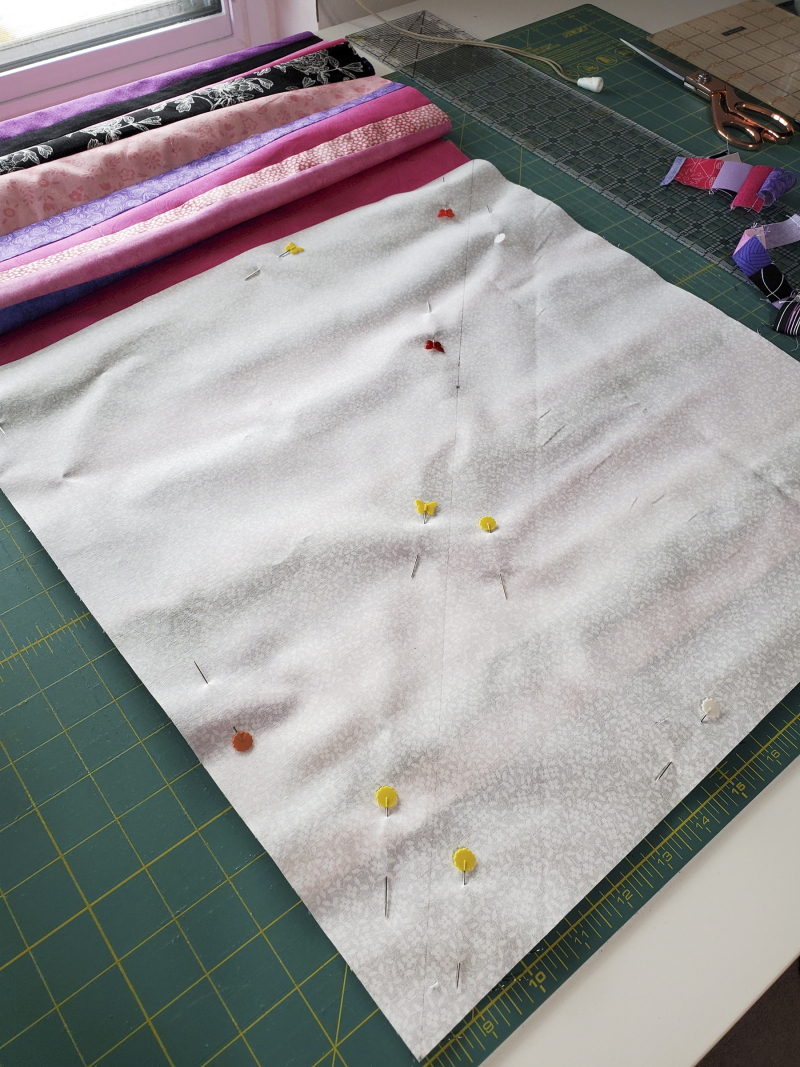
  4. Make the two heart pieces. Draw a diagonal line on the back side of the two large background squares. Pin one to the bottom left side of one strip. Sew along the diagonal line, then cut 1/4” away from the sewn line.
    Hearts like crazy paving making the heart
    It helps if you pin not just along the diagonal line, but on the straight edges too, especially with the larger pieces.

    Repeat with second strip, except sew the triangle on the right side. Repeat this process with the smaller squares, one on each side of the top of each strip. If this is confusing, refer to THIS AWESOME TUTORIAL on Amy Smart’s blog, it walks you through step by step.
  5. Press the seams away from the white (toward the colored strips).
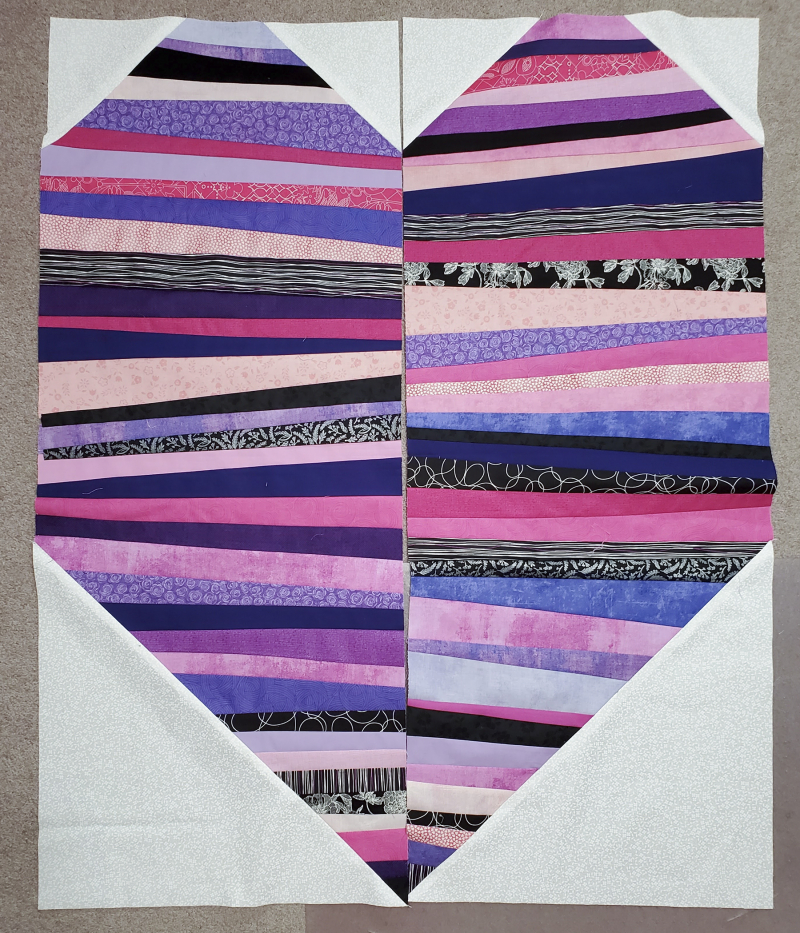
  6. Line up the points of the heart and sew both sides together.
    Hearts like crazy paving two halves of the heart
    Just before sewing the heart together.
  7. Using the white 2.5” strips, sew a border around the heart. Sew the LONG (left and ride) borders on first, and then the short (top and bottom) borders, so you don’t have to piece any strips. (BORDER NOTE: I know many quilters cut the border strips exactly the size of the piece they are sewing the border to. I don’t do it this way. Instead, I cut the border pieces about 1” longer than the piece I am bordering, sew the strips on, and the square off the ends. This is less frustrating to me, but use whichever method works best for you.)
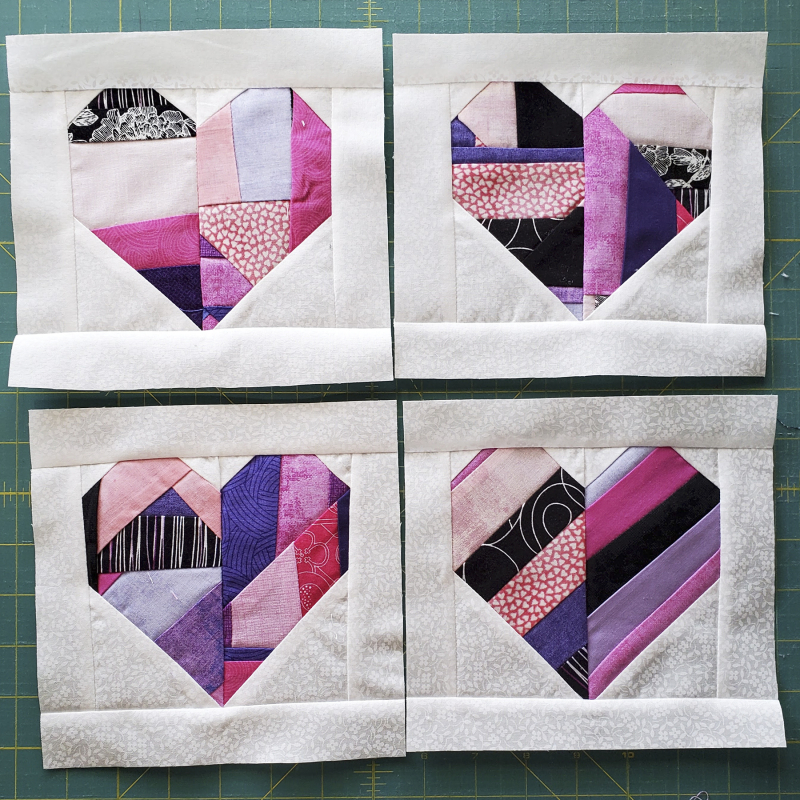
  8. Make the four small hearts—more improve piecing. When you cut off the big triangles in step 4, you were left with two triangles formed out of strips. Use these to create 8 pieces that are 2.5x5 inches. Don’t be afraid to cut more angles—have fun! Use these 8 pieces to create four smaller hearts, using the same method from step 4. Use the two leftover white triangles as necessary to make the background and borders of the smaller hearts. These should finish at 7.5” square.
    Hearts like crazy paving finished small hearts
    I think these little hearts are adorable
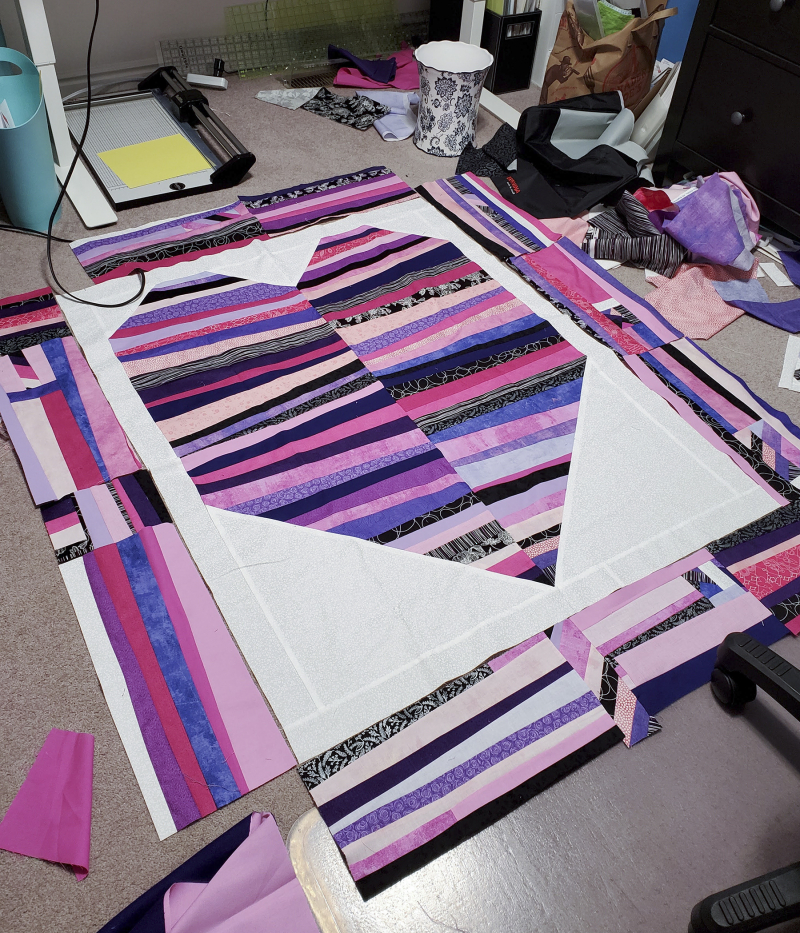
  9. Make the large border strips. You guessed it: even more improve piecing. Use whatever leftover strips you have, along with the scraps from the hearts. My favorite were the tiny little pieces of crazy pieced triangles left over from the smaller hearts. Piece four border strips, two that are as tall as the large bordered heart, two that are as wide. These are 7.5” wide.
    Hearts like crazy paving adding borders
    Hey! Another view of my mess! Cord from the iron. Big paper trimmer under my tall desk. That paper bag has a bunch of Skirt Sports skirts I am going to try to resell. Garbage can and paper recycling can. I work well in chaos.


  10. Sew the top and bottom borders to the heart.
  11. Sew the left and right borders with the cornerstones (the small hearts) at each corner. OK, here’s where things get real. The traditional way to add cornerstones is to measure the height of the quilt (WITHOUT the top and bottom border), add the seam allowance, then cut the left and right borders to that length. Sew on the cornerstones, then sew that strip to the left and right sides. I have NEVER managed to make this work correctly. The corners just never match up perfectly. So here’s how I add cornerstones. First, I make the left and right borders about 1-2” longer than the left/right sides. Sew the top cornerstone to the top of the left border strip. Line up the corners and then sew the strip to the left side, but stop about two inches away from the bottom corner. Pin the rest of the way, and then trim the leftover bit so it is one seam length longer than the corner. (I used 1/4” seams on this quilt.) Unpin, sew the second cornerstone to what is now the bottom of the border, then match up the corners and finish sewing it down the length. Repeat on the right side. I know…this is clunky. But it works best for me, and, again: use your favorite method.
  12. Sew the outer border on, starting with the top and bottom and finishing with the left and right. Iron the quilt top on both sides and clean up any stray threads.
    Hearts like crazy paving finished top
    Finished top!
  13. Sandwich, quilt, and bind.

For the quilting, I used an idea I found in the book Quilting Modern.  (I used this idea even though the title of that book is annoying. Modern is an adjective, not an adverb, so it should be titled Modern Quilting or Quilting Modernly, which admittedly is awkward but grammatically correct. Quilting in the Modern Way would be OK, although clunky. Quilting Modern is not. Unless there is a thing that is called a “modern” and you’re quilting it. End of rant.) It is called “shattered.”

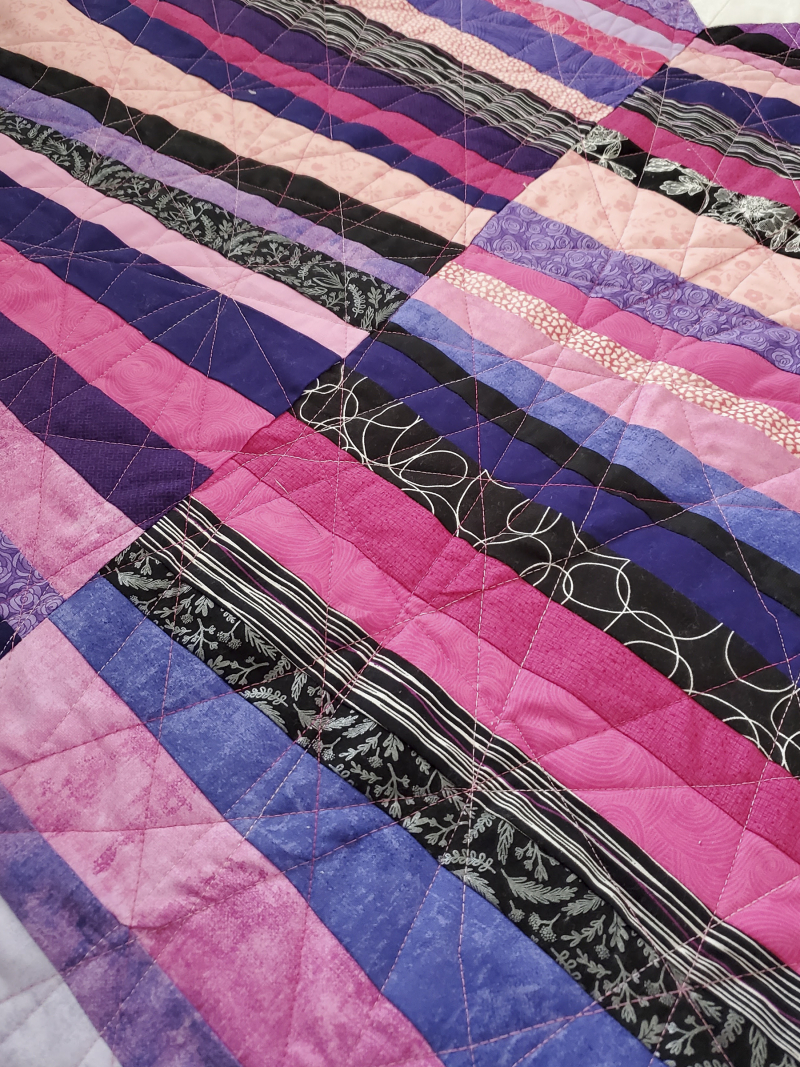
Hearts like crazy paving more quilting
When I first started quilting this, I marked the lines with painter's tape. Then I got frustrated with how long that was taking so I just freeformed. Are the lines *exactly* straight? No. But straight enough, which works for this style.


This took a while and it has lots of starts and stops, but the random angles felt like they fit the best with this quilt’s aesthetic. I also echo quilted white lines around the heart. (I love echo quilting!)

Hearts like crazy paving quilting close up
Another view of the quilting, this time from the back. The pink lines make me happy.

Things I learned from this quilt:
(because I think you can learn something from every quilt you make)

  • I wish I would’ve made the strips 22” instead of 18”, so the heart wasn’t quite so angular. I cut them on the straight grainline because I was worried that with the random angles, the extra stretch that comes from cutting on the weft would be problematic. The black strips, though, are cut on the weft, and they are narrow, but it was still fine.
  • I also wish I would’ve made the border less balanced. The busiest parts are squares and they are roughly balanced on the four middle points. I didn’t want that much symmetry but didn’t notice until it was already sewed together.
  • Angles and improv piecing are really fun. It’s freeing to just see different pieces coming together in random ways. Some of my favorite parts of this quilt are the TINY little slivers of fabric that you can barely see.
  • Sewing angled pieces together makes WAY more lint that pieces cut on a straight line. I cleaned out my feed dogs about 37 times.
  • I’m getting better at accurate quarter-inch seams, which was one of my goals for this quilt.
  • I’m NOT happy with how my new machine cuts the bobbin thread. I mean, it was really fast to just push the “cut” button but because the bobbin threat cut is really short, they all got tangled up on the back. Not sure how to resolve that other than cutting it with the thread cutter instead.
  • Despite reading about it and following all the tips—use a wider seam allowance, sew with your walking foot, pin like crazy—I still am struggling to get the combination of minky+cotton to be pucker-free. (You can see on the pic of the backing that the cotton has ripples. I’m not sure what else to do! However, I only ended up with two small puckered spots on the back when I finished quilting, so that is OK.
  • I think I am now ready to make a quilt that uses some of the many little strips of scraps I have from other quilts. Stay tuned!

Honestly, I’m not sure anyone would want to replicate this quilt, and that is just fine. But I’m hoping you find some little helpful nugget in this tutorial to use in your own quilting.

Hearts like crazy paving finished with binding