Lemon Bundt Cake or, the Secret to Getting the Bundt Cake out of the Bundt Pan

A few weeks ago, I went shopping at Macy’s for the last time. Or, at least, my local Macy’s, which is now closed. It made me think about all of the stores we used to have that are gone: Weinstock’s, Mervyn’s, ZCMI, Sears. We used to have a Nordstrom in our valley, which was lovely. I still miss Robert’s (a craft store), and, even though I haven’t shopped there for a couple of years, it is so weird to me that Toy R Us no longer exists.

I don’t remember the last thing I bought at any of those stores, but I realized today: the last thing I bought at Macy’s is a beautiful copper bundt pan.

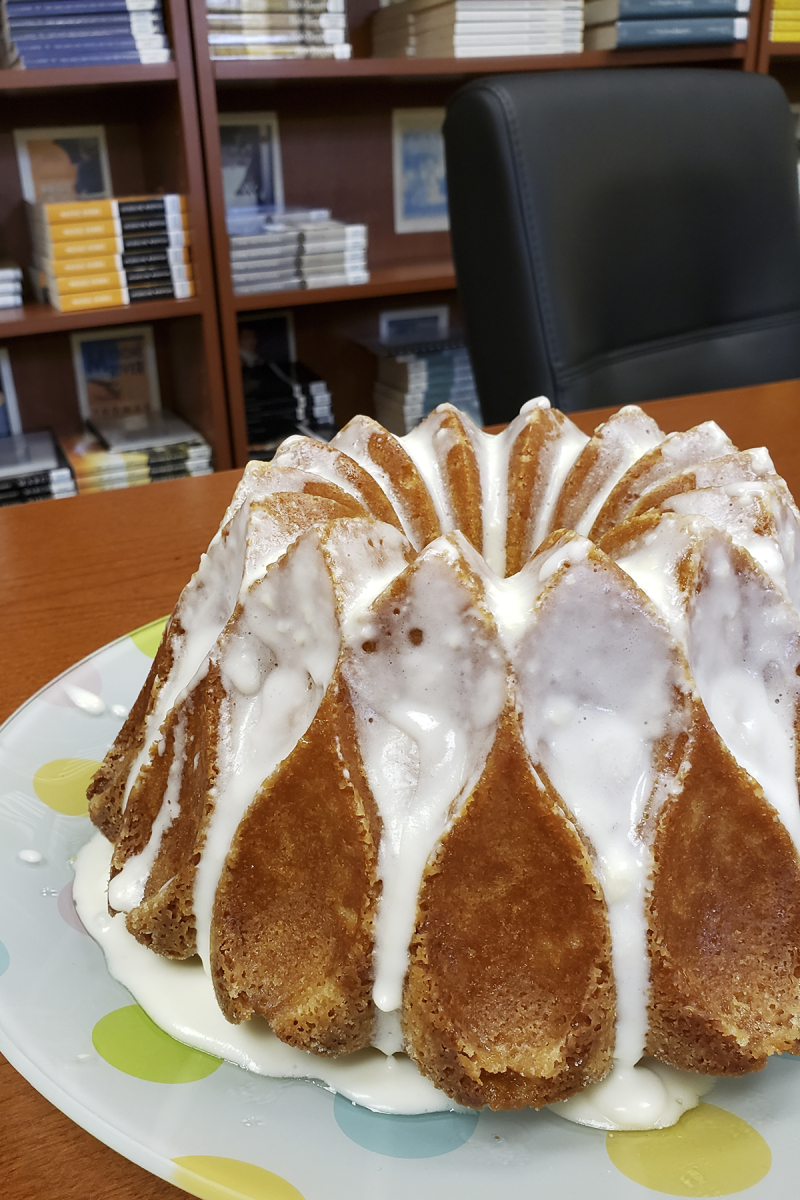
Lemon bundt cake

I totally forgot about it until this morning, when I needed to make a cake for a co-worker’s birthday, and I wanted something pretty and delicious but also, I was tired.

So I made this lemon bundt cake, but I was full of trepidation. Because, you know it’s often complicated to get a cake out of a bundt pan. And that’s the usual bundt pan, but this one is built of peaks and teardrops…a whole bunch of possible cake breakage points.

But I used my knowledge and, sweet! The cake came out just fine, and it was fairly beautiful, and I think it was pretty delicious, too.

Here’s the secret to getting cake out of a bundt pan:

  1. Grease the pan with butter. (I guess you could use Crisco if you’re a savage, that’s totally up to you!)
  2. Pour about ½ cup of white sugar into the pan and swirl it around so that the butter is covered with sugar. Toss out the extra.
  3. Find your baker’s spray and spray away!

The combination makes it so that the cake almost always comes away clean. Now you know how to get that cake out of an intricate pan, you should buy one too!

Here’s a printable version of the recipe I used. I love the addition of a lemon syrup, because it crisps up the edges and adds a delicious sourness. Let me know if you try it out.

Download Cake lemon bundt


Zupas Southwest Potato and Green Chili Soup Copycat Recipe

On Tuesdays I often stop at Zupas to grab a salad, which I eat while I work in the office (because not all of my time at the library is on a desk; when I have office time I get to work without being interrupted by questions). I actually don’t really love salads (I know, take away my girl card), but I like Zupas’ salads because they have tons of different stuff in them. (Stuff I didn't have to cook, chill, chop, and dice.)

I feel a bit virtuous getting a salad, because what I really want is a big bowl of (cream-based) soup. As soup has fewer veggies and more calories, I try not to get it very often. But a few weeks ago, the girl dishing up the soup gave me a sample of the Southwest Potato soup…and oh my. I couldn’t stop thinking about it! So, on another Tuesday, I gave in to my base, feral instincts and had a big bowl of soup, instead of the salad.

It was delicious, but needed a few tweaks, I thought. So yesterday, I tried to make my own. And since it turned out so good (despite my boys’ comments…they always complain when I make soup, and the “big boy” is the very worst) I thought I’d write down the recipe here so I can make it again.

Zupas Southwest Potato and Green Chili Soup copycat

5 pounds red potatoes
crushed garlic
scoop of chicken base
1 white onion
1 cube butter
1/3 cup flour
2 cans chicken broth
2 cups half & half
1/2 cup cream
4 cups milk
1 16-oz bag sweet corn kernels
1 can mild green chilies
1 can hot green chilies
cumin, white pepper, cayenne pepper, black pepper, and salt to taste

Peel and dice the potatoes into bite-sized chunks (not tiny squares; you want the potatoes to be chunky but also not TOO big). Add the chicken base and garlic to a pan of water and cook the potatoes until just barely tender. Drain, but keep some of the potato-cooking water. Spread the potatoes on a big baking sheet so they don’t keep cooking. Meanwhile, in the pan you will finish the soup in, melt the butter. Dice the onion and let it simmer in the butter on low heat. (You don’t want the onions to caramelize but to be very soft.) Blend the onions and butter until smooth. Return to the pan. Whisk in the flour, then cook the roux until golden. Slowly add the chicken broth. Measure the milk into a glass measure (I am estimating on the cream/milk/half & half ratio, as it doesn’t really matter; more cream makes it creamier) and put it in the microwave for 3 or 4 minutes. (This is an essential step when making a cream-based soup. If you add cold milk to the hot roux, the soup will be grainy instead of creamy. It doesn’t have to be boiling, or even hot; just warm.)

Bring the roux and broth mixture to a boil. Meanwhile, cook the corn in the left over potato water. Slowly whisk the warmed milk into the chicken-broth base. Bring to a simmer (but be careful not to boil). Add the spices to your taste. Drain the corn, then add it to the soup along with the chilies. Adjust spices as necessary. Add potatoes and bring back to a simmer.

Serve with pepper jack cheese and guacamole. (Or, do it like Zupas, with bacon crumbles and tortilla strips on top.)

One note about this recipe: I make a different potato soup (still cream based, but with different flavors) and I’ve always made it with russet potatoes. I will NEVER make a potato soup with russets again! The red potatoes hold their shape so much better, so you feel like you get bites of potato, instead of mushy blobs. Delicious!

Also, you could substitute diced jalapeños for the chilies if you wanted more spice.

If you'd like to print this recipe, here's a PDF:  Download Zupas Southwest Potato and Green Chili Soup Copycat


Third Week of Weekly Reviews. Including a Recipe!

(I know. I'm as surprised as you are that I've actually stuck with this goal of mine! Not only that but I've been taking more pictures just to make sure I have a few to pick from each week.)

Last week was a little bit crazy. Big mood swings and I had some awful headaches. On Friday I melted down completely. But we got tons of rain, and that meltdown triggered something in me, reminding me that I don’t have to be a victim to my mood. I know what I need to do and this week I just need to do it: run more, consume less sugar. Even if it rains!

My favorite picture from last week:

  September week 3

We took this selfie last Sunday. I love it because Kaleb is smiling! (He’s at that age where he hates having his picture taken and so he’s really, really hard to photograph.) That dress I’m wearing is the oldest piece of clothing I own; I bought it in 2003 when I was teaching, and I still love it.

Last Sunday was my week to teach in church. This is always difficult for me. I wrestle with church history and some of the doctrine, but I usually find a way to make a decent lesson. Last week I talked about the handcart pioneer disaster, which is near to my heart as I had ancestors who survived it. Mostly, though, I talked about how we can help to rescue the people we love. It is harder now, more subtle. More about loving and accepting and just…seeing what is needed rather than assuming that all of the answers fit everyone. I’m working on that. And I know in the end only Christ can save anyone. Even me. (Especially me.)

I did a little bit better with cooking this week. On Sunday I made sweet & hot meatballs (recipe at the end of this post) and on Friday we had grilled burgers and brown rice. OK…not much better. But a little bit. Places we ate out:  Pizza Pie Café, Costa Vida, and Mi Ranchito. I guess we did have leftovers one night, and sandwiches another night, so it could’ve been worse. Pizza Pie Café is a buffet-style restaurant, with pizza, salad, and pasta. (It’s where Jake, Nathan, and Haley have all worked.) When we were eating there on Monday, I asked Kaleb what his favorite pizza there is. (Mine is the chicken ranch, which is weird because I don’t really like ranch, except when it’s topped with grilled chicken and plenty of salty mozzarella I guess.) He thought for a second and then said “garlic knots are my favorite pizza.” Which made me giggle a bit!

I went to ballet barre class on Monday, and I ran only once. The cold weather snuck in and drained all of my running mojo. This week, I’m going to dig into some of my warmer running clothes and see if that helps me feel motivated. I have so loved running in the heat this summer that I’m sort of dreading running in the cold.

Nathan and Jake both had appointments with the dermatologist, but not on the same day. That’s three dermo appointments in six days. That means I saw the dermatologist more than I saw my own mother last week. We chatted about his awesome experience seeing the eclipse last month and I tried not to feel bitter that I didn’t go and see it too. (Maybe I should’ve just hitched a ride with my dermatologist? Seeing as how we’re besties now???)

It’s always good to spend time with Jake, even if it is bonding over wart-removal techniques.

On Monday, I mowed the lawn while Kendell went to the gym, and then when he got home I asked him to help me get an enormous weed out that was growing between our fence and the neighbor’s. Turns out there was an enormous hornet’s nest back there and he got stung twice. Not so fun.

Kendell and I went to see It. And then a couple of days later I bought a copy of the book. It’s been calling to me for a couple of months now, and seeing the movie finally made me give in and get the book. I read it when it first came out—when I was 14—and I don’t have the clearest memories of it, except I remember that I enjoyed it, plus a few snippets of images (Bill riding his bike with Bev on the handlebars is the clearest). I’m about 50 pages in and I’m discovering that I can’t re-read this in the same way I read it the first time, which is true of any book but especially true of Stephen King. I find myself reading to understand how he does it, rather than just for the adventure and terror. We’ll see if that keeps up or if I can sink down into the story.

Kaleb had two soccer games this week. The Thursday game was in Highland and the storm was coming in. It was so cold and windy. I managed to survive because I happened to have two cardigans with me, lol, but Kendell was in shorts and flip flops and he was freezing! Kaleb scored at each game; they won their Thursday game and tied their Saturday game, with Kaleb getting a goal about two minutes before the game was over to tie it up (which I didn’t get to see because I was at work). He is enjoying soccer so much more this year. It helps that his coach is pretty even tempered and balances out who plays which position, so Kaleb isn’t always stuck being the goalie. (In fact, he keeps it a secret from his team, that he’s really good at being goalie, because he hates playing that position!)

On Friday Nathan asked me to make him lunch (he comes home for lunch quite often) and I was so grumpy and sad that I said “nah, I don’t want to fix lunch” and so we went to lunch instead. (Oooops, add that to my list of places I ate this week!) We went to Panda Express, had a nice chat, and I left feeling a little bit happier.

Kendell and I watched the series episode of one of our favorite TV shows, The Strain. We also watched a lot of news together, and ranted about politics. Every day when we wake up, he’ll turn on the TV to check the news, a habit he picked up during the election last fall (I would rather have no TV on in the morning) and I always say “what fresh new way has trump ruined our world overnight?” It’s hard to believe we are living through such strange times, earthquakes and hurricanes and an enormous baby as the president of the United States.

Anyway. Here’s to a week with fewer headaches and more running, fewer restaurants and more cooking! And here’s that recipe:

Sweet & Hot Meatballs

2 cups pineapple juice or 1 20 oz can pineapple chunks
1 15 oz can tomato sauce
1 8 oz can tomato paste
2 cups V8
¾ cup brown sugar
1-2 T chili powder
2 tsp liquid smoke
red pepper flakes to taste
prepared meatballs

Mix all of the sauce ingredients together, adjusting spices to your heat preference. Add meatballs (I just use the ones they sell at Costco…making my own meatballs sounds nightmarish) and heat through. Serve over coconut rice (which is rice with some portion of the water replaced with coconut milk).

I haven’t made these in forever and I forgot how much everyone likes them. Nathan came home from a date with Bailey on Sunday night and had a second helping before he went to bed! Yay for dinners that no one complains about.


Double Chocolate Cookies

(Or, adventures in photographing desserts.)

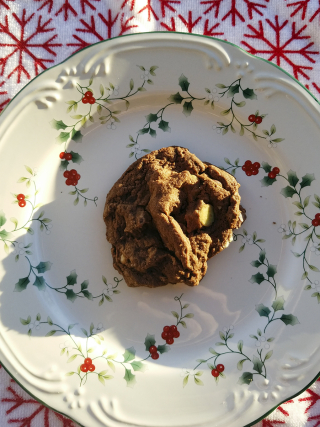
(Actually, I think this cookie has four types of chocolate, but who's counting?)

This is my favorite cookie to bake at Christmas. It's got the best chocolate flavor and because it's not cocoa-based it doesn't feel brownie-esque. I always make it with some mint flavored chocolate chips so the cookies taste like Christmas. Yum. I've shared the recipe on my blog before, but I always have a hard time finding it because it's smooshed in with some other recipes. So I'm sharing it here all on its own.

And because Internet Blogging Etiquette requires a photograph, I took my cookie (the very last one!) outside to photograph. It was bright and cold outside; you can't really tell it's cold from the picture, but you can tell it's bright. I should've gone hunting for better light but it was too damn cold, so I took the cookie inside for a "natural, diffused light" photo in my front room instead. Poor cookie, placed here in unflattering, harsh light!

Ah, well, I did photograph it and then eat it, so it's OK.


A sorensen double chocolate cookiesDouble Chocolate Cookies

1 1/2 cups bittersweet chocolate chips
1 cup butter, softened
1 cup packed brown sugar
1 tsp vanilla
2 eggs
2 1/2 cups flour
1 1/4 tsp baking soda
1/2 tsp salt
1/2-1 cup roughly-chopped pecans (optional)
3 1/2 cups of chocolate chip combination (see instructions)

Melt the bittersweet chocolate chips over low heat until smooth. (You can use semisweet instead, but the bittersweet gives them more flavor.) Beat the butter and sugar (really: it's not a mistake, you don't need any white sugar, just brown) until pale; add vanilla and melted chocolate. Beat eggs in one at a time, until light and fluffy. Stir in flour, baking soda, and salt. Add the pecans if you have kids who won't freak out at the thoughts of nuts in cookies. Then add a total combination of  3 1/2 cups of a combination of chocolate chips—white, milk, dark, mini, or mint—or, if you're not like me and don't obsessively buy chocolate chips in every cocoa percentage, just use one kind. It's up to you. (I don't really measure this part.) The dough will at first seem too soft, but don't add any extra flour. Give it a couple of minutes and it will firm up all on its own. Bake at 350 for 10-11 minutes. Store in a covered container—these seem to dry out quickly if you don't.

And, in case you want to bake your own little delicious chocolate mouthfuls of heaven in cookie form, here is a printable PDF for fun:

Download Cookies double chocolate

Happy baking!


The Secrets to Perfect Pie

I used to make the best pie crust ever. It was easy to work with and baked up perfectly flaky and crisp.

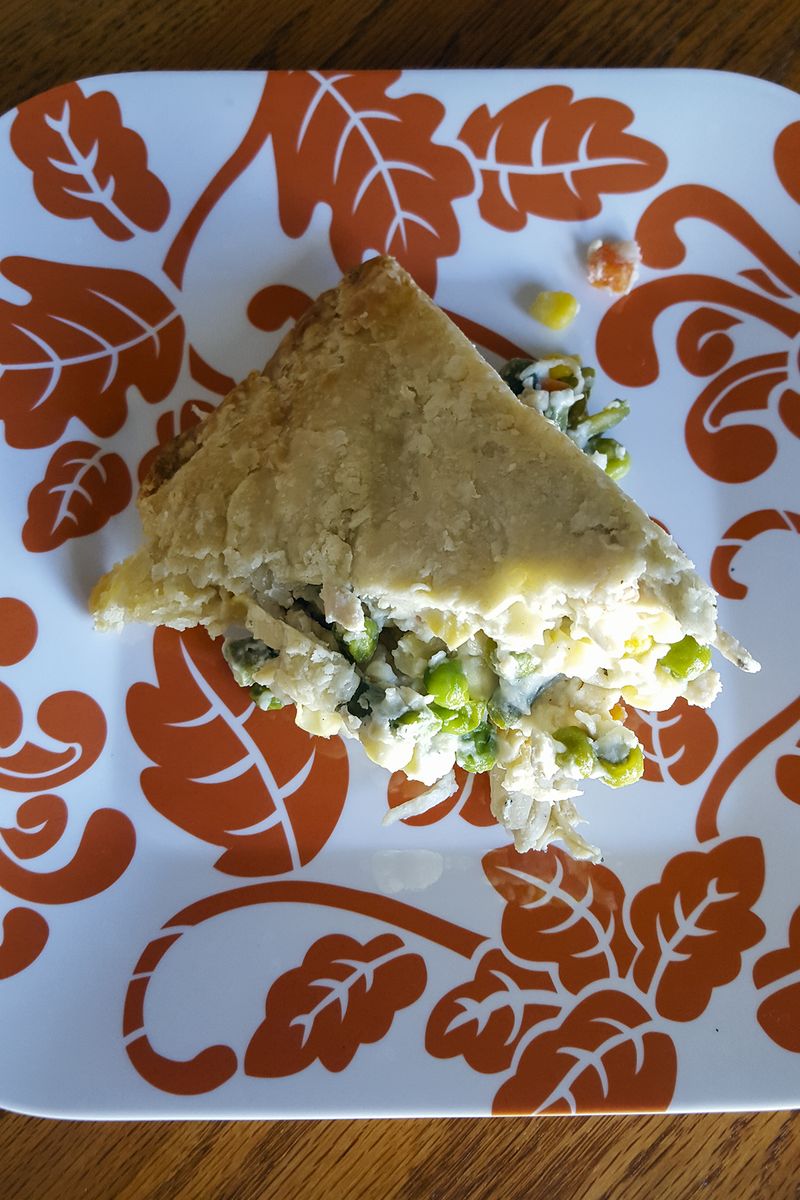
Chicken pot pie

And then, a few years ago, I decided to take hydrogenated oils out of our diet completely. This has been a mostly-easy process because most of the things with HVO are garbage we shouldn’t be eating anyway. (Except for that big bag of meatballs they sell at Costco. Why do they need to imbue meat with HVO? I’m still missing those.)

Easy except for pie. Because that pie crust I’d perfected? It was effortlessly flaky because of shortening. I thought it would be as simple as replacing the shortening with butter, but a light, flaky, just-right all-butter crust has mostly eluded me. Some of my crusts have had the texture of cardboard. Some have just been OK. None of them has been perfectly delicious.

More than anything, though, what has made me crazy about it was just how hard it is to work with butter. (Maybe it would be easier if I bought a food processor…but I don’t want to buy one just to make crust. And part of me thinks I should be able to do it with the tools I already have.) The butter has to be cold to end up with flaky crust, but cutting in cold (or frozen) butter is a miserable experience. It takes forever. And the dough seemed impossible to roll out. One time I nearly started weeping, I was so frustrated with rolling out my crust.

But I persevered. This fall, I resolved to figure out this issue once and for all, so that I could bring some perfect pies to Thanksgiving and put to rest my mother’s doubt that an all-butter pie crust could ever be good. I am the Dessert Aunt, after all. I won’t allow pie crust to be my kryptonite. (That would be cheesecake, which I also think I mastered recently.)

As I also have had problems getting my berry pies to thicken properly, I put that on my list of November projects.

And after several delicious experiments, here’s a list of all the pie secrets I have learned:

  1. Make your crust in a dry kitchen. If you’re doing anything that makes steam—boiling potatoes, running the dishwasher, hanging out while someone handwashes the pans—it’s harder to get the moisture content right. No steam!
  2. Make a double recipe. If you’re going to the effort of making pie crust, double the recipe. If you don’t need all four, freeze two. Your future self will be grateful to have two prepared crusts. But: don’t try to roll out frozen pie crust. It will only make you cry.
  3. Nearly every pie crust recipe is the same. What changes is mostly technique and liquid. I haven’t tried the vodka recipe so I can’t speak to it, but otherwise the basic recipe is nearly always:

2 ½ cups flour
1 tsp salt
1 T sugar
1 cup butter (purists will say only use non-salted, but purists are fancier than I; I use salted butter)
¾ cup (about) some liquid—water, eggs, vinegar, vodka

  1. Fewer eggs, but still: eggs. The recipe I started with (the one with shortening) has one egg for a double crust. I doubled everything (to make 4 crusts) except the eggs. After trying one with eggs and one without, I think the egg makes the crust tenderer and more flavorful, but two eggs made it harder to roll out. So if you’re just making one batch, use ½ of a beaten egg.
  2. Grate the frozen butter. I do this with my Bosch, but if you have a box grater that will work, too. It will just take a little bit longer. Use the big grate side. I mix all of the dry ingredients, then pour half into the bottom of the bowl. Grate the butter on top of the flour, then pour it all back into the bowl with the rest of the dry ingredients. Then, use your pastry cutter to mix everything together. You don’t technically cut it in; mostly you’re just mixing to make sure all of the butter is coated with flour.
  3. Don’t be afraid of the liquid. Even though that really is the frustrating part about making pie crust: the right amount of liquid makes or breaks it. Too little and it won’t stick together, too much and you lose the flakiness. But no one will stick to an exact amount. You just have to try until you get it right. Make sure the liquid is as cold as possible. I fill up a 2-cup glass measure with ice, water, and 2 T of vinegar, and then I put it in the freezer while I do the flour/butter part. You have to get your hands involved with this part of the process. Pour in some liquid and start stirring it in with a rubber spatula—it’s sort of a folding action. Fold, spin the bowl, fold. Add some more water and repeat. Then, when you think it’s ready, start using your hands instead of the spatula. Add a little and see if the whole mass will stick together, by trying to form it into a ball. If it crumbles when you squeeze it together, it needs more water. Add it slowly at this point. You might be able to start making balls in layers—the top might come together but then bottom might still need more water.
  4. You have to chill the dough. I already knew this, but I did try once to roll it out right after I made it. It was an impossible sticky mess. Squish each ball into a disk, and then cover each piece with plastic wrap. Put all four into a Ziplock bag, and squeeze out as much air as you can.
  5. Speaking of rolling out: go read this post at Smitten Kitchen right now. My mom taught me that you should use the least amount of flour possible when you’re rolling out your crust, to prevent too much flour getting in and making the crust dry. But I decided to try this method of rolling out, and OMG. It took three minutes to roll out a crust. Fewer than three minutes. It was so easy. And the crust was still delicious.
  6. The secret to making non-runny berry pies: cook some of the berries. For a raspberry pie in a regular (non-deep-dish) pie pan, do this:

3 pounds berries (this is 4 of the containers from Costco)
1 cup sugar
2 T Minute tapioca
dash cinnamon
2 T corn starch
1/3 cup cran-raspberry juice
juice of ½ lemon

Wash the berries. In a big bowl, mix the sugar, tapioca, and cinnamon. Stir in the berries and let sit for about an hour. Position a sieve or strainer over a saucepan; pour the (now juicy) berries into the strainer so that the juice drains out. Ad the cran-raspberry juice, the lemon juice, and the corn starch. Stir until smooth. Add about 1 cup berries. Cook over medium heat, stirring occasionally, until thickened. Pour over the remaining berries and stir to combine. Then pour them over the bottom crust in your pie pan. Top with remaining crust. Bake at 400 for 15 minutes and then 350 for about another half hour.

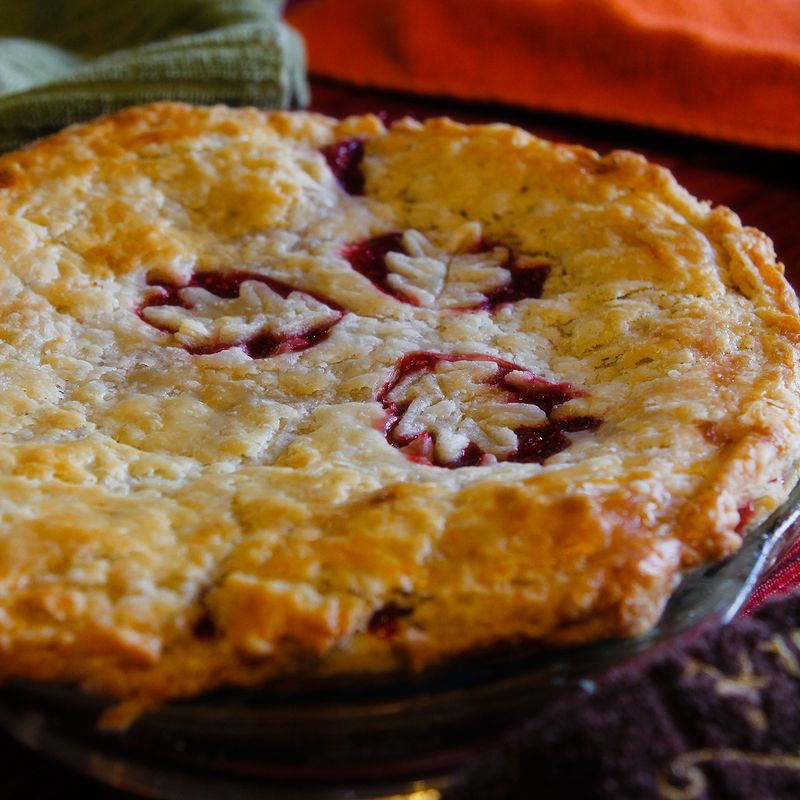
Raspberry pie

  1. Buy the right amount of apples. I like to make a deep dish apple pie, but I am never sure how many apples to buy. This year I paid attention: 8 normal-sized apples. (Not the small ones, in other words.) Some of my other apple pie secrets:
  • After you peel, core, and dice the apples, toss them with some lemon juice and a capful of vanilla. It adds a warmth to the apples.
  • Cinnamon is not the only spice! I put nutmeg, ginger, and cloves in my apple pie. This might offend an apple pie purist, but who cares?
  • Use a combination of white sugar and brown. It helps the filling set up better.

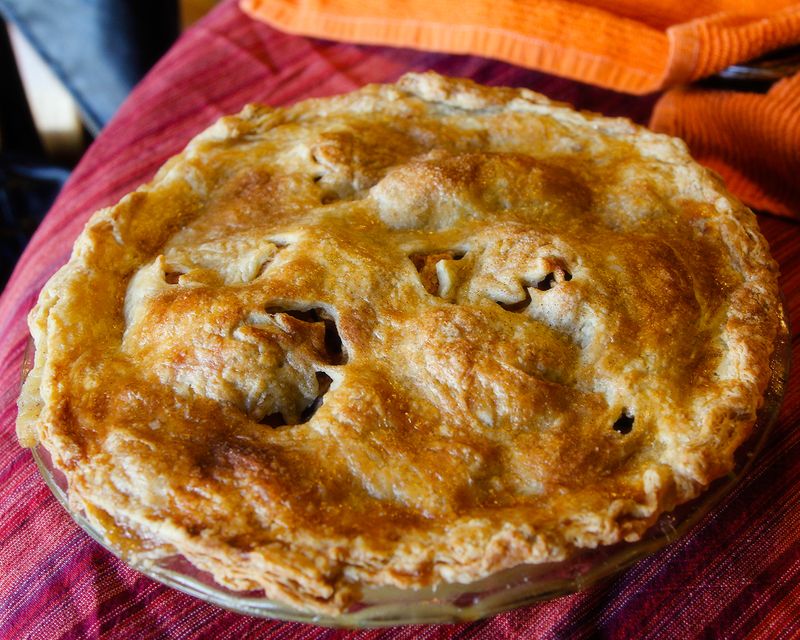
Apple pie

  1. Glaze the pie! I’ve always skipped this step as just seemed unnecessary. This year I glazed both pies with egg mixed with cream. They were much prettier than any other year!
  2. Reheat the pie. I’ve never quite been able to get the timing right on Thanksgiving pies. When do you bake them while your oven is so busy, so that they’re hot when you’re ready to eat? In theory I guess you could bake them while you’re eating dinner, but then you’d have to make them just before dinner (because filling sitting on that uncooked bottom crust will make it soggy). Instead, bake the pie in the morning, and then put the pie, covered loosely with tinfoil, into a 300-degree oven for about 20 minutes. The tin foil will help it not to burn, and it will be nicely warmed. (This is how to reheat a slice of pie for breakfast the next day—or the rest of the weekend, depending on how much leftover pie you have—except just put the slice in the toaster oven. If you reheat your pie in the microwave, I’m not sure we can still be friends!)

So! Those are all of the pie secrets I know. Do you know any I missed?


Classic Cream of Broccoli Soup

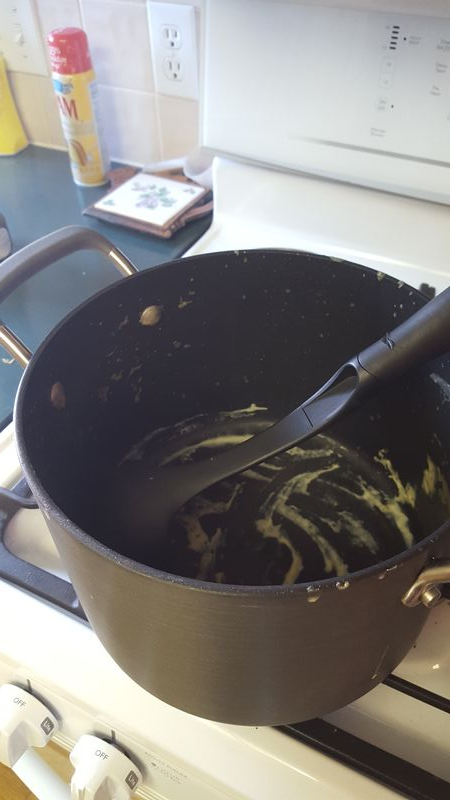
We had a family dinner today to celebrate my niece, who came home from her LDS mission last week. My sister-in-law asked me to bring soup, so I made a big pot of cream of broccoli. When we all got home, Kendell and I had to run back out again, and when I came home from our errand, I found the pot—which had quite a bit left—like this:

  20150531_194058

Guess those teenage boys “put it away” in their bellies instead of the fridge!

My mom used to make cream of broccoli soup when I was a kid, but she put little noodles in hers. I loved it, but the one time I put noodles in mine, my kids freaked out. They did not like it! So whenever I make it, I pause for a second and wonder if I should try it with noodles again. I never do though. It’s still delicious! Here's how I make mine:

Cream of Broccoli Soup (for a crowd…adjust proportions if you want less, but it makes good leftovers!)

2 pounds broccoli crowns (I just use about 2/3 of the bag from Costco)
2/3 stick of butter
1 onion, diced small
½ cup flour
2 cans chicken broth
4 ½ cups milk (plus extra)
½ cup heavy cream
1 cup half & half
chicken base
black pepper
white pepper
garlic powder
onion salt
cheddar cheese, grated

Measure the milk/cream/half & half in a large measuring cup, and let it sit out for about 30 minutes, until it is no longer chilly. (This keeps the milk from curdling later. If you forget to set it out, just put it in the microwave for 3-4 minutes.) Steam or boil the broccoli until crisp-tender; save the cooking water. In another pan, melt the butter and then sauté the onions; let simmer until soft and translucent. Sprinkle the flour over the butter and onions, then stir until the flour is incorporated into the butter. Then keep cooking for another 3-4 minutes over medium heat. Pour in the chicken broth, whisk until creamy, and then bring to a boil. This mixture will be fairly thick. Once it is thickened, pour in the milk. Stir over medium-low heat until heated through, almost boiling but not quite. Add the chicken base, black and white pepper, garlic powder, and onion salt. I totally don’t measure the spices, I just keep adding until it tastes right. The chicken base is pretty salty, so start with about half a tablespoon and then add it in smaller amounts. While the soup is still hot, add some cheese. Again…I don’t measure how much, just add some handfuls until it tastes like you want. (I want mine to taste more like broccoli, with a hint of cheese.) Let simmer. Meanwhile, pour the steamed broccoli into a strainer, reserving the liquid. Pick through it to find any pieces of stem and whatever bigger florets you have, and put those in the blender (about 1 ½ cups of broccoli and 3/4 cup of broth) with some of the left over broccoli cooking liquid. Process those until they are completely smooth, then add to the soup and stir again. (Or use an immersion blender. I don’t have one!) Chop the rest of the broccoli as small as you like (I do mine pretty fine, but also try to leave some chunkier pieces for Kendell to find), add it to the soup, and then make sure it is heated through again. Taste and adjust spices. If it is thicker than you like, add more cream, half & half, milk, or broccoli broth. 


Pecan Bars: Not Just for Thanksgiving!

Last Thanksgiving, when I made the meal on my own, I wanted something pecan-pie-ish, because Kendell loves it and my mom normally makes one. But as I was planning on an apple pie, a pumpkin pie, and a berry pie, I didn't think we needed another pie.

(Plus I think pecan pie is sort of gross. The filling under the pecans is too Jello-esque to me. Yes, a caramel-flavored Jello texture, but still.)

So I did something novel and amazing: I made something with a recipe I had pinned!

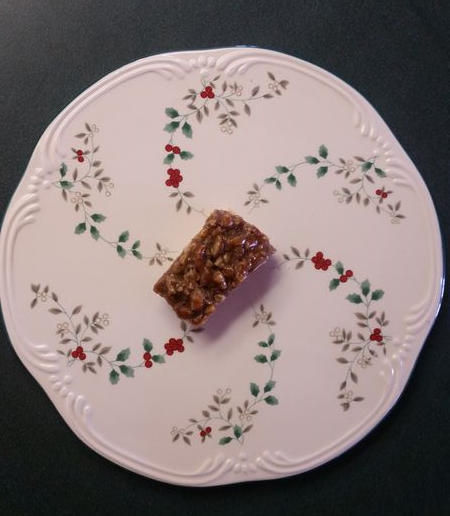
Actually, I started with a recipe I had pinned, and then I tweaked it a bit, and I then I made pecan bars.

20141210_140307

And, you know...everyone loved them. Even Mr. Picky Himself! (OK, take your pick, I'm not sure which boy of mine is officially Mr. Picky, although Kaleb is the closest.) It makes a pretty big batch and we snacked from the pan the entire weekend, and then I decided that I will always make pecan bars for Thanksgiving. I made them this year and took them to my sister's, with similar results: most everyone loved them. (Except for my niece, who doesn't like nuts, and when she told me that her husband piped in with a nut-related joke and then it went downhill from there!)

Then this week I had to bring a dish to share for our library Christmas party. Last year I won the cookie contest, and I sort of have a reputation for making good treats, a reputation I had to uphold. So I made the pecan bars again.

There wasn't a contest this year, but I think I would've won again if there had been. I'm not saying that because of my skills but because of the prodigious amazingness of the recipe.

Seriously. These are good pecan bars!

Here's the process with some photos, but if you scroll down to the bottom, you'll find a printable PDF.

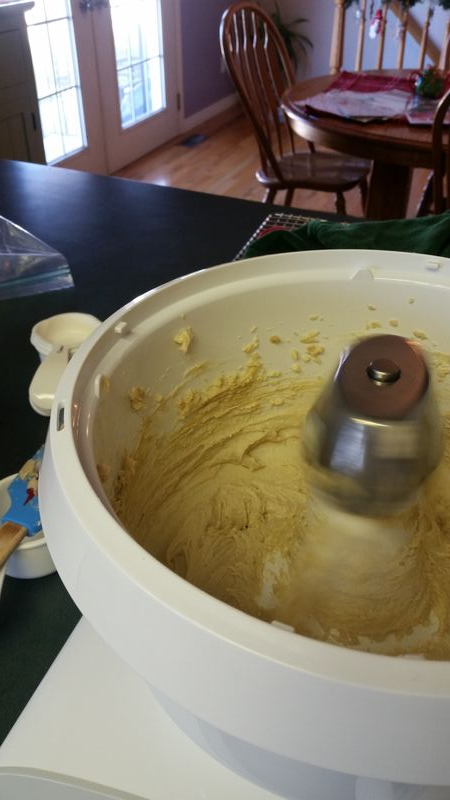
1. Cream the butter, brown sugar, salt, and vanilla.

20141209_085800

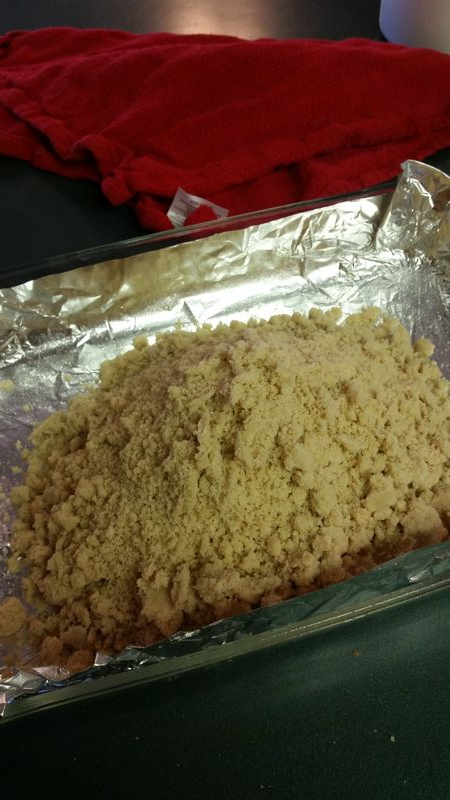
2. Add the flour. WARNING: It will puff up everywhere if you add it too quickly. Basically, you are cutting the flour into the butter/sugar mix. It will look like sand when you're finished (buttery, delicious sand.)

20141209_090328

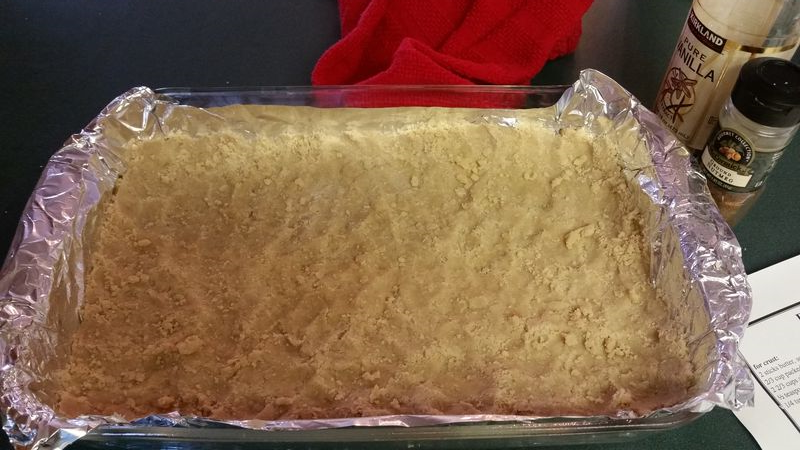
3. Press it into a 9x11 glass dish (which you've prepared by lining with tinfoil and spraying with Pam) and put it into the oven at 350 for 20 minutes.

20141209_090612

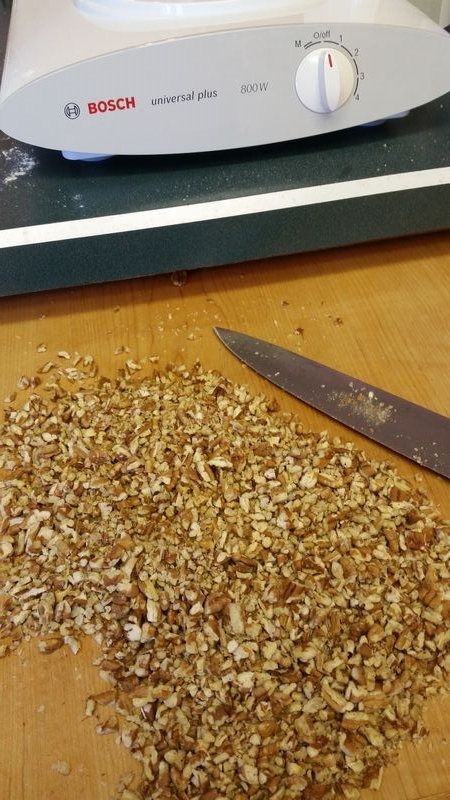
While it is baking, make the filling. The strange thing about this is it takes almost exactly twenty minutes to make the filling. Unless you're not a ridiculously slow nut chopper. (No! I'm not afraid of kitchen knives now!*)

4. Chop the nuts. You want to measure them after they are chopped, which requires some guess work as to how many to pour onto the cutting board. That is OK. 20141209_091243
I chop the first batch pretty fine, and then I toss them in the measuring bowl and chop a second batch to bring it to 3 cups, only I leave the second batch a little chunkier. Chopping nuts always makes me think about baking cookies with my mom when she was a kid. She always put walnuts in the cookies, and I remember one time trying to grab one while she was chopping. She pushed my hand away and said "that's a little girl who's going to get her finger cut if she's not careful" and then she gave me a walnut. I bet she doesn't remember that but for some reason I always remember it when I chop any kind of nuts.

Anyway.

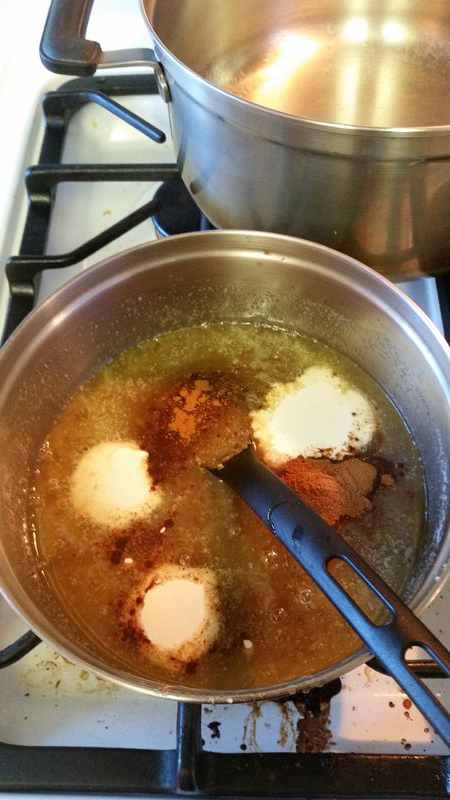
5. Make the filling by first melting the butter and then pouring in everything else. Isn't it pretty?

20141209_091920

6. Here's a tip. Use the little bit of left over butter on the wrapper to grease the cup you measure the honey with. It will slide right out of a greased cup!

7. Stir and mix and gently boil. When the crust is finished, pour the mixture onto the crust. Make sure you put the oven mitt back on before you pick the pan up. Seriously.

8. Bake for twenty minutes.

Another ideal thing about this: it takes about twenty minutes to wash all the mixer parts and the pans, put away all the ingredients, and wipe off the counters.

9. Cut into whatever sized squares you want. Or just leave a knife in the pan so your family can cut off nibbles and bites and pieces. Whatever works for you!

Here is the printable PDF:  Download Pecan bars


Thankful Countdown #13: On Cooking, with a Recipe

Even though my mom is an excellent cook, I can’t say I learned all I know from her. She taught me how to make chocolate chip cookies, and pizza dough. She taught me to serve vegetables with every meal (even though I don’t always follow her example). She taught me spaghetti sauce and beef stroganoff and cheese potatoes, but I don’t think she ever really taught me how to cook. Instead, she taught me to cook. Which is a fine distinction. What I mean is that I learned from my mother that moms cook for their family, and so it is something I do for mine as well.

Something I enjoy doing for them.

My sisters are good cooks, too. From Michelle I learned chocolate zucchini cake. From Suzette I learned chicken noodle soup and chili and meat loaf. From Becky, guacamole salsa and *.

Books taught me, too. Not just cookbooks, but novels. Every time I eat avocado, I think about the scene in The Bell Jar with the avocado pears stuffed with crab salad and I am a little bit more careful with my cooking methods. Heidi’s grandfather taught me the redemptive power of cheesy toast. And I cannot read (or watch, for that matter) anything set at Hogwarts without immediately baking something delicious.

If you pay attention, you can pick up cooking tips and tricks from almost anyone who cooks. My library friend Julie taught me about All-Clad pans (I’m still saving up!). My friend Sophia taught me about how food, really good and memorable but never fancy-in-that-expensive-way food does more than meet just nutritional needs. One of my co-workers from twenty years ago taught me a cheesecake trick that I still use, and just last week my sister’s sister-in-law taught me how to make perfect hot fudge sauce. Because it’s not just technique or motivation—recipes are so good to share. Family recipes are the best ones, I think, tried and made true by years of repetition. Tweaked to perfection.

I don’t really watch a lot of TV, but I like the Food Channel to be on sometimes if the house is feeling too quite. It’s good background noise because whenever I stop to pay attention, I learn something new.

I’m not an especially inventive cook. I think I have the basics down, but I don’t have that creative spark that allows a person with a bag of frozen lima beans, some corn meal and a fresh piece of fish to turn out a gourmet meal. But if I know what I’m cooking, I can generally do it well. (Albeit fairly slow. In fact, I might be the world’s slowest chef!) I love to bake, and if you need a dessert, I am generally your go-to girl.

It is a skill I’m grateful for.

Especially as my kids are getting older, I am finding that I cannot always have an answer or a solution for them. We don’t always get along or see things the same way. But there is something restorative in eating together. I feel a little bit like I sprinkle into spaghetti sauce and whisk into broccoli soup the things I cannot say or they cannot hear, so that when they are eating they are consuming my advice or knowledge or love. I have baked I’m-sorry-for-throwing-a-piece-of-cheese-at-you macaroni and cheese for Jake, I-miss-you red bean burritos for Haley, thank-you-for-knowing-I-needed-your-help chicken curry for Nathan. I scramble every ounce of love I have into every pan of scrambled eggs I make for Kaleb.

Food binds us together. We eat to celebrate, to have a reason to get together, to have an excuse to be in the same room at the same time. But cooking binds in a different way. It’s one thing to eat at a restaurant but an entirely different thing to eat at the dinner table. We might squabble over food and I might get frustrated over everyone’s pickiness. But I am grateful that I learned from my mother that being a mom is partly being a cook. I’m grateful I can cook things that at least one of them loves, things that nourish their bodies and hopefully their spirits. I’m grateful that cooking helps me feel, in a small way, creative. I’m grateful for all the people—from celebrity TV chefs to the lady at the grocery store who helped me pick out a better spaghetti squash—who have taught me what I know. I’m grateful every day brings another chance to try again.

And I’m grateful for how food unites us.

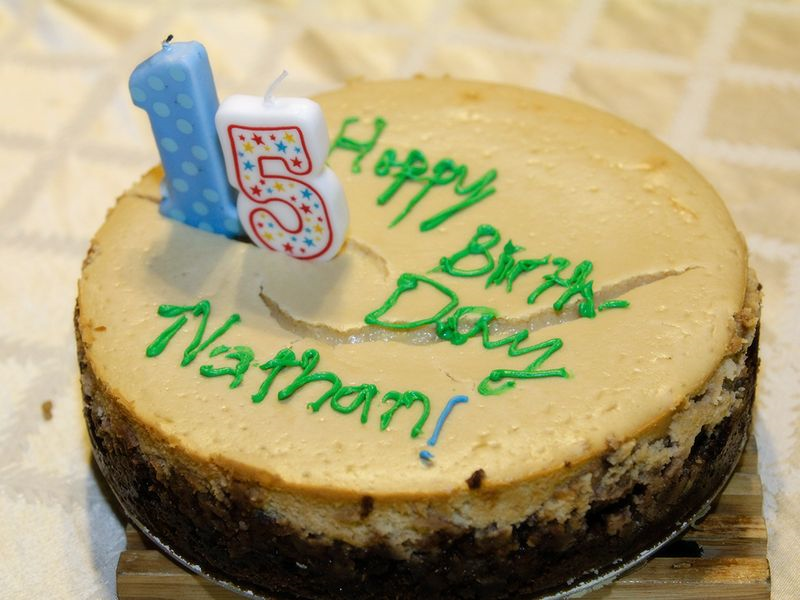
Last night, we had Nathan’s 15th birthday dinner, which is our family tradition: the birthday kid gets to pick the meal, and the grandparents come. We eat with a tablecloth and pretty dishes (because that is part of it, too…the food, but also how the food is served, and whose hands have also used those dishes); we tell stories while we eat. Nathan chose Shanghai Buffalo Wings for dinner and cheesecake for dessert.
_MG_4873 nathans cheesecake
Baking: one of my skills. Cake decoration: not so much.


As I made the cheesecake, I thought about that long-ago coworker, Pat, whose secret to good cheesecake is to put some cornstarch in the filling, to help it set well. I remembered making the same cheesecake for Christmas last year, and the first time I made a cheesecake (I set off the smoke alarm in my kitchen because I didn’t know the butter from the crust would seep out from the sides of the pan), and how much Jake and Haley also love cheesecake. That is part of the pleasure of cooking as well, how it is wrapped up in memory and tradition. The cheesecake cracked and it was slightly runny in the middle, but it didn’t matter to Nathan, who was happy to eat it anyway. It didn’t matter to anyone, actually, except for my own little inner Alton Brown cooking critic, but I hushed him with a little chocolate fudge sauce.

I’m just grateful I could try to make a cheesecake!

Pecan Pie Cheesecake
(modified from this recipe)

Crust:

 1 ¾  cups gingersnap crumbs
 ¼ cup firmly packed brown sugar
 1/3 cup butter, melted
¼ tsp nutmeg
¾ tsp cinnamon

 Pecan Filling:

 1 cup sugar
2/3 cup dark corn syrup
1/3 cup butter, melted
2 eggs
1 ½ cups chopped pecans
1 teaspoon vanilla
3/4 tsp cinnamon
dash nutmeg

 Cheesecake Filling:

 3 (8-ounce) packages cream cheese, softened
1 ¼ cups firmly packed brown sugar
2 tablespoons all-purpose flour
2 tsp corn starch
4 eggs
2/3 cup heavy whipping cream
1 teaspoon vanilla

Mix the crust ingredients and press into the bottom and sides of a spring form pan. Bake at 350 for 8 minutes.

Make the pecan filling while the crust is cooling. Combine the sugar, corn syrup, and butter in a pan, and bring just to a boil, stirring often. Whisk the eggs in a separate bowl. Temper the eggs by whisking in about 1/3 cup of the sugar mixture, then whisk them into the rest of the filling. Add the pecans and cook, stirring constantly, until thick, about five-six minutes.

Let cool while making the filling. Meanwhile, bring a pot of water to boil.

Beat the cream cheese, brown sugar, flour, and corn starch together until smooth and entirely lump-free. Whisk the eggs, cream, and vanilla together in a separate bowl. Pour into the cream cheese mixture and mix again, until all of the ingredients are incorporated.

Spread the pecan filling on top of the crust, the pour the cheesecake filling on top. Smooth the top with a rubber spatula. Wrap the pan with tinfoil.

Pour the boiling water into a 9x13 glass casserole dish, and put that on the bottom rack of the oven. Change the heat to 325. Put the cheesecake in the oven, and cook for 70 minutes. Turn the oven off and let the cake continue to sit in the oven for one hour. Then, slide a knife around the edge, and put it in the fridge to chill.  At the very least, give yourself four hours for chilling, but it’s really better if you serve it the next day.

Perfect Alfredo Sauce

There’s a little Italian restaurant in Provo called La Dolce Vita. Kendell and I used to go there all the time when we were dating and just married. The last time we went, Kendell had a cold and wasn’t feeling well and didn’t really want to be there, so he asked the waiter if the cook could just make him a grilled cheese sandwich. I was so embarrassed that we never went back.

We should go back, though. It’s the first place I tasted fettuchini Alfredo and first fell in love with its creamy, salty, buttery delicious goodness. (Is it odd that I was 19 before I knew Alfredo sauce existed? Proof of the era I grew up in? Or just evidence that my mom was anti-butter before anti-butter was cool?)

I’ve tried to make it ever since then, but Alfredo sauce has always been one of my weaknesses as a cook. I’ve tried about half a million recipes, but haven’t ever found anything I love. I always end up going back to the Knorr mix and then feeling ashamed of my cooking prowess.

Today, though, I discovered a new recipe. It wasn’t bland, or too thin, or too thick. It didn’t feel super-fattening (like the one with cream cheese does to me). The texture was perfect and the spices just about right.

Perhaps my search for the perfect Alfredo sauce has ended!

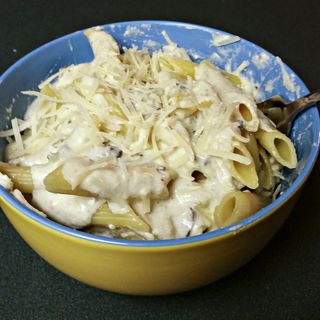
Alfredo with penne

It is a modified version of THIS recipe I found on Pinterest. I wish I'd had some romano, but I didn't and it still was delicious. (Next time I will add romano and some fresh parsley, which I sort of have a crush on lately.) She calls hers “better than Olive Garden” but as I don’t exactly love the Olive Garden’s version, I’m just calling mine the…


Possibly Perfect Alfredo Sauce

(you’re going to need a whisk!)

2 ½ cups half and half
¾ cup heavy cream
2 cups 1% milk (I’d imagine skim or 2% or whole would work just as well)
3 large egg yolks
1 T cornstarch
3-5 garlic cloves, crushed
½ tsp garlic powder
4 T butter, separated
8 oz baby Portobello or other mushrooms, sliced
1 tsp white pepper
¼ tsp nutmeg
½ tsp salt
½ tsp Italian seasoning
lots of freshly-ground pepper
½ cup mozzarella cheese
several handfuls freshly grated Parmesan
1 ½ lbs pasta

Boil water and cook the pasta. Meanwhile, combine the milk, cream, and half & half. Separate the eggs and put the yolks in a small-ish bowl; whisk until smooth. Pour about ¼ cup milk combo into the egg yolks. Pour about ¼ cup of the milk combo into another little bowl. Whisk the cornstarch into the second little bowl. Pour the rest of the milk combo into a large sauce pan. Bring to a simmer. Pour about ½ cup of the hot milk combo into the eggs, whisking continuously while you pour, until smooth. Whisk the cornstarch/milk combo into the tempered eggs, then whisk all of it into the simmering milk combo. (This sounds like a lot of steps…it’s really not! You have to temper the egg yolks or they will just scramble in the hot milk, and cornstarch needs to start in a cold liquid.) Cook over medium-low heat, whisking constantly until it comes to a boil, then boil very gently for 3-4 minutes, whisking occasionally and watching the heat very carefully.

Meanwhile, melt 1 T of butter in a skillet. Add the crushed garlic, reduce heat to low, and let it cook until fragrant, about 2 minutes, stirring occasionally. Pour into the milk combo. In the same pan, melt the rest of the butter, then saute the mushrooms over medium-low heat for about 1 minute. Turn heat to very low (I use my smallest burner for this part) and let the mushrooms sweat.

Add spices to the sauce, then add the cheeses in small sprinkles, whisking between handfuls until completely melted. Taste and adjust spices. Add the mushrooms and butter, whisking again. Serve over cooked pasta, with extra cheese and black pepper on top.

If you want a printable PDF, here you go:  Download Alfredo sauce

Let me know if you try it. Happy cooking!

(Looking for more recipes? Click here!)