Patchwork Forest, or How My Crafty Ambitions Spiraled Out of Control Once Again

Ever since I saw Amy Smart’s Christmas quilt called Patchwork Forest a couple of years ago, I have wanted to make one. (Seriously…look at her blog post and then search the hashtag on Instagram and tell me you don’t want to make one too?) But I’ve talked myself out of it because seriously, I don’t need another Christmas quilt. And because sometimes if I start a quilting project in December I let it consume me and I know my family hates it when that happens.

But I never stopped wanting it.

This November I was admiring some Christmas fabric at the fabric store, thinking about that pine forest quilt. And how, to make it scrappy enough, I would have to buy a lot more Christmas fabric. And how I didn’t need to spend a whole bunch of money on Christmas fabric.

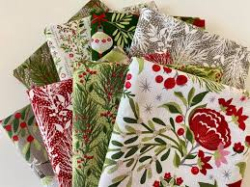
But also how gorgeous that fabric was. It’s called Naughty or Nice and it’s designed by Basic Grey, a designer I’ve loved since they made scrapbooking product (wish they still did!):

Moda naughty or nice

(I mean…could YOU resist that? Especially that floral???)

I’ve also been thinking a lot lately about low volume fabrics. About making a quilt with low volume fabrics. (Because I totally need another quilt, yes!)

And somehow, right there in the fabric store, my thoughts, ambitions, desires, and fiscal responsibility combined into an idea.

What if I just made a few trees, with the scraps I have saved from previous Christmas projects?

And what if I just made a few more trees, with the fabric I love this year?

Then next year, when certainly there will be more Christmas fabric I love, I could make a few more squares.

And it could be my thing I do in December, just make a few squares, until I have enough for a whole quilt.

Perfect, right!?! I could just make a few, without spending all of this December making a quilt.

And this year I could make some low volume ones, because certainly by next Christmas my creative itch will be different.

It was a perfect, perfect plan.

Except.

When you make the pine tree squares, you make two reversed images (or four, depending on how many you cut at once). So one square has fabric A as the background and fabric B as the tree, and the second square is the opposite.  And there was something in my scrappy-makes-me-happy nature that rebelled against that. I wanted all the trees to be different.

And, yeah.

It spiraled out of control from there.

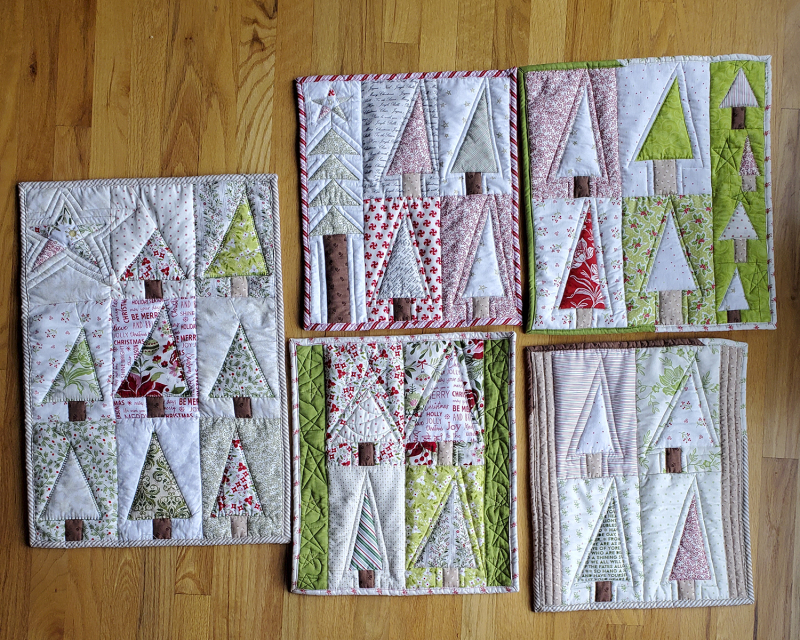
Because I had the reversed squares, I thought well, I’ll just make a few little gifts with the extras. And that turned in to five Christmas potholders

Patchwork forest hot pads

(the one on the left is mine; I made that one first, before everything spiraled out of control, and decided I didn't love how big it was, so I made the others all slightly different so they're not quite as large)

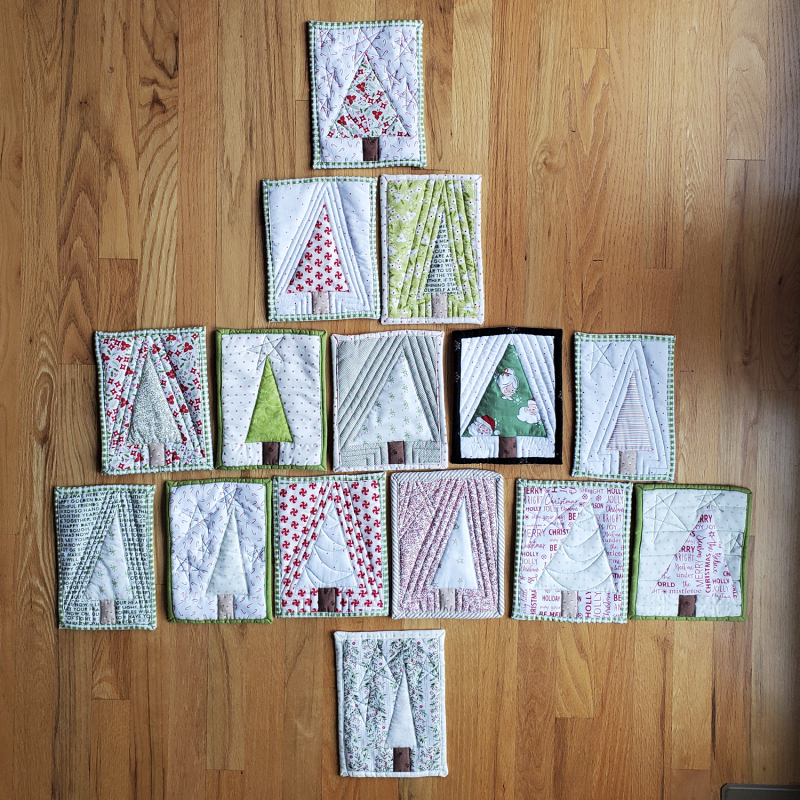
and more than 20 Christmas mug rugs:

Patchwork forest mug rugs

(Not all of them are pictured because I left some in the dryer and didn't notice until I'd packaged the rest up.)

And then Becky sent me some of her scraps so I made a few more squares (what will I do with the reverse duplicates? Because I am 100% sure my current friends and family have enough potholders and/or mug rugs. Should I try to make more friends so I can have more people to make stuff for???)

I totally did NOT make my goal to not get consumed by a quilting project.

At all.

Most of December my crafty space was covered with bits & pieces of patchwork trees in various forms of "finished." But I learned how to make them pretty quickly, and also how to cut them so they all look a bit different, and even what to do if I didn't have a big enough scrap to make two squares. Also I discovered, right at the end, that making them drastically different heights is fun. I'll use all that knowledge next year!

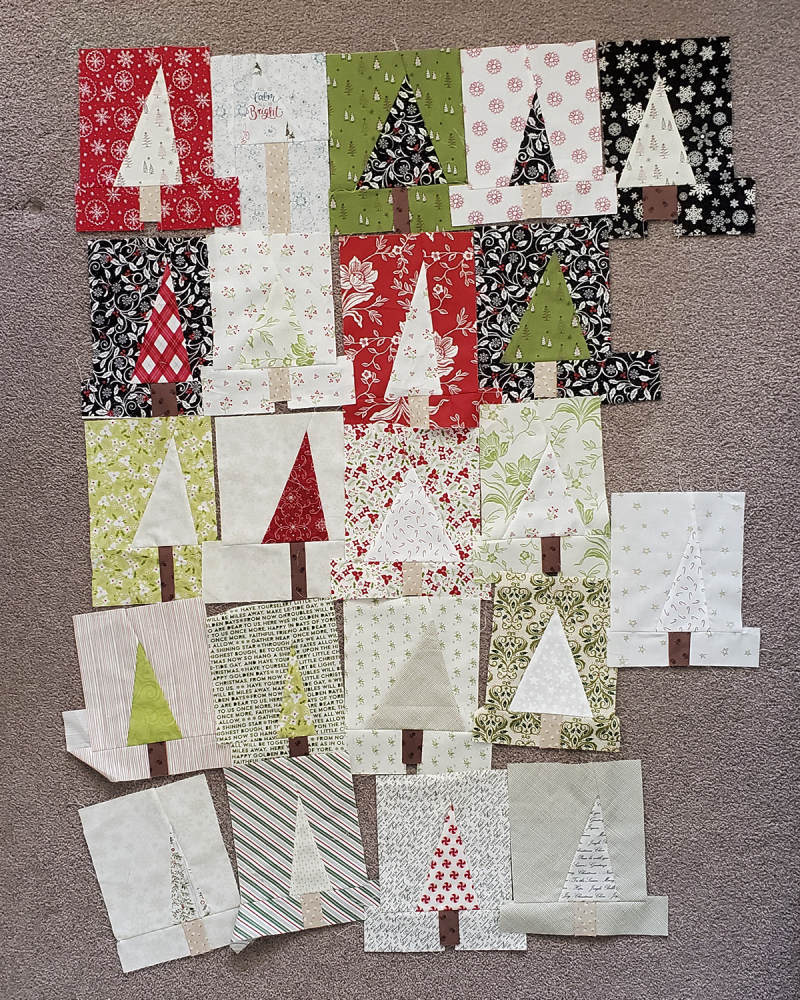
Before my surgery, I made sure that all of my Christmas sewing projects were cleaned up—extra fabric boxed up and the squares packaged carefully. I have 22 squares that will eventually go into a quilt—and, ironically enough, none of them made with that original floral I love so much! (It's OK. I noticed that when I was putting them away, and I still have some left.) I'll square them all up when I'm ready to sew them all together.

Patchwork forest 2020 squares

And, I confess…I’m a little bit excited to see what fabric I can get next year to make more trees!
Christmas in...March?

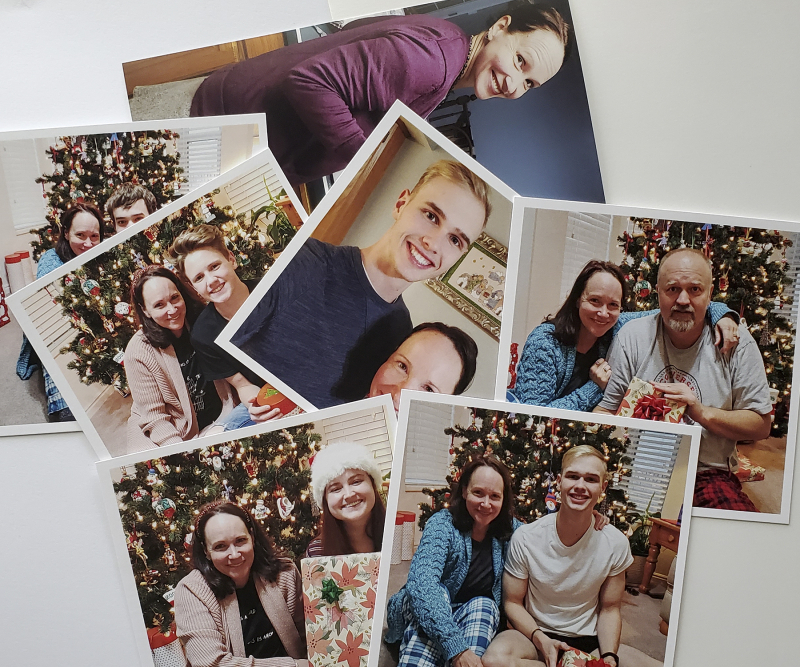
One of the post-holiday, survive-January traditions I’ve established is to scrap the previous December’s photos in the following January. (So…I scrapped December 2016’s Christmas stories in January of 2017.) But at the end of December 2017, my mom got really sick. And then through most of 2018, she was ill, in and out of different facilities, and she didn’t actually make it back home until October of 2018. Then she passed away in January of 2019, and the process of cleaning out her house and settling her estate (not to mention grief) took up much of that year.

Also Kendell had knee surgery in February 2018, and then he started working from home, and I had whooping cough in the middle of my marathon training, and somehow in all of that mess, scrapbooking just kind of fell by the wayside.

But it has always felt important to me to keep the Christmas stories scrapbooked. I’m not sure why Christmas feels so important to me, except for the fact that there are always great stories to go along with the holidays, and because it’s the time I feel strongly connected to both my own family and my own history, and because I wish I had more photos and stories from my childhood Christmases.

Or it might just be the fact that Christmas supplies are pretty fun to use.

Christmas in march

So even though it’s March and I didn’t do any scrapbooking at all in January (but I made several quilts and got acquainted with my new sewing machine), I’m going to use the next week (and, let’s be honest…maybe all the way into April) to scrapbook some stories and photos from 2018 and 2019.

If you’d like to join me, just for fun AND to relieve some of that COVID-19 stress, here’s a list of challenges:

  1. Write your journaling in the form of a letter.
  2. Scrap some photos you’ve had printed for more than 5 years.
  3. Use an alphabet stamp to create your title.
  4. Combine an old product and a new product on the same page.
  5. Use a non-Christmas-themed supply on a Christmas layout.
  6. Make a layout with FIVE or more puffy stickers, THREE or more washi taps, and TWO or more different patterned papers.
  7. Combine silver and gold on one layout.
  8. Make a double-page spread.
  9. Make a layout about yourself.
  10. Make a layout using non-traditional Christmas colors.

You can use all the challenges or some. You can make one layout or 27. You can even just print out your photos and put them in your photo album if you don’t make scrapbooks. You could finish up your December Daily or Journal Your Christmas or however else you document your holidays.

If you play along and want to share, use the hashtag #christmasinmarch2020 so it is all grouped together. I’ll be sharing here and on my Instagram, which is @amylsorensen. Hope you’ll join in!


Winter 2018-2019: Recap, Part One, or My Belated Thoughts on Christmas

Yesterday it snowed here in Utah. I’m guessing this will probably be our last snow in the valley (although, sometimes we get surprise snow storms as late as May, so who knows), and already it felt like a spring snow, not a winter one. I walked outside to feel the cold air. The still-naked trees bent a little with the weight, and with every breath or step I took, a little flurry would fall down. I felt like my trees were throwing snowballs at them. (I know I might sound nutty but I don’t care: I love my trees. They know I love them and they each have a different spirit.)

Spring is coming.

I’m itching for warmer days, when I can come home from a morning run, make a protein shake, and then work in my yard. Weeding and pruning and planting some new flowers, greeting the perennials as they take turns blooming. I’m looking forward to bright yellow daffodils and that bright, happy fragrance of hyacinth flowers.

But before spring happens, I want to look back and record this winter. It was an important one in my life history and I don’t want to forget the details. Because of all that’s happened in the past three months, I haven’t had much blogging time. But I’m going to make time over the next few days to write about the last three months of winter.

First off, Christmas. This Christmas was so different from any Christmas we’ve had before. Partly this is because I was having a dark spell with my depression. Partly it was because of how my family is changing. Haley stayed in Colorado because of work and travel expenses, and her greatest need was help paying for her med school applications. I made a Christmas quilt for her (because she wasn’t putting up a tree and I thought it would be nice to have something Christmasy in their apartment…but that backfired because I didn’t get it done fast enough), and sent some other things, but her gift was money. Nathan was leaving for basic training the week after Christmas, so he didn’t need anything. So mostly I shopped for Jake and Kaleb. It took almost no time at all to wrap gifts this year, and Christmas morning was so low-key, as no one woke up until 11:00.

In early December, on the night we put up the tree, I got in an argument with Kendell. (Glad this happened after the tree was up and we had a fun time with the five of us together decorating it.) He had been teasing me about how there were too many ornaments to fit on the tree. And I didn’t even mention the other box of ornaments I hadn’t even brought out. This lit a spark in me (because really…almost no argument in a marriage is ever only REALLY about the argument’s topic) because of what the ornaments represented. Not just the Santas and stockings and bears and angels and snowflakes themselves, but tradition, and time, and a last little bit of myself as a young mother. So once we got to a spot where there was really no point in talking anymore, I went for a drive in the mountains. I stood outside and looked at the stars and the cliffs against the midnight-dark sky and I cried and then I processed. Why was that little bit of teasing so intensely painful? What did it mean?

When Haley was a baby, I bought an ornament at a craft fair, a little ceramic tennis shoe with her name painted on it, and thus I started the tradition of giving my kids an ornament every Christmas. I did this because my Christmas tree was so bare. I had made some quilted balls when we were first married, and I had some bells and a few other little things, but my tree had almost nothing on it. I bought that little shoe thinking of our future Christmases together, and how each year we’d add more, and then my tree wouldn’t be naked. It would be full of memories. But I also started it so that when my kids grew up and had their own trees, they could start with memories from their childhood Christmases and then go from there. My intention was always to give them their ornaments when they were ready for them.

A few years ago, I realized something: as each kid became an adult and took their ornaments, my tree would be bare again. So, I started watching for ornaments for myself as well. Mostly angels. And as more years passed, and each year at least four (but usually five or six) more ornaments were added, the tree did start getting crowded.

So here we are, twenty-something years later, and my kids are adults but they’re not ready for their ornaments yet. (Which is 100% totally fine, no guilt-trip intended.) And the tradition I started so long ago stopped making sense. Kaleb really didn’t care. Nathan didn’t care. Jake didn’t care. It just wasn’t a big deal to them.

So in December 2018, I bought exactly zero new ornaments.

And the modifying of traditions didn’t stop there. I also gave up on Christmas Eve pajamas. And sibling gifts on Christmas Eve. I didn’t decorate the banister in my kitchen and I got out only about half of my decorations. And while there was sadness in this transitional Christmas, there was also a sense of…relief, maybe. Christmas and all it entails has been one of my favorite parts of being a mom. I did as much as I could to make it magical for my kids and I loved doing it. But it is also stressful. Because let’s face it: I am not a magical person. Santa has bajillions of elves and magic to help him. I just have me. And I think for the last couple of Christmases, I was continuing to make the magic because I felt I needed to, not necessarily because my kids needed it. They still need (and Kaleb, as the youngest, still deserves) a happy Christmas morning. But it is OK to be in this place, when things are changing. It is OK to adjust traditions and take some away and add some new ones. And I am grateful I was able to process enough to see my way through.


Scrapbooking Christmas in January: Wrapping it Up with some Two-Page Layout Tips

Christmas in january 2016

I’ve almost scrapbooked all of the photos I printed from December, and what I have left I’m either not inspired to scrap or just not ready to yet. My recycle bucket is full of little Christmas-colored scraps. I’m feeling anxious to use different colors and focus on different topics. I think, in other words, I’m just about finished with scrapping Christmas for now.

Since I’ll not likely be getting into my Christmas scrapping supplies for a while, I like to put it all away in an organized fashion, so that in December if I have some scrapping time, I’ll be ready to go. I do this by:

  • Making notes for the photos I’m not going to scrapbook right now. This January (remember, I’m ignoring the fact that is February!) these are mostly just photos of my own Christmas. I have some of the journaling written, but I’m not feeling ready to scrapbook them yet. So I made some notes about what I want to do with them, and tucked them away. I’m hoping I’ll make these layouts when December rolls around again, and having a little refresher about my ideas (and a note about where I saved the journaling!) will help.
  • Doing a brutal purge. I thought I did this last year, but I was surprised when I opened my Christmas drawer and found it brimming with stuff. It’s all good stuff—but it’s the “all” that becomes overwhelming. Even if a paper is useful and my style, this brutal purge I’m going to force myself to also acknowledge this question: Yes, but will I ever really use it?
  • Photographing and processing all of the layouts I made in January. (I haven’t shared all of them on my blog. I think what I didn’t share I’m going to use for a blog post in December. Stay tuned!) I HATE photographing layouts. It just doesn’t seem to matter what I try, I can never get the angle right. It doesn’t help that I need to take my camera in, because it doesn’t seem to be able to get the color balance correct. But I’ve been trying to do this—keep a digital record of the paper layouts I make—for a couple of years now, and I find it to be so helpful. Partly because sometimes I’m not sure whether or not I actually made a layout with a set of pictures (lol…please tell me I’m not the only one who does this!) but also as inspiration for when I’m feeling stuck. It helps me get my mojo back to just look at layouts I’ve made.

I tend to do a ton of two-page layouts when I’m scrapbooking Christmas. I guess in theory I could just pick one photo that represents all of Christmas day…but there are always so many of them. Plus, I’ve learned from looking back at photos from my childhood Christmases that a lot of times, it’s not just the people in the forefront that give the photos meaning. It’s also the little details in the background.  So I like to include quite a few pics on Christmas layouts—and thus, two pagers!

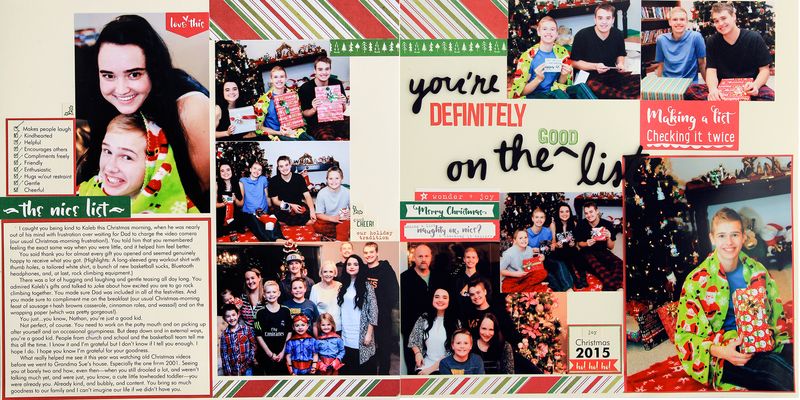
This is the one I made for Nathan (please note that in real life, the lines actually meet up correctly and the color of the background is the same!):

A sorensen tips for two page layouts

So today I’m sharing a list of tips for making two-page scrapbook layouts that feel cohesive.

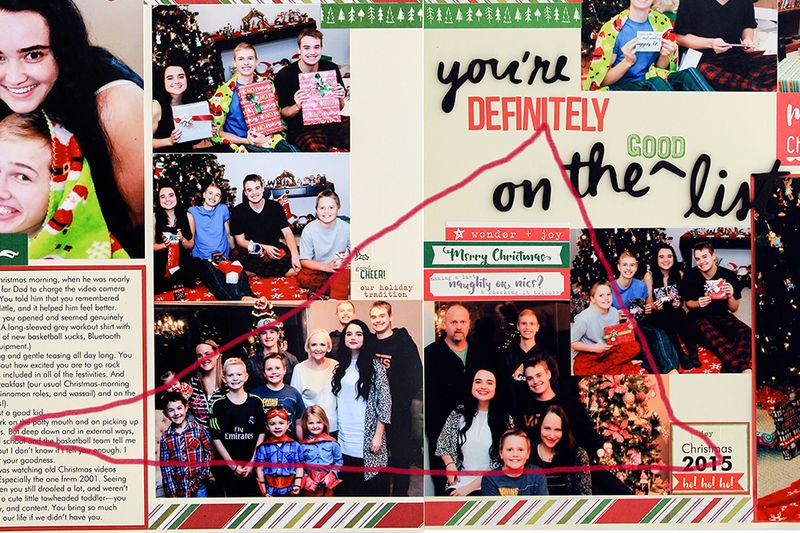
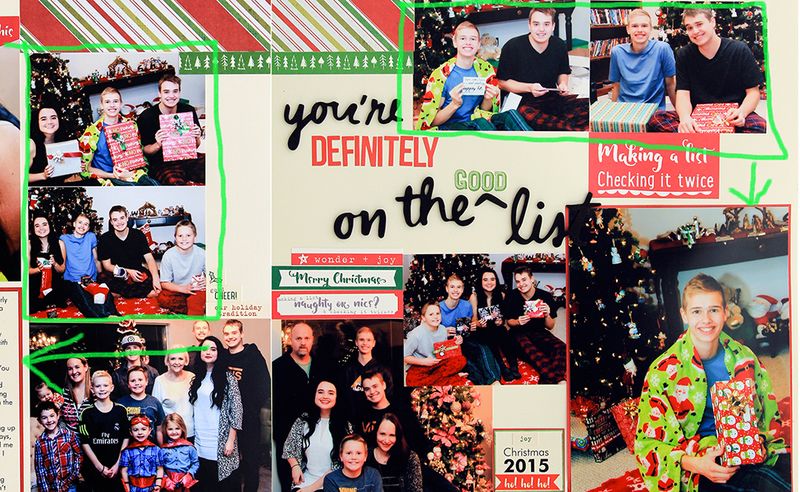
  1. Think of the layout as 12x24. Literally: lay the two background sheets together, and then start designing. The layout will feel more cohesive and balanced this way, more so than if you design each half of the page separately. 
  2. Create a visual triangle with text items. In theory, most pages have two text items: the title and the journaling. There can also be embellishments with text (these tend to be my favorites!) but there is another corner to the triangle that sometimes gets overlooked, but can give your layout a sense of balance, and that is the date. It’s a little thing, but the date can be a good spot for some cute embellishments, a little extra note, or your own handwriting. It can reinforce the design by repeating the font you used in the journaling or an embellishment from the title. (Lots of my layouts have the subject’s first initial with the date, using the same lettering type I used on the title.) By turning the date into a small embellishment, you give your layout three pieces of text—and then when you arrange them in a triangle, they both lead the eye through the layout and help it feel balanced. A sorensen text triangle
  3. Cross the middle line with at least one thing. Sometimes I do this with a photo, especially if I’m using one that has a lot of white space on one side or the other. Usually I do this with border strips of some sort. On today’s layout, the striped paper strips and the little strip with pine trees each cross the middle line. This makes the layout feel more like one piece, even when you put it in a sheet protector.
  4. Repeat embellishments on both sides. For me, this is easiest to do if I’m using the same brand of embellishments. In this layout, I used a bunch of Elle’s Studio product, some on each side. The consistency in color and feel of the embellishments helps the two sides “read” as one large piece.
  5. Repeat one design element, even if it’s switched up a little bit. Here, the things I repeated were the line with two 2x3 photos (even though it from vertical to horizontal) and the red border on a major element (the journaling on the left, the focal-point photo on the right). A sorensen repeat design

And with that, Christmas 2015 is all wrapped up! Are you finished with scrapbooking Christmas? What are you moving on to next?

Happy scrapping!


Scrapbooking Christmas in January: When You Don't Do December Daily

Christmas in january 2016

Yes, I know: it’s February! But I’m so close to completing my scrapbooking-Christmas-in-January goal that I’m going to push on and finish.

Unlike the (seemingly) rest of the scrapbook world, I don’t do December Daily. The thought of it gives me hives. I am always so stressed and busy in December that the thought of trying to find something scrap-worthy every. single. day. just seems like a nightmare to me.  (Kudos to those of you who can do this. It’s just not me.) I just scrapbook Christmas and December like any other topic in my traditional albums. I always do a layout about Christmas day for each of my kids. Depending on how the pictures turn out, I’ll make one about Christmas Eve. This year I meant to make a layout about how much I love the week between Christmas and New Year, but I realized I took hardly zero pics during that week this year.

Next year!

In fact, that’s something I do: While I am scrapbooking Christmas photos, I keep a list of pictures I want to remember to take the following December. Mostly this list comes from that feeling when I’m scrapbooking and I think “I really wish I had a picture of ____________.” I set it up as an email that I delay delivery of until December 1. It is so helpful to be reminded of as the holiday season starts.

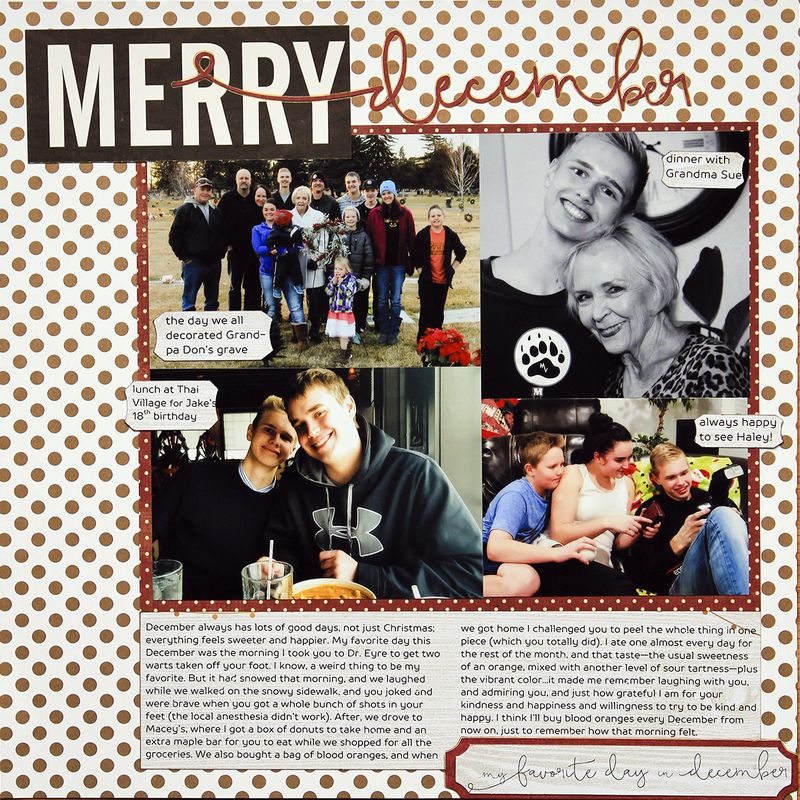
But I’m also a big believer that you don’t HAVE to have a photo to scrapbook a story. Take this layout:

Merry december by amy sorensen

The story I wanted to get down was the one I wrote in my journaling, about the snowy morning with Nathan when we bought blood oranges at the grocery store after his wart-removal appointment with the dermatologist. Not the most festive topic, maybe, but it really was one of my very most favorite mornings all December. I wish I would’ve taken a selfie of the two of us, but I didn’t. So I just gathered some other pictures from December and then told the story.

font tip: contrast. I really, really love script fonts. The more swooshes the better! But with mostly boys in my life, I don’t use them very often. If I’m making a layout that is about a boy and a girl, though (if it’s about one of my sons and me, for example, or a teacher, grandma, sister, aunt, or friend who is also a girl) I tend to get scripty. To keep it from feeling too feminine, however, I always pair a script font with a straightforward, simple, and bold sans serif font. Not only does it help the layout feel a little more masculine, it establishes some contrast. Use the script in small doses.

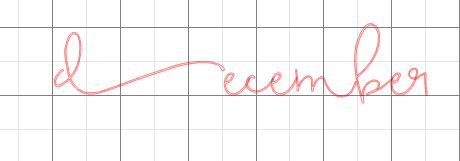
Silhouette tip: cutting thin fonts. Some fonts are constructed of really, really thin lines. The one I used for this layout—Bellweathers—is one of those. I liked the shape of the swooshes (especially that long on the “d” in “December”) but it was so thin it would’ve been nearly impossible to get off of the cutting mat and glued down onto my layout. To thicken up thin fonts before you cut them on your Silhouette, use the Offset button.

  1. Choose the font and type the word you want to use. Offset no1
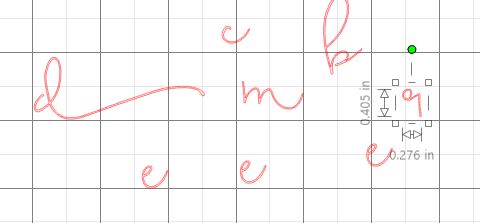
  2. Select the word, then right click and choose Ungroup. This makes each letter into its own object. Spread the letters out so that they’re not touching each other and have some space. Offset no2 ungroup spaced

  3. Select all of the spaced-out letters by dragging a square around all of them.
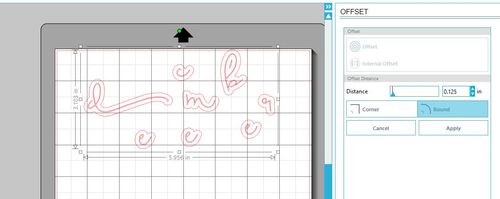
  4. Right click, then choose Offset. This brings up the Offset menu on the left side of the screen. Offset no3 offset start
  5. Click on the Corner button. This keeps the closest shape to the original font, while the Round button curves the edges.
  6. Enter a small number in the Distance box. I usually put something like .025. If you put in a number that is too big or too small, click on the Cancel button and start again. Depending on the distance you Offset by, the inner parts of the letters might go away.
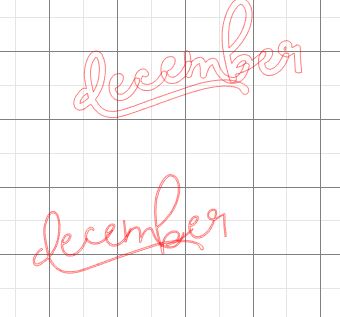
  7. Click on Apply. Each letter will now have a wider copy. Drag the thinner ones onto a spot on the screen and then delete them. (I put mine like this so you could see the difference in width.) Offset no5 thick and thin
  8. Arrange the thicker letters in the way you want them, and then weld them back together.

After you’ve done this a couple of times, you’ll find it’s a really quick process for making your words just a little bit thicker.

Are you a scrapbooker who does December daily? If not, how do you document—if you do at all—the other days in December?

Happy scrapbooking!


Scrapbooking Christmas in January: When You Make a Layout You Don't Love

Christmas in january 2016
It happens to everyone: you have an idea for a layout, you make the layout, you finish and look at it, and think….ehhhhh. Consider this layout:

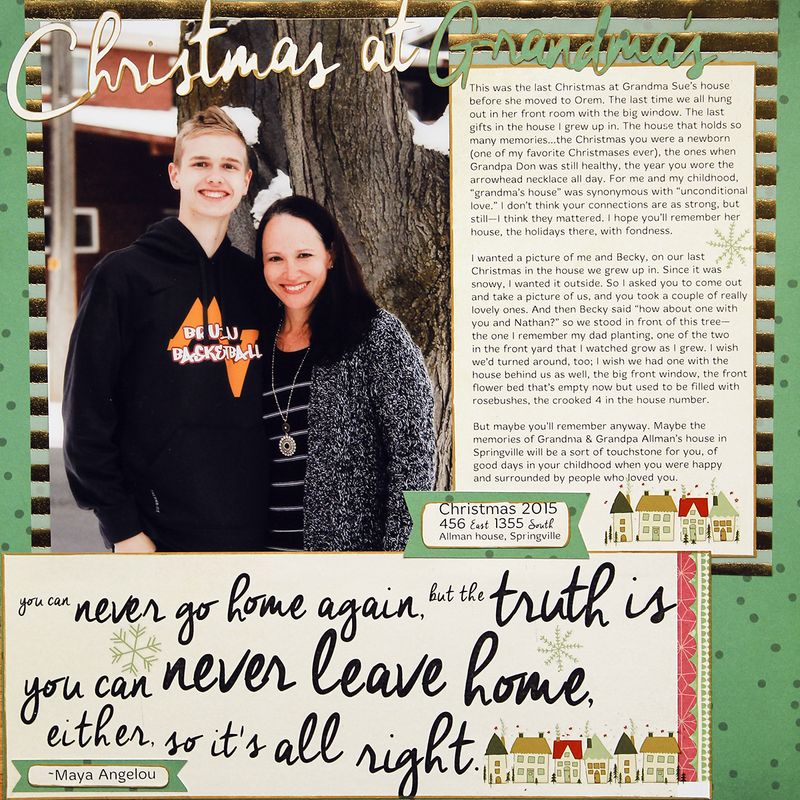
Christmas in january amy sorensen never leave home

I like some things about it: the green, gold, and cream color combination. Those cute rub-on houses, which go so well with the layout’s theme. The photo itself. (Strike that. I actually sort of love this photo.)

But I don’t love how the title turned out. I should’ve just cut the whole thing out of cream instead of swapping out the colors. And I think the quote at the bottom looks like it’s crooked.

I don’t hate it. But I don’t love it. It’s just…ehhhhh.

Which brings up a question: should you redo a layout you don’t love? Or just leave it alone?

Part of me wants to ditch this layout and start all over. (Even though I’d have to buy a new package of the rub-ons and a new piece of that gold-striped vellum). It’s the part of me that thinks but this is an important story I wanted to tell, and since it’s important, the layout should be impeccable. I think that motivation is a strong one—to make sure an important (for whatever reason) story is presented in a remarkable way. It’s part of what drives us scrapbookers to scrapbook. There are easier, less visually intensive, ways to tell our stories, but we choose to also illustrate them. It’s what we do!

But there’s another part of me that has learned something: done is always preferable to perfect.

I don’t know how many layouts I’ve made in my twenty-something years of scrapbooking. Close to 1,000, I would guess. Most of those stories I’ve scrapped are important ones, experiences, ideas, memories, tales and everyday details that I am grateful to have put down on paper. I’m happy to have the pretty illustrations, too. But I’ve learned in those two decades something that’s also important:

In the end, it doesn’t really matter what your layouts look like.

Especially not one layout in the context of hundreds.

Because think about it: your style is always changing. Products are always changing. Your design skills get better the more you scrapbook. You buy new tools, you use them for awhile, you get tired of them and pass them on to someone else. The thing that stays consistent in scrapbooking is just this: stories + photos. If you tell a story, and there's a picture to go with it (or you don't even have to have a picture!), the rest of it is fun, yes. But the embellishments and everything else—what the layout looks like—is secondary to the story.

Done is always preferable to perfect.

I can immediately think of five or six layouts I’ve made in the past two or three years that I actually kind of hate. Something happened between the translation of idea and finished layout. It just didn’t turn out like I wanted or imagined. But I did with those layouts exactly what I’m going to do with this layout: put them into albums and then move on.

There’s always another story. There’s always more pictures to scrap. If I let myself get caught up in a perfection quest, I’m doomed. So I reject that idea—that “important” stories demand perfect layouts. No layout is perfect, there’s always a typo or a slightly-crooked embellishment or a photo you processed too red or yellow. The next layout is just another chance. To tell a story, to use something pretty.

To get that memory onto paper where it might not be lost.

product idea: don’t forget that your fonts are also products you can use. I’ve narrowed down my font selection in recent years, especially for the ones I use to print journaling text, but one of my favorite embellishments will always be an illustrated quote like I made for this layout. What are some fonts you’ve loved? Use one or two in a big way on your next layout.

photo challenge: get yourself into a photo! Yes, I know. This is hard, especially if you’re the main photographer in your family. Sometimes it requires handing your camera to someone else and asking them to take your picture. I also know the argument: I’m too ___________ right now for a picture. (Fat, wrinkly, old.) My hair needs to be colored and I’m not wearing anything very special. To which I say: BULL! I have a handful of photos of me and my mom from my childhood, and when I look at them I never think she’s heavy in that picture. (Even though she would likely think that.) I think I am so glad I have this picture of my mom. I think I wish I had more pictures of my mom. You are never going to be younger than you are right now. You might be skinnier. But: you might not. You are only going to get more wrinkles and more grey hair. So let go of thinking you have to be perfect before you get in front of the camera. Just get in front of the camera now and then. Your future self—grey and wrinkled and softer and chubbier—will thank you!

So tell me: what do you do about layouts that you just don’t love?

Happy scrapping!


Scrapbooking Christmas in January: What to Do when You Don't Know What to Do

Christmas in january 2016

When I sat down to scrapbook Kaleb’s Christmas 2015 photos, I found myself stumped. I had a bunch of cute photos, and a whole bunch of awesome supplies, but nothing was speaking to me.  I didn’t want to put them aside, however, and work on something else, because I have that goal of getting all of Christmas 2015 scrapped before February 1.

I think that “I don’t know what to do with these pictures” feeling is a common problem when you’re scrapping something like Christmas, something that repeats in your albums. In a certain sense, all of the supplies are the same, or at the very least, very similar, and maybe some of your photos are too, if you’re like me and tend to take traditional pictures every year.

So I used some of the techniques I always use when I’m feeling a little bit resistant to making a layout. I thumbed through my Christmas drawer (but nothing grabbed me). I thought about titles (but nothing jumped out). I looked at layouts on my Pinterest boards (but nothing inspired me). I reread my journal from Christmas…and then I started to get a sense of why I was resisting this particular layout.

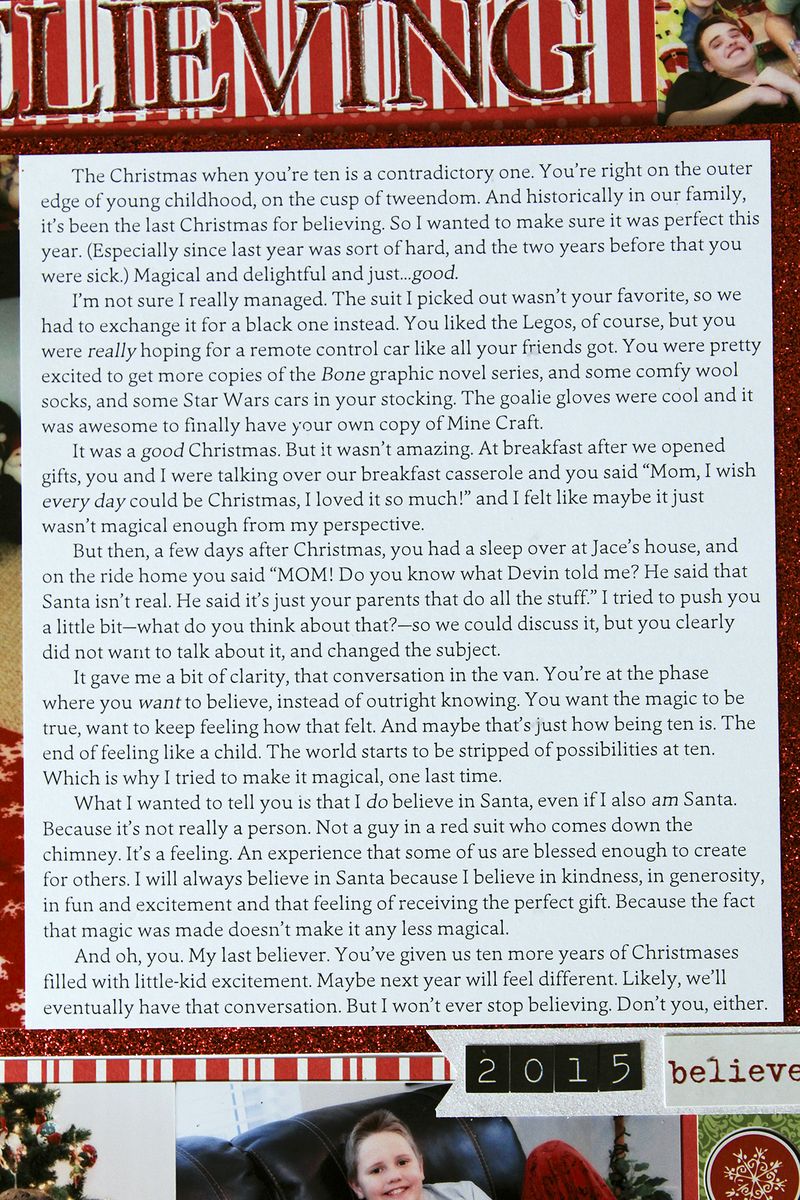
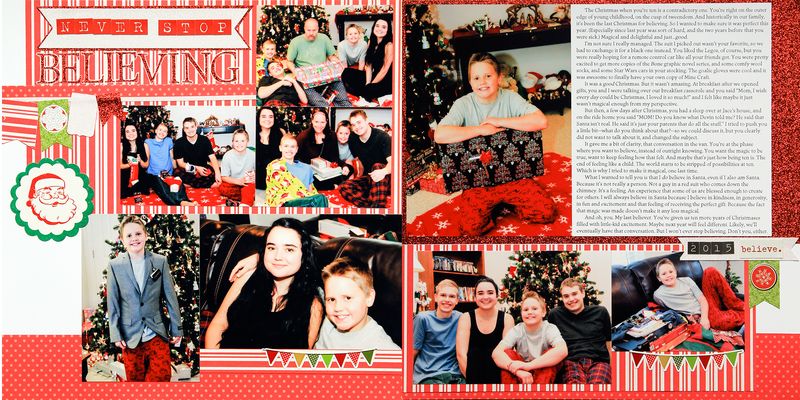
I sort of feel like I failed this year, at making Christmas magical for Kaleb. The new church suit he wanted was too small (and too grey!), his coveted Chuck Taylors too big, and his secret hope for a remote-control car unfulfilled. (Not that he complained, really. He wasn’t bratty about it. I just sensed a sort of sadness.) Which makes me feel all sorts of complicated feels, because it is likely the last year he’ll be a believer. And because I take it seriously, my role as Santa. Even when my kids have found out the truth, I still like them to have some surprises, some wishes fulfilled that seemed impossible. So when I think about Kaleb and Christmas 2015, I feel sad for him and annoyed at myself.

I think for some scrapbookers, writing about only the positive aspects of things is part of their method. For me, though, I don't have a problem with writing about the imperfect things. In fact, it's fairly hard to put a glowy lens on something that wasn't entirely glowy. This is a personal choice and has every bit to do with a scrapbooker's personality, so I'm not judging at all. But for me to feel like I am making layouts with journaling that is authentic to me, I tend to write about what really happened, the good and the difficult.  

So instead of being glowy, I took a deep breath and I wrote what I was really feeling and what really happened. Christmas in january no3 journaling close up
And once I got those words down, I was past my scrapper’s block. The journaling gave me the title and a sense of what embellishments to use (because how could I not use a Santa of some sort, with such a story?) and also the colors (obviously very Santa-inspired!). Plus I gave myself permission to go just a little bit crazy with some glitter cardstock! 

This is why, for me, it’s always best if I start a layout by writing the journaling. I can’t see my way to what I want to do until I’ve written what needs to be said. Then I can imagine the layout. I know not everyone works that way, but my suggestion for today is this: if you’re feeling like you don’t know exactly what to do with a set of pictures (but still want to get them scrapbooked), try writing the journaling, and see where it leads you.

Christmas in january no4 never stop believing Amy Sorensen

Some other ideas for if you’re stumped (but still want to get those photos scrapped):

  1. Switch up your process. If you usually start by picking your supplies, write your journaling first. If you start with photos, try picking a supply first, and then find photos or stories that go with it.
  2. Make a layout supply kit for an entirely different layout. You don’t even have to have the photos printed for it. Just pick something else you want to scrap, then choose some supplies for that story. Try to pick something that doesn’t relate at all to the other pictures. Set those supplies aside, and go back to your stubborn photos. Just looking at something different sometimes helps your ideas start to flow!
  3. Challenge yourself to use a specific type of supply; bonus points if it’s something you haven’t used in a while. When was the last time you made a stamped background? used your Copic markers? dug out your die cut machine? Sometimes techniques can get you engaged with the process.
  4. Take a quick break. Give yourself ten minutes to do something physical: walk around your backyard to admire your rosebushes, throw in a load of laundry, go get the mail out of your mailbox. Ignore all thoughts of scrapbooking for those ten minutes. Then see what new energy you discover!
  5. Look through some of your older layouts. Sometimes what you need is a reminder: you can do this! Remind yourself of that by seeing that you already have, in fact, done it. Don’t just flip through layouts; look at them. Remember how much you loved that embellishment or patterned paper? What about that funny thing your kid said that you’d forgotten about till you read it on a layout? See. You can totally do this. Now get going!

What do you do when you find yourself stumped over a set of photos?

Happy scrapping!


Scrapbooking Christmas in January: Non-Traditional Colors

Christmas in january 2016
Whenever I am concentrating most of my scrapbooking time on one subject—something I think of as “one topic scrapbooking” –I like to go through all the supplies I have that go along with it. So a couple of nights ago, I pulled out my two drawers of Christmas supplies. Honest: I didn’t think I had very much. I’m pretty good at purging the stuff that doesn’t work for me anymore.

But holy cow.

One two-inch-tall drawer filled with Christmas paper.

One drawer filled with Christmas embellishments.

I think I could not buy Christmas supplies for ten years without any troubles.

So I went through my drawers, and I realized that I don’t have anything I don’t love or can’t imagine using. It’s all good stuff.

So then, to see how I’ve been using my supplies, I looked through some of my previous years’ Christmas layouts. I realized that what I mostly use is patterned paper (which is good, considering all that I have!), alphabet stickers, and some embellishments.

But not a ton.

I also realized that I use a lot of regular (non-Christmas) supplies on my Christmas layouts. Probably to get some of that Christmas stash out of my supply drawers and onto layouts, I should actually use my Christmas stuff. And I’m totally going to do that—tomorrow.

But today I want to share a layout that is Christmasy but doesn’t use a whole lot of Christmas supplies…and what is Christmasy is in non-traditional colors.

I think I get a little bit burned out by only using red and green. That was the other thing I noticed in perusing my older Christmas layouts. Plenty of them use traditional Christmas colors, but quite a few don’t. I even have a couple of purple Christmas layouts. For this layout, I used pink and teal as my main colors, with grey and gold as a starting spot and as accents, respectively.

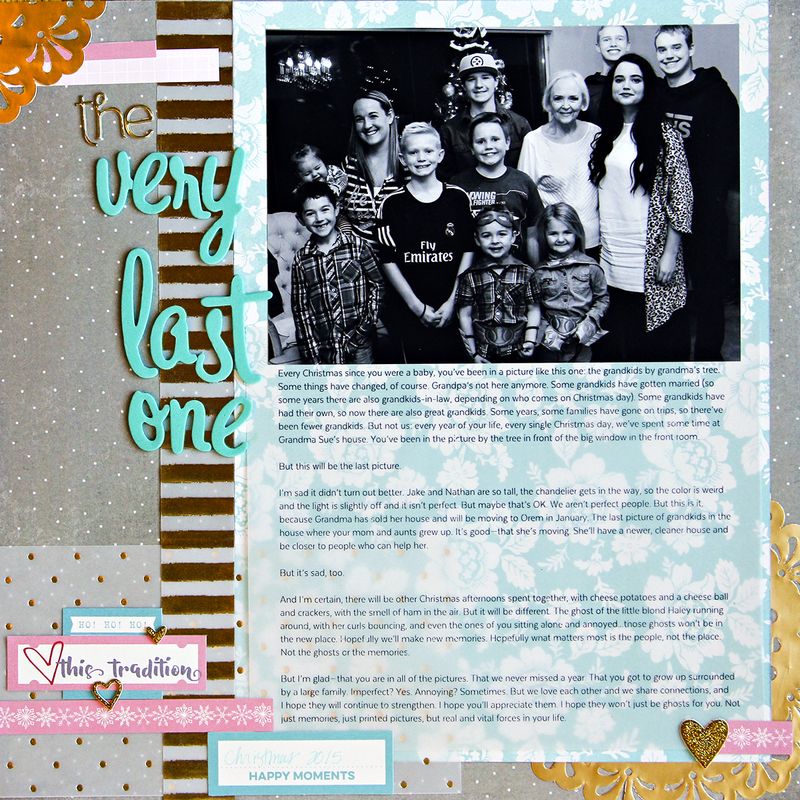
A sorensen christmas in january no2

The trick to making it still feel like a Christmas layout is using some Christmas-themed shapes (here, the snowflakes on the pink strip and the "ho ho ho" tag) and cooler tones in the colors you choose. I chose a floral pattern instead of a Christmas theme because it felt like something I’d find at my mom’s house, pretty and elegant. I guess in some sense, pink and teal are sort-of Christmas colors, since they are each shades of red and green. At any rate, I don’t care at all, because this layout makes me happy. Besides, gold is a Christmas color. And a supply out of any drawer is a supply used, right?

Scrapbook challenge: make a Christmas layout that doesn’t use traditional Christmas colors.

Photo note: I knew when I took this photo that it wouldn’t turn out well. Mostly because of the obnoxious chandelier in my mom’s front room, the one that my two sons are now taller than, but always insist on standing behind (and thus casting themselves in a yellow light, while the rest of the people are normal colors). Plus the baby was starting to cry. I was fairly frustrated but then I just converted it to black and white. Black and white can solve almost any weird lighting issue, I’ve found. And since most Christmas photos are taken inside, I can’t be alone in weird light issues. So if you’re struggling with getting an image to look right, try a black and white conversion.

Journaling approach: I wrote about how for every year of her life, my daughter has been in a Christmas photo with her cousins and her grandma. This was our last Christmas going to that house, though (the house I grew up in), since my mom just moved, and while we’ll certainly take a similar picture at her new house next Christmas, it won’t be the same. If you’re stumped for a journaling topic, consider your traditions. What is the longest one you’ve done? How or why did it start? How has it changed? What does it mean to you? How does it reflect or build on your family values?

So tell me: do you ever make scrapbook layouts with non-traditional Christmas colors?


Scrapbooking Christmas in January: Introduction

I’m pretty sure I’m in the minority here (especially if my Facebook feed is any indication!), but I love January. Sure, it’s cold outside, and here in Utah we tend to get socked in by ugly inversions. (I can’t tell you the passionate aversion I have for air pollution), I’m feeling chubby and unmotivated to do anything about it, and I’m missing my flowers. I get why it’s a hard month.

But I still love January, because it’s cold outside, and there’s that ugly inversion, and my yoga pants are awfully comfortable. What’s a girl to do but stay inside? And if I’m staying inside…I might as well make some scrapbook layouts!

It’s been my tradition now for about four years to scrapbook my Christmas layouts in January. Before that, I didn’t ever make a ton of Christmas layouts because I get almost zero scrapbooking done in December. I’m just too anxious about getting ready for Christmas to spend much time creating. And making Christmas layouts in, say, August, just doesn’t feel right, somehow.

But in January, when I’m all nestled into my cozy house, with my memories of Christmas still fresh? That, for me, is the perfect time to scrapbook Christmas.

Christmas in january 2016

This year, I decided to do a series on my blog wherein I explore my Christmas in January scrapbooking process. In it, I’ll explore:

  • Journaling ideas
  • Ways to use up some of your scrapbooking supplies
  • Challenges
  • New angles on an oft-visited subject
  • How to translate a holiday idea onto a non-holiday page (I’m calling this the “Christmas Conversion”)
  • Photo suggestions

I also want to end each post with a few take-aways…little pieces of knowledge or suggestions that you can apply not just to Christmas but to many of your scrapbook layouts.

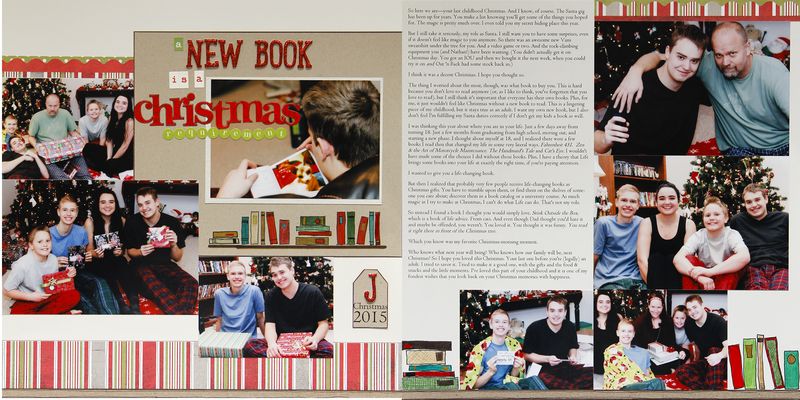
To kick it off, I’m sharing the first Christmas layout I made this January. This is the main layout I made for my son Jake:

Christmas in january 2016 no02 layout

I made it first because I was excited to write the journaling! Sometimes it’s hard to write about Christmas because really…what do you say that you haven’t already said? We got up, we saw what Santa brought, we opened presents, we ate a delicious breakfast. The repeating nature of our Christmas traditions is what makes Christmas Christmas. So I try to think about the thing that’s unique to each year and each individual. Funny things that happened, smaller stories within the larger arc of the day, a hope fulfilled (or not), little moments between individuals that develop relationships. Honestly, part of the magic of Christmas for me is watching for those unique experiences.

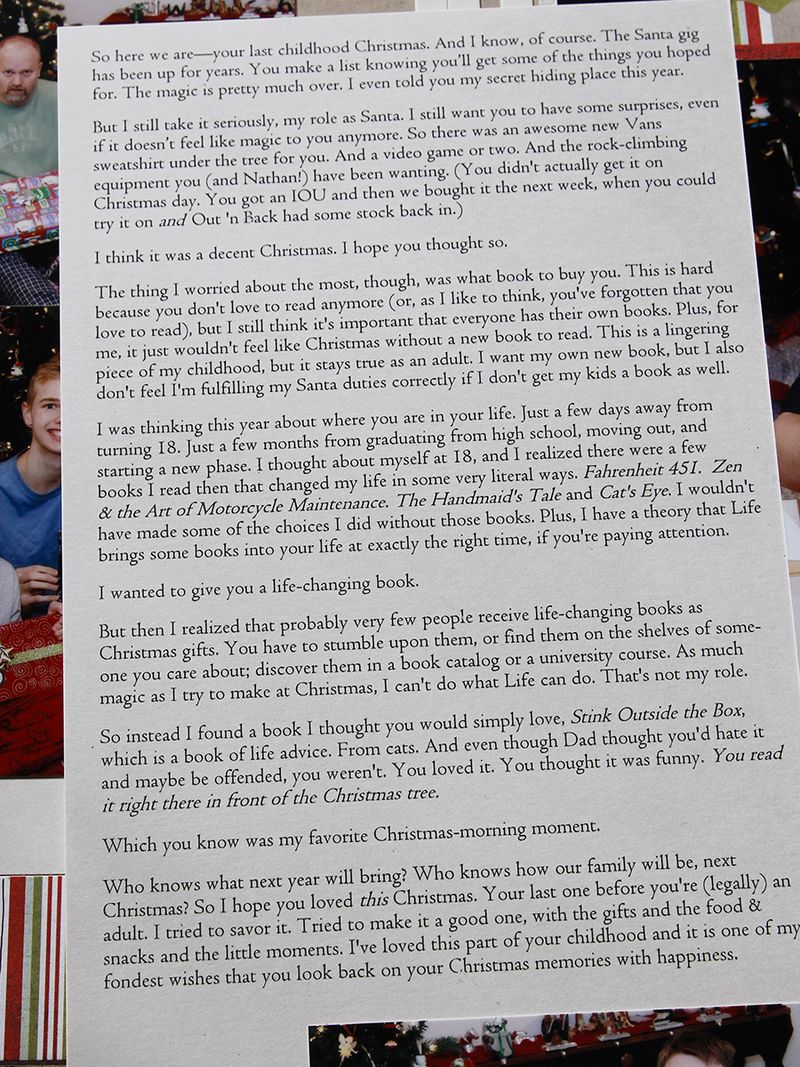
Watching Jake open his Christmas book and then sit down and immediately read it was one of the highlights of Christmas for me. So I decided to take that moment and expand it—to tell a larger story than only “you loved the book you received.” Instead I wrote about my process of picking the book, and how it reflects on Jake’s stage of life and the meaning that this particular Christmas (he’s a senior in high school this year, so it’s his last “childhood” Christmas) holds.

Christmas in january 2016 no02 journaling

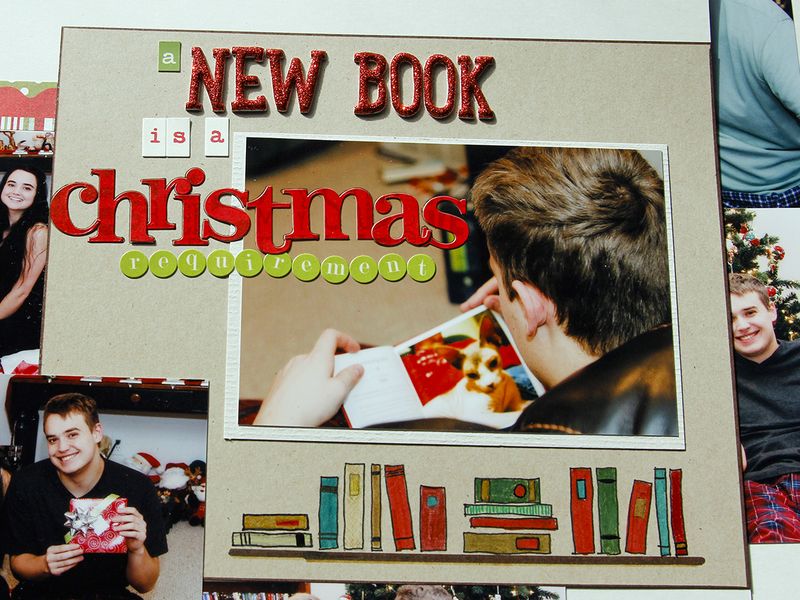
Supply Tip: last July or August, Studio Calico had a book stamp in one of their kits. I desperately wanted the stamp (since I’m a librarian and a book lover and a writer, it is one I definitely should own!), but I’m not a kit subscriber (I’m just too picky about what I don’t use on my layouts to get much benefit), and it sold out so quickly I didn’t get to buy the individual kit. I still desperately want the stamp, but instead I just bought the digital .png file they also sell. I used it as a sort of template to draw the shelves of books on my layout.

My tip, then, is this: you don’t always have to use a supply, literally, to use the supply. The digital file helped me see how to keep the proportions correct in my little sketch, but in the end it was more an inspired-by than a direct copy.

Supply Challenge: do a little drawing! I am not very good at drawing, sketching, or doodling. But when I give myself the time and encouragement to do it anyway, I tend to love the personal touch my own drawing adds. Mix up the mediums you use for coloring what you draw; on my layout, I used a mix of several different markers and colored pencils.

Christmas Conversion: on any layout, pick the one photo you want to draw the most attention to—your focal point photo—and merge it with the layout’s title. I cropped the picture of Jake reading his book purposefully, so I could add letter stickers in the white space. Repeat one of the design elements you are going to use (here, the shelf of books) with the title and photo, and you create a sense of cohesiveness. This works especially well on two-page layouts.

Christmas in january 2016 no01 close up

Do you scrapbook Christmas in January? Do share!